How I Improved My GitHub Profile Readme

Possessing a high ambition of being a full-stack developer after working as a frontend engineer for some time, currently, I am expertizing in backend engineering with AWS and serverless architecture. Taking a problem, solving it, and then making it work using coding always gives me great pleasure. Moreover, as I got to taste the flavor of both the frontend and backend parts, I can easily visualize and make a bridge between them while working on any project now.
Updating the default boring-looking github profile to an amazing one, showcasing one’s expertise in different programming languages, frameworks, and tools can be a great way to impress recruiters, developers, also yourself. Therefore, in this blog, I am going to show you how I updated my github profile. So, let’s get started.
First, let me give you a short tour of my github profile. I plan to split my github profile into 6 sections. These are:
Intro
Social Media
YouTube Cards
Blog Posts
Favorite Tools
GitHub Stats
Here is what the final version of my github profile will look like:
🗃️Prerequisite
A GitHub account
Basic knowledge of HTML and Markdown languages
Now to start customizing, I need to create a brand-new repository first. To do so, I am going to follow these steps:
Log in to my GitHub Account
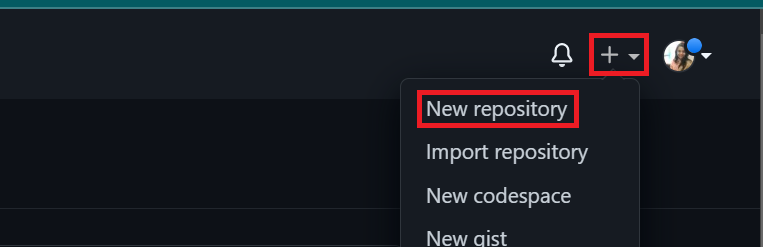
Create a new repository by clicking on the + icon in the top right corner
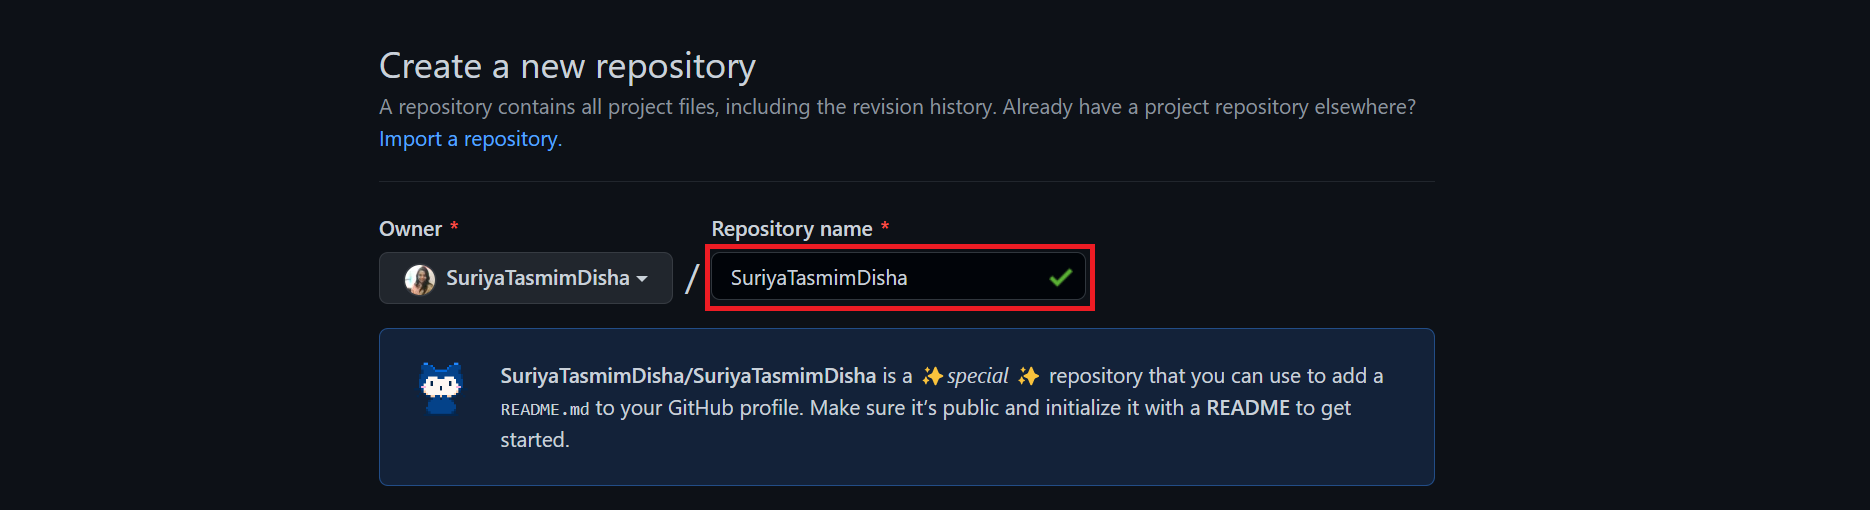
In the Create a new repository page, I need to input my github username as the Repository name. After inputting the repository name, github will show me a message saying that this repository is ✨special✨. Using this repo I will be able to add a customized README.md file to my profile.
I am going to choose the visibility as Public.
💡Note: Choosing the visibility of the repo as Private won’t show any changes on the github profile.
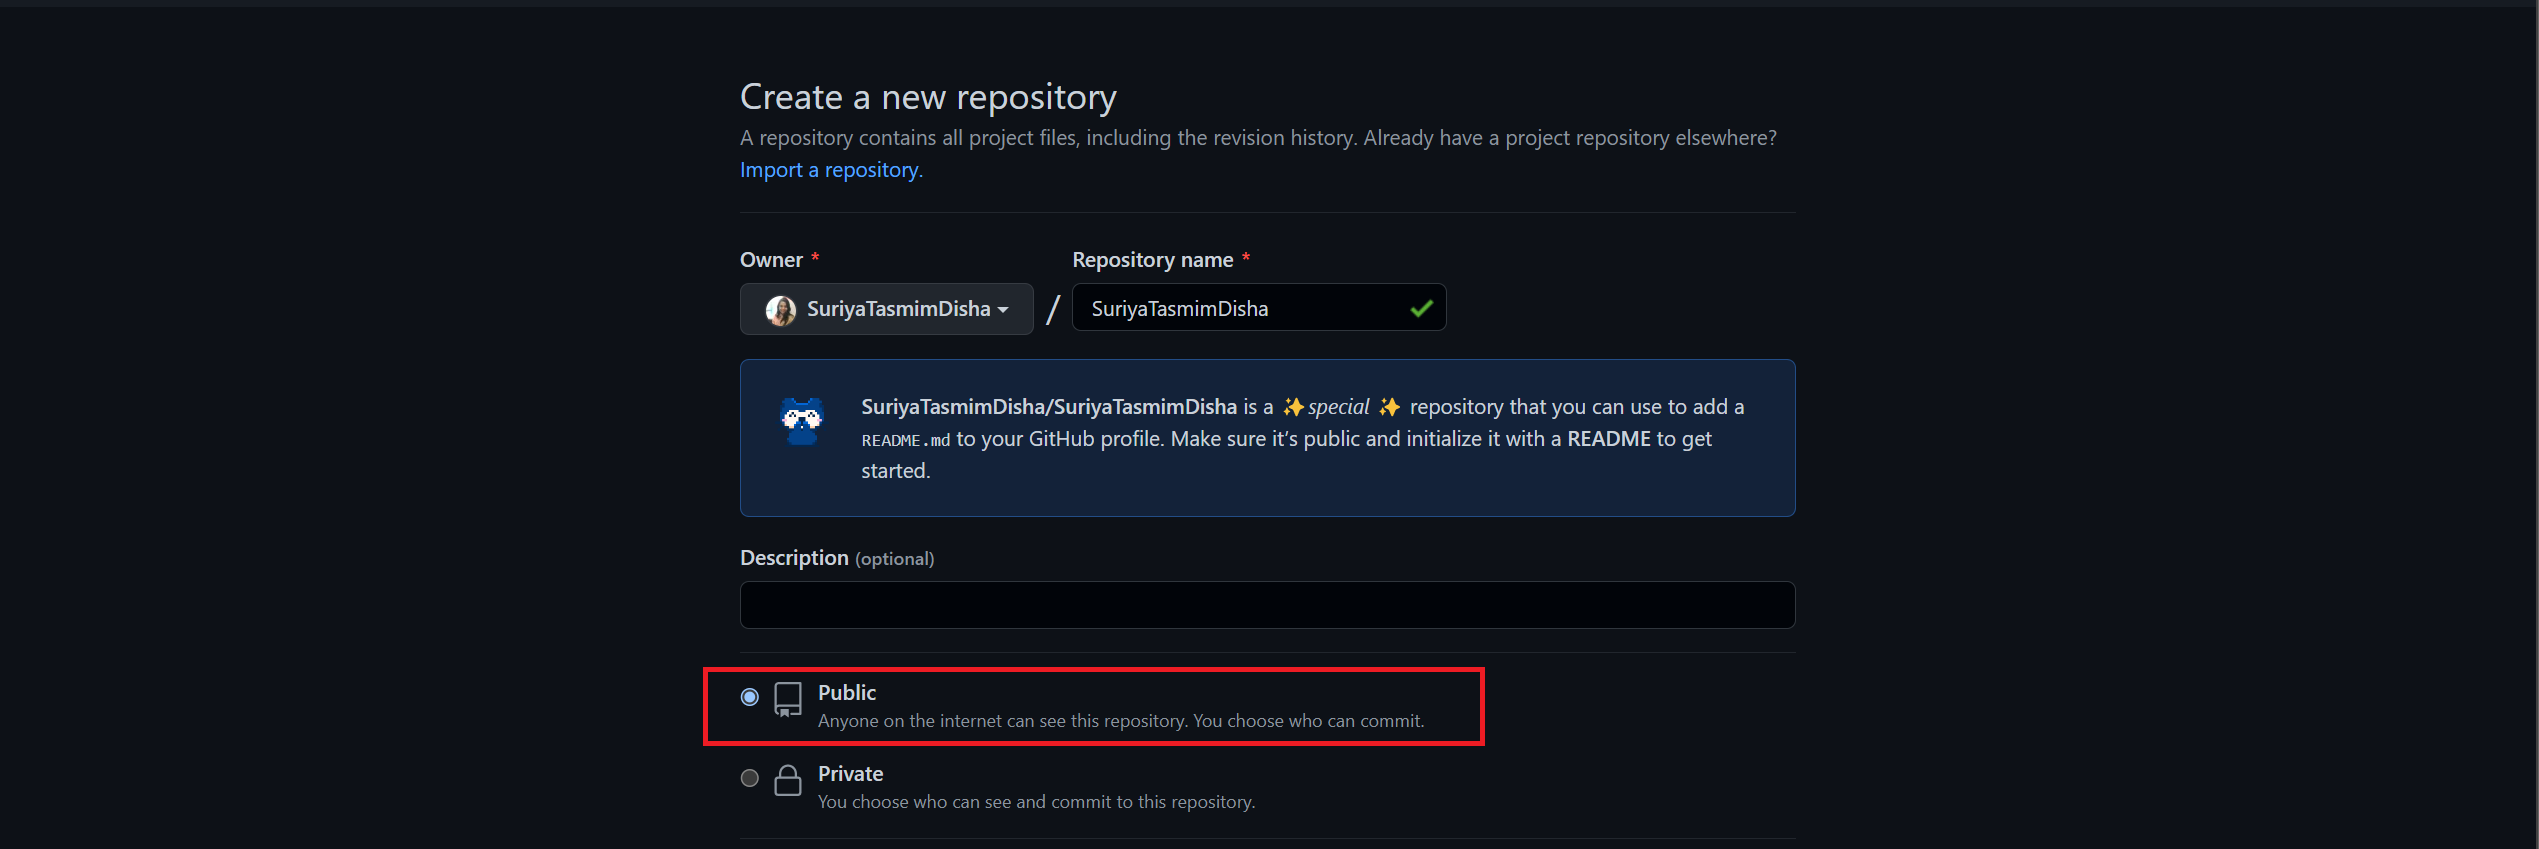
Next, I am going to select the checkbox to Add a README file.

Finally, I am going to hit the Create repository button.

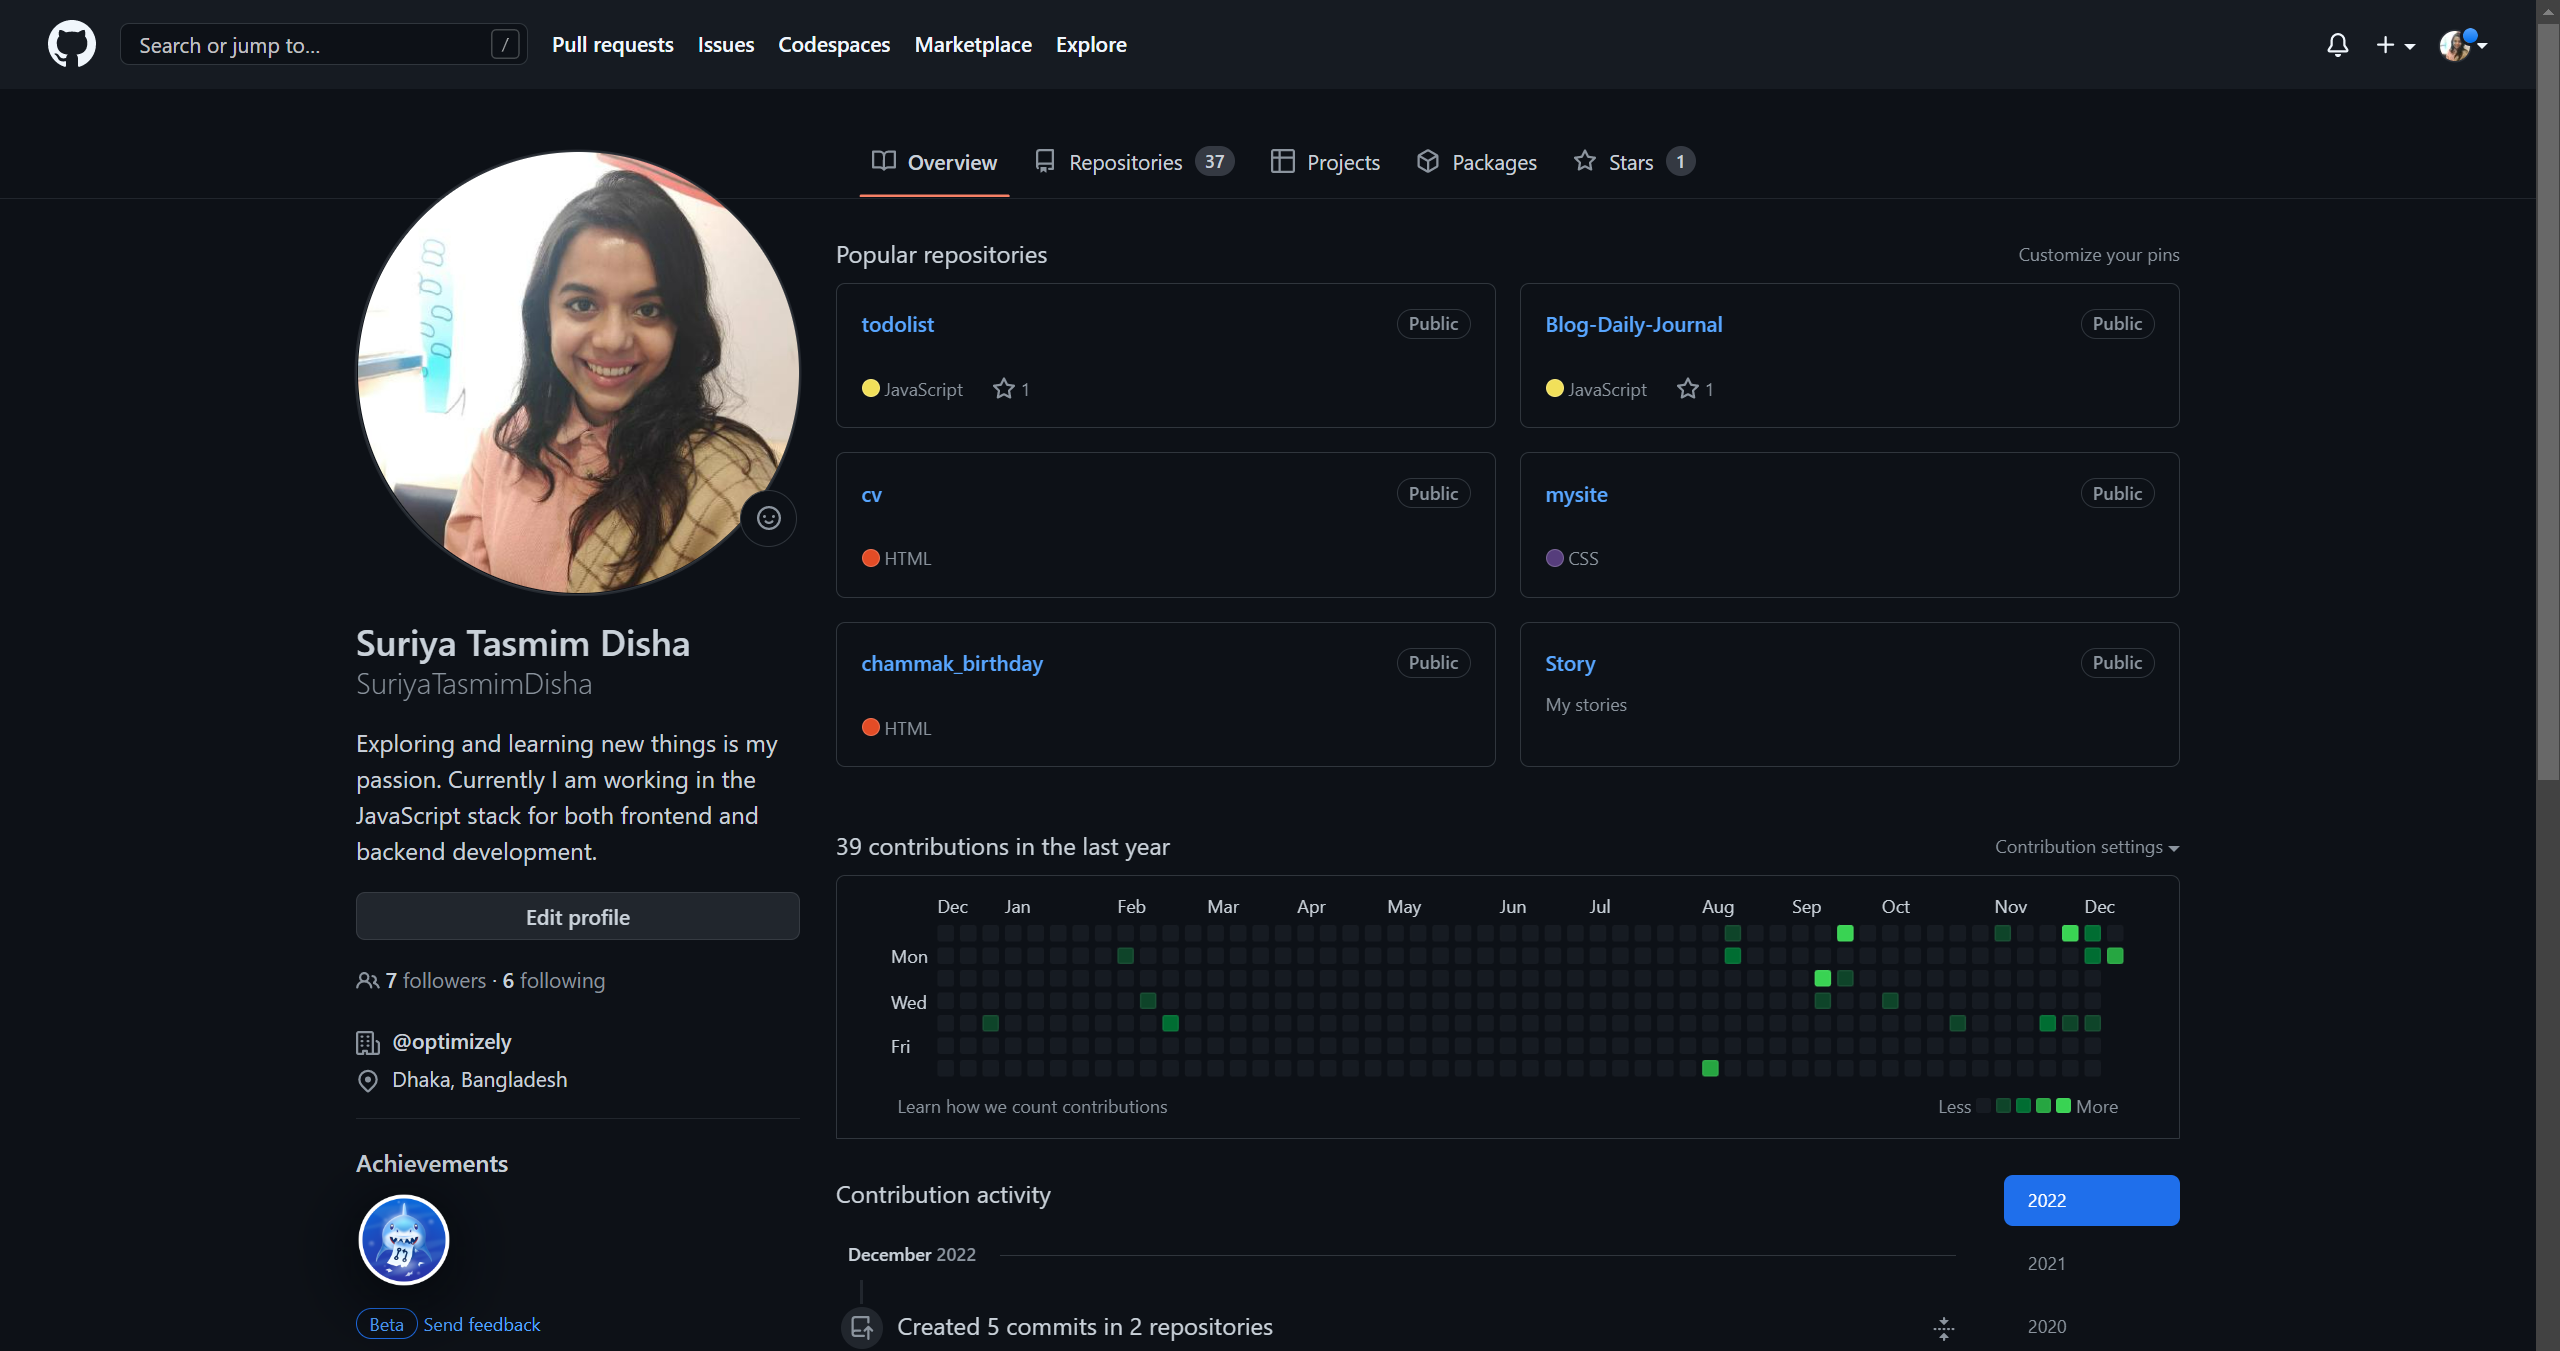
After successfully creating the repository, my github profile now looks like this:
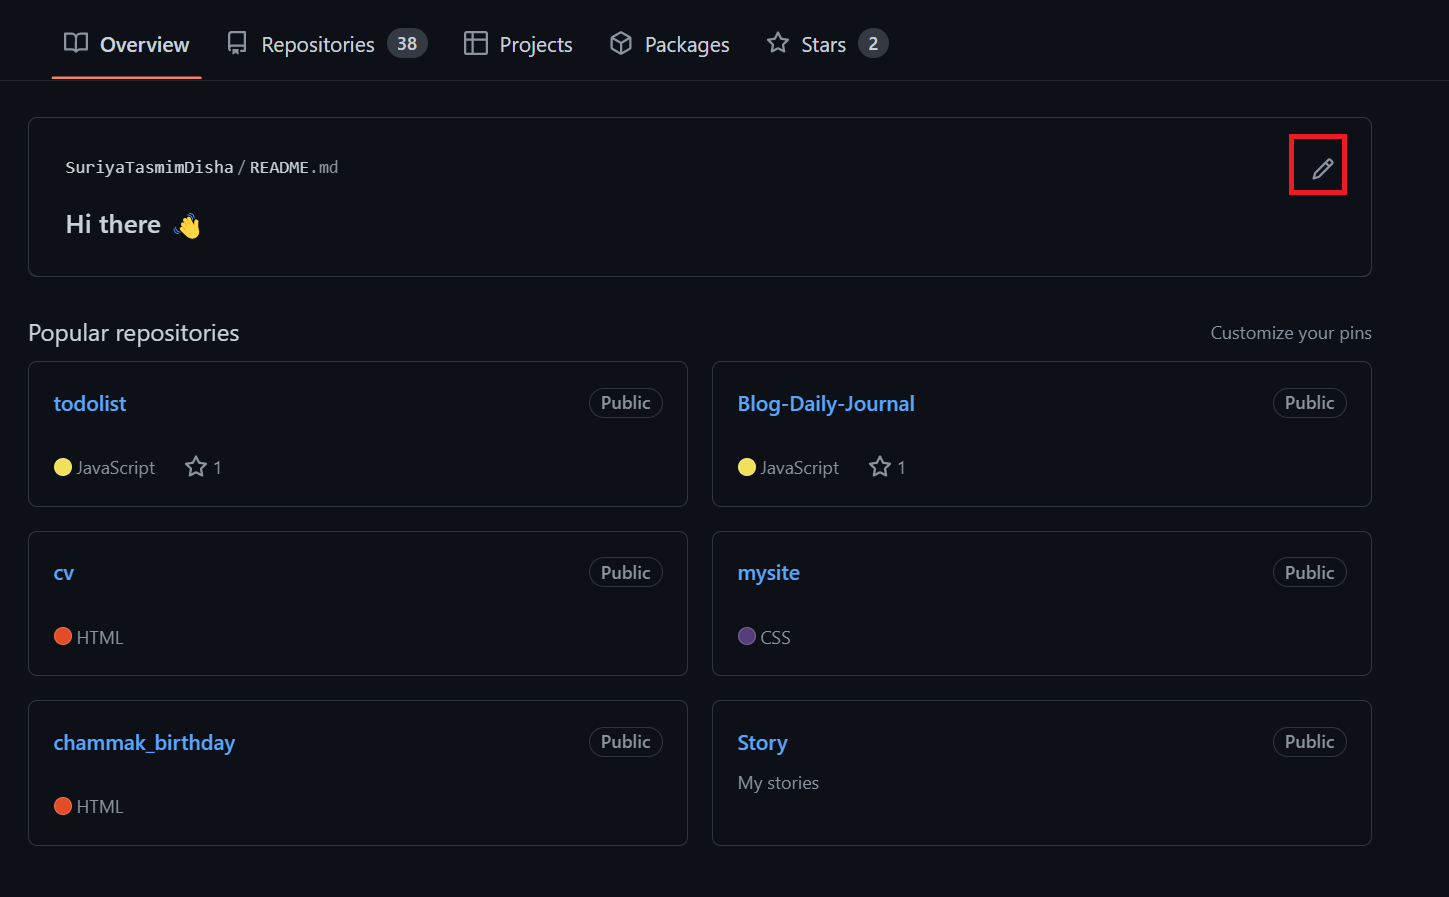
Now, I will start customizing my github profile. To do that I am going to click on the pencil icon showing on the top right side of the README.md section in my profile.
This will open the github editor and here I am going to write down my code.
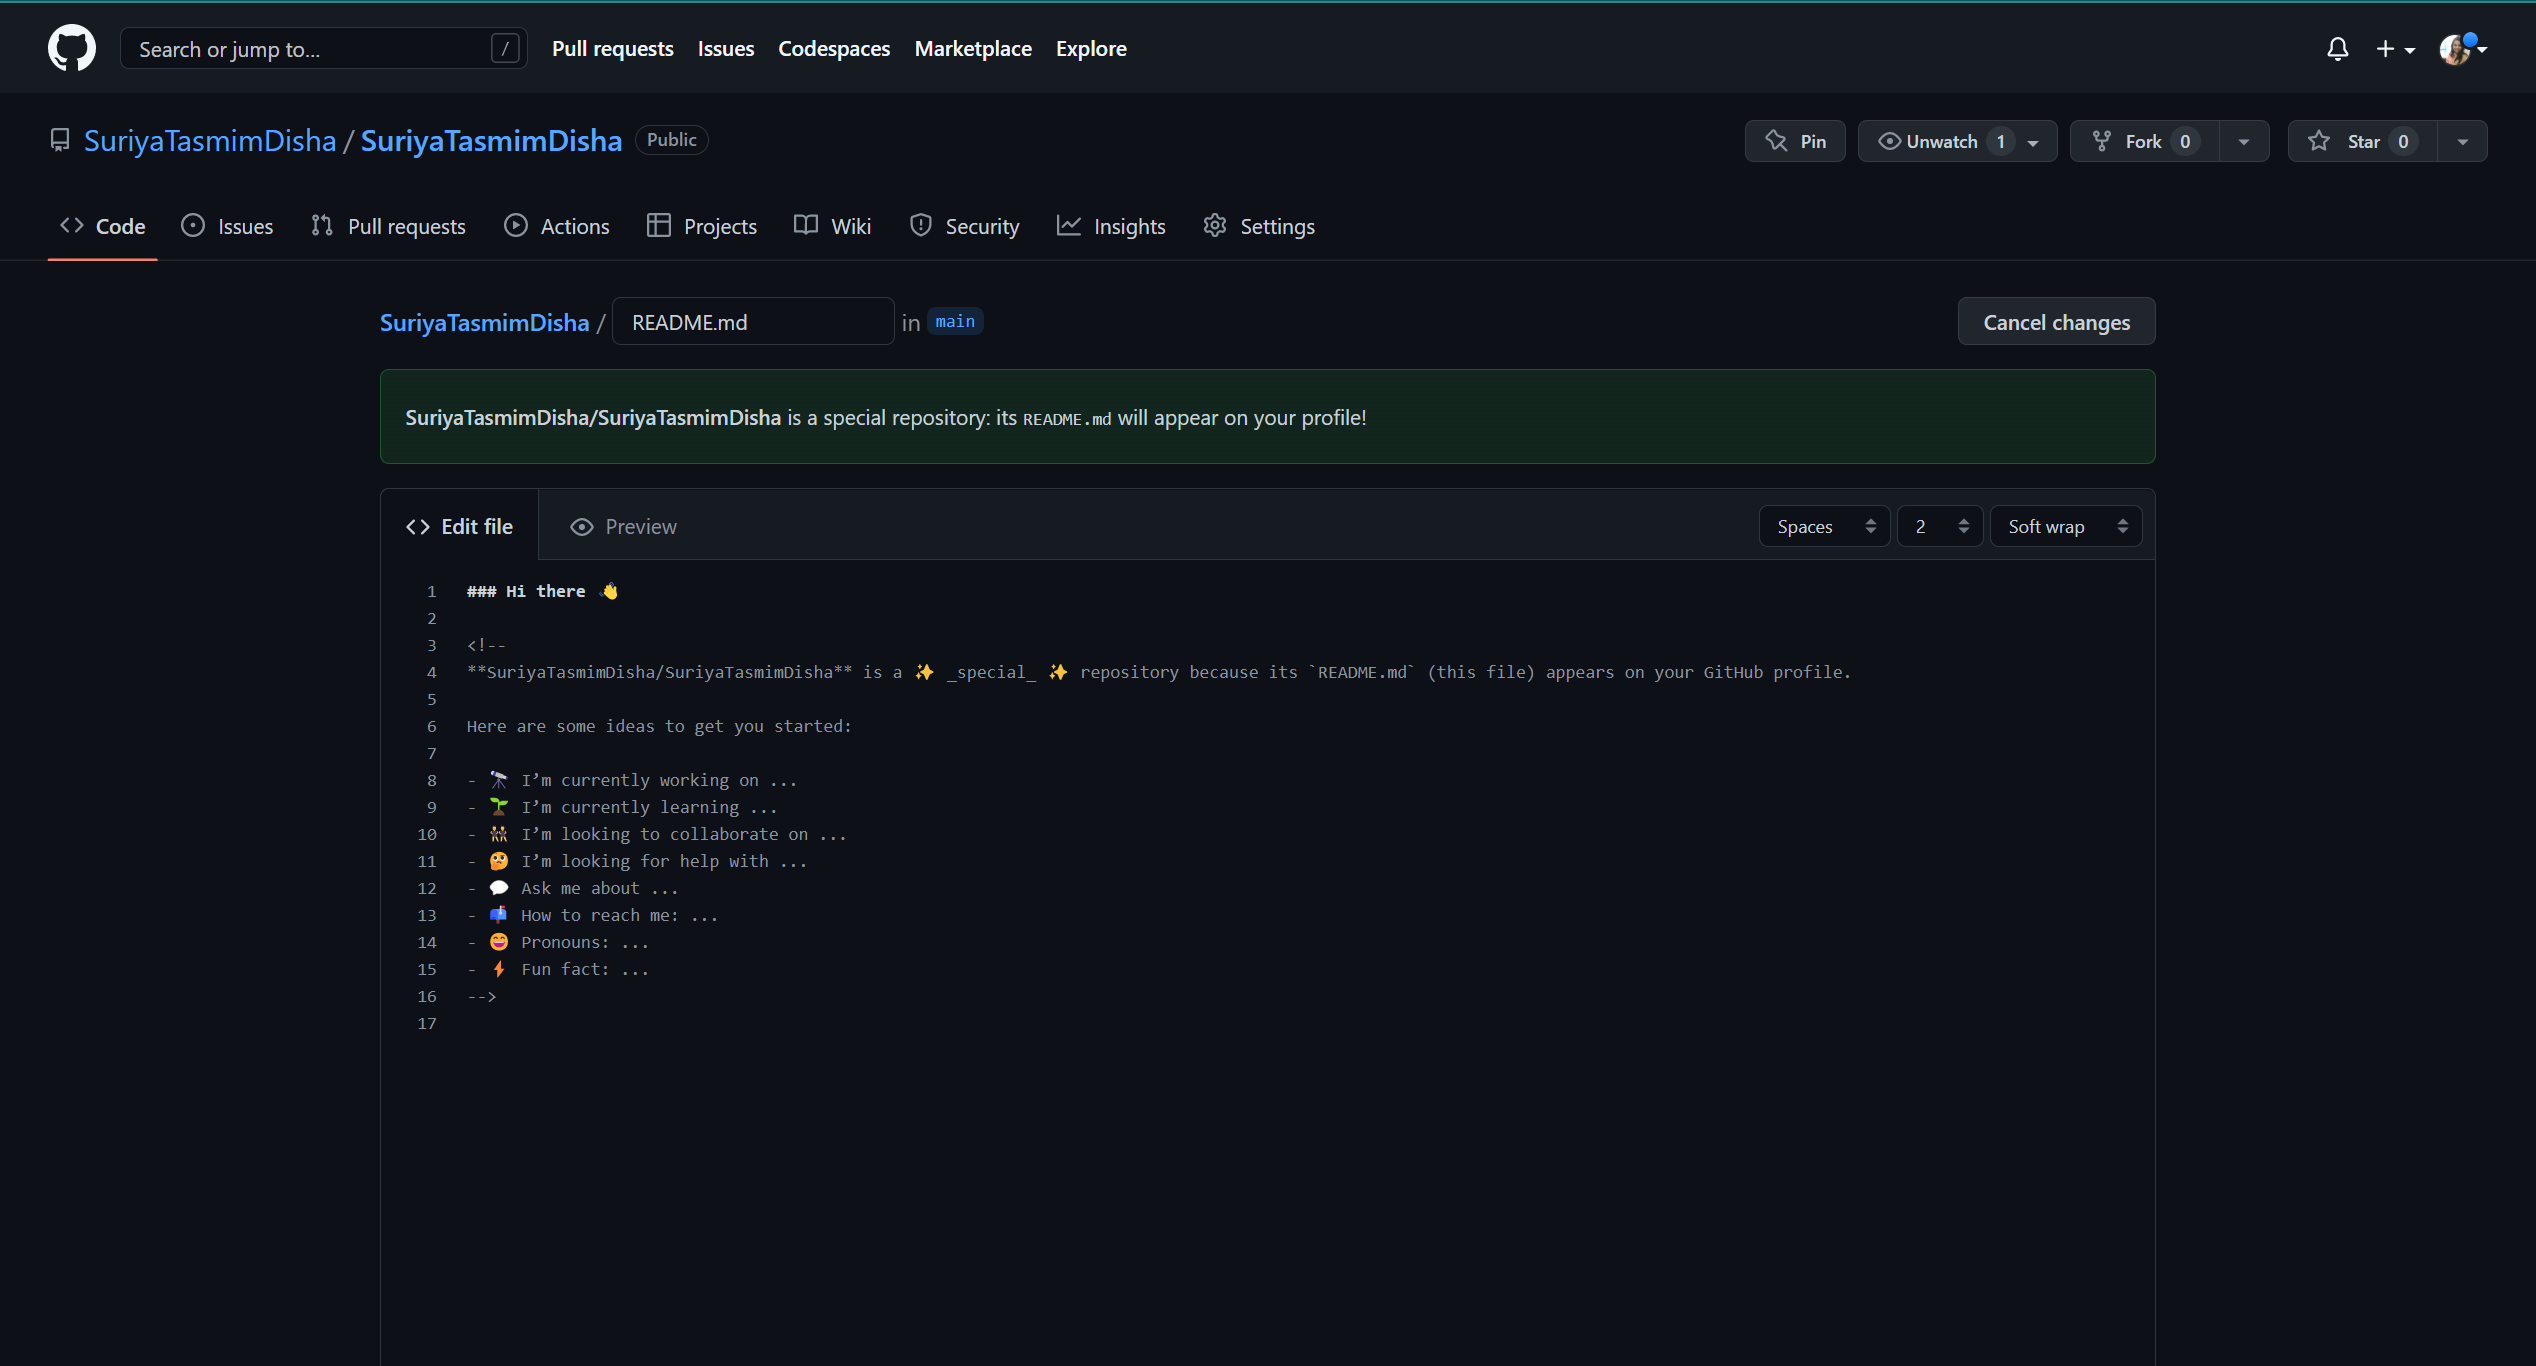
Now, I am going to remove the unnecessary lines of code and start coding.
🙋♀️Intro
First, I am going to start with the intro section. For this, I am going to create a section name using an HTML comment tag. Then I am going to create a div tag and align it to the center. Next, I am going to go to Thomas Guibert's github profile. From there I am going to copy the emoji url that I want to use in my github profile. After this, I am going to go back to my github editor and paste the url in the src attribute of the img tag. If you want you can add a different emoji or gif. For that just change the src in the img tag. Here the image is clickable. So to avoid clicking on the image and ending up on a different page, I am going to wrap this img into an a tag and refer to my homepage using href=”#”. Now I am going to check the changes in the Preview section and if it looks good then I am going to commit these changes and head over to my github profile to see the new look.
<!-- Intro Section  -->
<div id="intro-img" align="center">
    <a href="#"><img src="https://emojis.slackmojis.com/emojis/images/1531849430/4246/blob-sunglasses.gif?1531849430" width=100></a>
</div>
Next, I am going to add my name and a short description of myself. So, I am going to head over to readme-typing-svg and customize the font type and other styles as per I want. Then I am going to copy the HTML code snippet, go back to my editor, and paste the code. After this, I am going to check the changes in the Preview section and commit the changes.
<div id="about-me" align="center">
<a href="https://git.io/typing-svg"><img src="https://readme-typing-svg.demolab.com?font=Roboto+Condensed&weight=500&size=25&duration=4000&pause=500&color=EB5775¢er=true&vCenter=true&width=550&lines=Hi%2C+I+am+Suriya+Tasmim+Disha;It's+nice+to+meet+you!;I+am+a+full+stack+web+and+app+developer" alt="Typing SVG" /></a>
</div>
The final look of the Intro section:
📱Social Media
Now I am going to add my social media section. For this, I am going to use the following URL from Shields.io.
https://img.shields.io/badge/{**Label-Color**}?logo={**social_media_icon_name**}&logoColor={**color**}&style=for-the-badge
I am going to replace the parameter names with three social networks: LinkedIn, YouTube, and Twitter. After replacing the parameters with values, the urls will look like the below:
LinkedIn: https://img.shields.io/badge/LinkedIn-blue?style=for-the-badge&logo=linkedin&logoColor=white
YouTube: https://img.shields.io/badge/YouTube-red?style=for-the-badge&logo=youtube&logoColor=white
Twitter: https://img.shields.io/badge/Twitter-blue?style=for-the-badge&logo=twitter&logoColor=white
I am also going to add a github-profile-views-counter in my profile which will show how many times my profile has been visited. For this, I am going to use the following url: https://komarev.com/ghpvc/?username={your-github-username}
As all the necessary links are ready, now I am going to wrap them in an img tag. For each social network, I am going to use an a tag to point to the respective accounts. Finally, I am going to check the changes in the Preview section and commit the changes.
<!-- Social Media -->
<div id="badges" align="center">
  <a href="https://www.linkedin.com/in/suriya-tasmim-disha/">
    <img src="https://img.shields.io/badge/LinkedIn-blue?style=for-the-badge&logo=linkedin&logoColor=white" alt="LinkedIn Badge">
  </a>
  <a href="https://www.youtube.com/channel/UC6n_v98g89xYfeyzpLj84JQ">
    <img src="https://img.shields.io/badge/YouTube-red?style=for-the-badge&logo=youtube&logoColor=white" alt="Youtube Badge">
  </a>
  <a href="https://twitter.com/SuriyaDisha">
    <img src="https://img.shields.io/badge/Twitter-blue?style=for-the-badge&logo=twitter&logoColor=white" alt="Twitter Badge">
  </a>
  <a href="#"><img src="https://komarev.com/ghpvc/?username=SuriyaTasmimDisha&style=for-the-badge&color=red" alt="Profile Views"></a>
</div>
The final look of the Social Media section:
📺Latest YouTube Videos:
Recently I have started making YouTube videos. So, I want to show the latest videos in my github profile. For this, I am going to use GitHub Actions. GitHub Actions gives developers the ability to automate their workflows. With this configuration, github will automatically keep checking for new videos. So, I manually don’t have to keep adding the YouTube cards each time I upload a new video to my channel. To do this, I am going to use github-readme-youtube-cards following the steps below:
I am going to add the following code to my editor and commit the changes.
 <!-- Latest Youtube Videos -->
  ## 📺 Latest YouTube Videos
 <!-- BEGIN YOUTUBE-CARDS -->
 <!-- END YOUTUBE-CARDS -->
In the repo, I am going to create a new file named .github/workflows/youtube-cards.yml. I am going to open the youtube-cards.yml file in my editor and add the given code:
 name: GitHub Readme YouTube Cards
 on:
   schedule:
     # Runs every hour, on the hour
     - cron: "0 * * * *"
   workflow_dispatch:

 jobs:
   deploy:
     runs-on: ubuntu-latest
     steps:
       - uses: DenverCoder1/github-readme-youtube-cards@main
         with:
           channel_id: UC6n_v98g89xYfeyzpLj84JQ
           comment_tag_name: YOUTUBE-CARDS
           youtube_api_key: ${{ secrets.YOUTUBE_API_KEY }} # Configured in Actions Secrets (see Wiki)
           show_duration: true # Requires YouTube API Key (see Wiki)
           output_type: html
I am going to replace your-channel-id with my YouTube channel id.
💡Note: To show the video duration on the YouTube card, you have to set up a YOUTUBE_API_KEY. If you are wondering where you can get a YOUTUBE_API_KEY then you can follow this document. Now if you are wondering how you are going to set up this API_KEY in github secrets then follow this document.
Finally, I am going to Actions → GitHub Readme YouTube Cards and hit the Run workflow button.
If the workflow runs successfully, then I am going to go to my github profile to see the changes.
The final look of the YouTube Cards section:
📝Latest Blog Posts:
Similar to YouTube Cards section, I am going to set up GitHub Actions for getting the latest blogs to my github profile automatically. For this part, I am going to use blog-post-workflow following these steps:
I am going to add the following code to my editor and commit the changes.
 <!-- Latest Blog Posts -->
  ## 📝 Latest Blog Posts
 <!-- BLOG-POST-LIST:START -->
 <!-- BLOG-POST-LIST:END -->
In the repo, I am going to create a new file named .github/workflows/blog-post-workflow.yml. Then, I am going to open the blog-post-workflow.yml file in my editor and add the given code:
 name: Latest blog post workflow
 on:
   schedule:
     # Runs every hour
     - cron: '0 * * * *'
   workflow_dispatch:

 jobs:
   update-readme-with-blog:
     name: Update this repos README with latest blog posts
     runs-on: ubuntu-latest
     steps:
       - uses: actions/checkout@v2
       - uses: gautamkrishnar/blog-post-workflow@master
         with:
           max_post_count: "4"
           feed_list: "https://blog.suriyadisha.com/rss.xml"
I am going to replace your-feed-url with my blog url. You can find the list of available sources here.
Finally, I am going to go to Actions → Latest blog post workflow and hit the Run workflow button.
If the workflow runs successfully, then I am going to go to my github profile to see the changes.
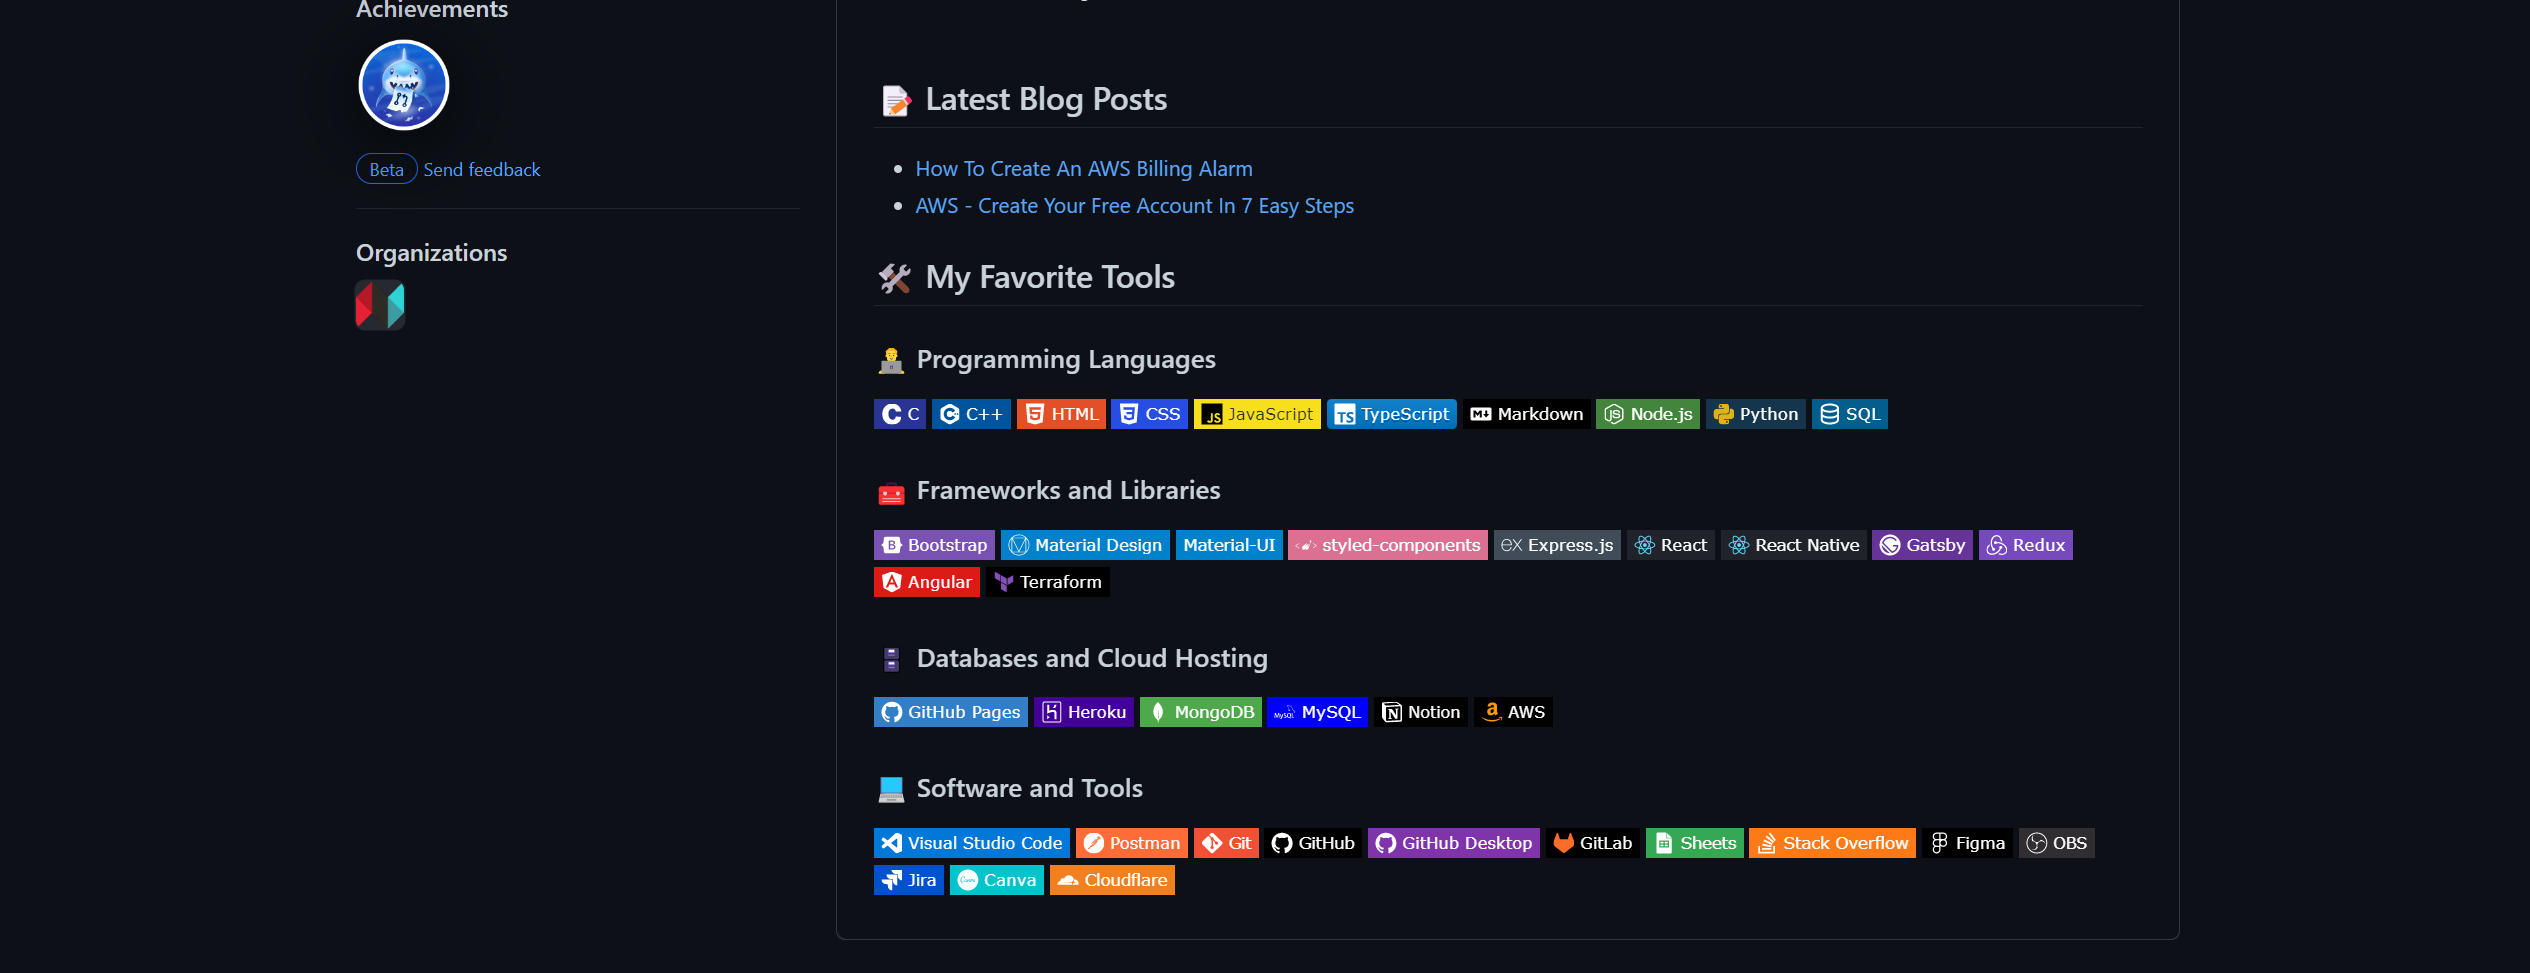
The final look of the Blog Posts section:
⚒️My Favorite Tools
In this part, I am going to add a list of my favorite tools that I use for development. For this, I am going to use badges from Shields.io. But I am not going to directly generate these badges from Shields.io. There is a big collection of shield badges in this blog named Awesome Badges. So, I am going to use the badges from here. I am going to take the badge sources of the tools that I use and paste them in the src of the img tag like this:
<img alt="C" src="https://img.shields.io/badge/-C-283593?style=flat-square&logo=c&logoColor=white">
And this will generate a badge for my tool. The badge is a clickable item. So, if I click on the badge it will open up a new page showing the badge. To avoid this scenario, I am going to wrap the img tag with an a tag like below:
<a href="#">
    <img alt="C" src="https://img.shields.io/badge/-C-283593?style=flat-square&logo=c&logoColor=white">
</a>
Now, if I click on the badge, I will still be on the same page. The rest of the code for this section is given below:
<!-- Favorite Tools -->
## 🛠️ My Favorite Tools
<h3>👨💻 Programming Languages</h3>
<p>
<a href="#"><img alt="C" src="https://img.shields.io/badge/-C-283593?style=flat-square&logo=c&logoColor=white"></a>
<a href="#"><img alt="C++" src="https://img.shields.io/badge/-C++-00549D?style=flat-square&logo=cplusplus&logoColor=white"></a>
<a href="#"><img alt="HTML" src="https://img.shields.io/badge/-HTML-E34F26.svg?style=flat-square&logo=html5&logoColor=white"></a>
<a href="#"><img alt="CSS" src="https://img.shields.io/badge/-CSS-264de4.svg?style=flat-square&logo=css3&logoColor=white"></a>
<a href="#"><img alt="JavaScript" src="https://img.shields.io/badge/-JavaScript-F7DF1E.svg?style=flat-square&logo=javascript&logoColor=black"></a>
<a href="#"><img alt="TypeScript" src="https://img.shields.io/badge/TypeScript-007ACC.svg?logo=typescript&logoColor=white"></a>
<a href="#"><img alt="Markdown" src="https://img.shields.io/badge/-Markdown-000000.svg?style=flat-square&logo=markdown&logoColor=white"></a>
<a href="#"><img alt="Node.js" src="https://img.shields.io/badge/Node.js-43853D.svg?style=flat-square&logo=node.js&logoColor=white"></a>
<a href="#"><img alt="Python" src="https://img.shields.io/badge/Python-14354C.svg?style=flat-square&logo=python&logoColor=yellow"></a>
<a href="#"><img alt="SQL" src="https://custom-icon-badges.demolab.com/badge/SQL-025E8C.svg?style=flat-square&logo=database&logoColor=white"></a>
</p>
<h3>🧰 Frameworks and Libraries</h3>
<p>
<a href="#"><img alt="Bootstrap" src="https://img.shields.io/badge/Bootstrap-7952B3.svg?style=flat-square&logo=bootstrap&logoColor=white"></a>
<a href="#"><img alt="Material Design" src="https://img.shields.io/badge/Material%20Design-0081CB.svg?style=flat-square&logo=material-design&logoColor=white"></a>
<a href="#"><img alt="Material UI" src="https://img.shields.io/badge/Material--UI-0081CB?style=flat-square&logo=material-ui&logoColor=white"></a>
<a href="#"><img alt="Styled Component" src="https://img.shields.io/badge/styled--components-DB7093?style=flat-square&logo=styled-components&logoColor=white"></a>
<a href="#"><img alt="Express.js" src="https://img.shields.io/badge/Express.js-404d59.svg?style=flat-square&logo=express&logoColor=white"></a>
<a href="#"><img alt="React" src="https://img.shields.io/badge/React-20232a.svg?style=flat-square&logo=react&logoColor=%2361DAFB"></a>
<a href="#"><img alt="React Native" src="https://img.shields.io/badge/React%20Native-20232a.svg?style=flat-square&logo=react&logoColor=%2361DAFB"></a>
<a href="#"><img alt="Gatsby" src="https://img.shields.io/badge/Gatsby-663399?style=flat-square&logo=gatsby&logoColor=white"></a>
<a href="#"><img alt="redux" src="https://img.shields.io/badge/-Redux-764ABC?style=flat-square&logo=redux&logoColor=white"></a>
<a href="#"><img alt="Angular" src="https://img.shields.io/badge/Angular-dd1b16.svg?style=flat-square&logo=angular&logoColor=white"></a>
<a href="#"><img alt="Terraform" src="https://img.shields.io/badge/Terraform-000000.svg?style=flat-square&logo=terraform&logoColor=%23844FBA"></a>
</p>
<h3>🗄️ Databases and Cloud Hosting</h3>
<a href="#"><img alt="GitHub Pages" src="https://img.shields.io/badge/GitHub%20Pages-327FC7.svg?style=flat-square&logo=github&logoColor=white"></a>
<a href="#"><img alt="Heroku" src="https://img.shields.io/badge/Heroku-430098.svg?style=flat-square&logo=heroku&logoColor=white"></a>
<a href="#"><img alt="MongoDB" src ="https://img.shields.io/badge/MongoDB-4ea94b.svg?style=flat-square&logo=mongodb&logoColor=white"></a>
<a href="#"><img alt="MySQL" src="https://img.shields.io/badge/MySQL-00f.svg?style=flat-square&logo=mysql&logoColor=white"></a>
<a href="#"><img alt="Notion" src="https://img.shields.io/badge/Notion-010101.svg?style=flat-square&logo=notion&logoColor=white"></a>
<a href="#"><img alt="AWS" src="https://img.shields.io/badge/AWS-010101.svg?style=flat-square&logo=amazon&logoColor=%23FF9900"></a>
<h3>💻 Software and Tools</h3>
<p>
<a href="#"><img alt="Visual Studio Code" src="https://img.shields.io/badge/Visual%20Studio%20Code-0078d7.svg?style=flat-square&logo=visual-studio-code&logoColor=white"></a>
<a href="#"><img alt="Postman" src="https://img.shields.io/badge/Postman-FF6C37?style=flat-square&logo=postman&logoColor=white"></a>
<a href="#"><img alt="Git" src="https://img.shields.io/badge/Git-F05033.svg?style=flat-square&logo=git&logoColor=white"></a>
<a href="#"><img alt="GitHub" src="https://img.shields.io/badge/GitHub-000000.svg?style=flat-square&logo=github&logoColor=white"></a>
<a href="#"><img alt="GitHub Desktop" src="https://img.shields.io/badge/GitHub%20Desktop-8034A9.svg?style=flat-square&logo=github&logoColor=white"></a>
<a href="#"><img alt="GitLab" src="https://img.shields.io/badge/GitLab-000000.svg?style=flat-square&logo=gitlab&logoColor=FC6D27"></a>
<a href="#"><img alt="Google Sheets" src="https://img.shields.io/badge/Sheets-34A853.svg?style=flat-square&logo=google%20sheets&logoColor=white"></a>
<a href="#"><img alt="Stack Overflow" src="https://img.shields.io/badge/-Stack%20Overflow-FE7A16?style=flat-square&logo=stack-overflow&logoColor=white"></a>
<a href="#"><img alt="Figma" src="https://img.shields.io/badge/-Figma-000000?style=flat-square&logo=figma&logoColor=white"></a>
<a href="#"><img alt="OBS Studio" src="https://img.shields.io/badge/-OBS-302E31?style=flat-square&logo=obs-studio&logoColor=white"></a>
<a href="#"><img alt="Jira" src="https://img.shields.io/badge/Jira-0052CC?style=flat-square&logo=Jira&logoColor=white"></a>
<a href="#"><img alt="Canva" src="https://img.shields.io/badge/Canva-%2300C4CC.svg?&style=flat-square&logo=Canva&logoColor=white"></a>
<a href="#"><img alt="Clodflare" src="https://img.shields.io/badge/Cloudflare-F38020?style=flat-square&logo=Cloudflare&logoColor=white"></a>
</p>
The final look of the Favorite Tools section:
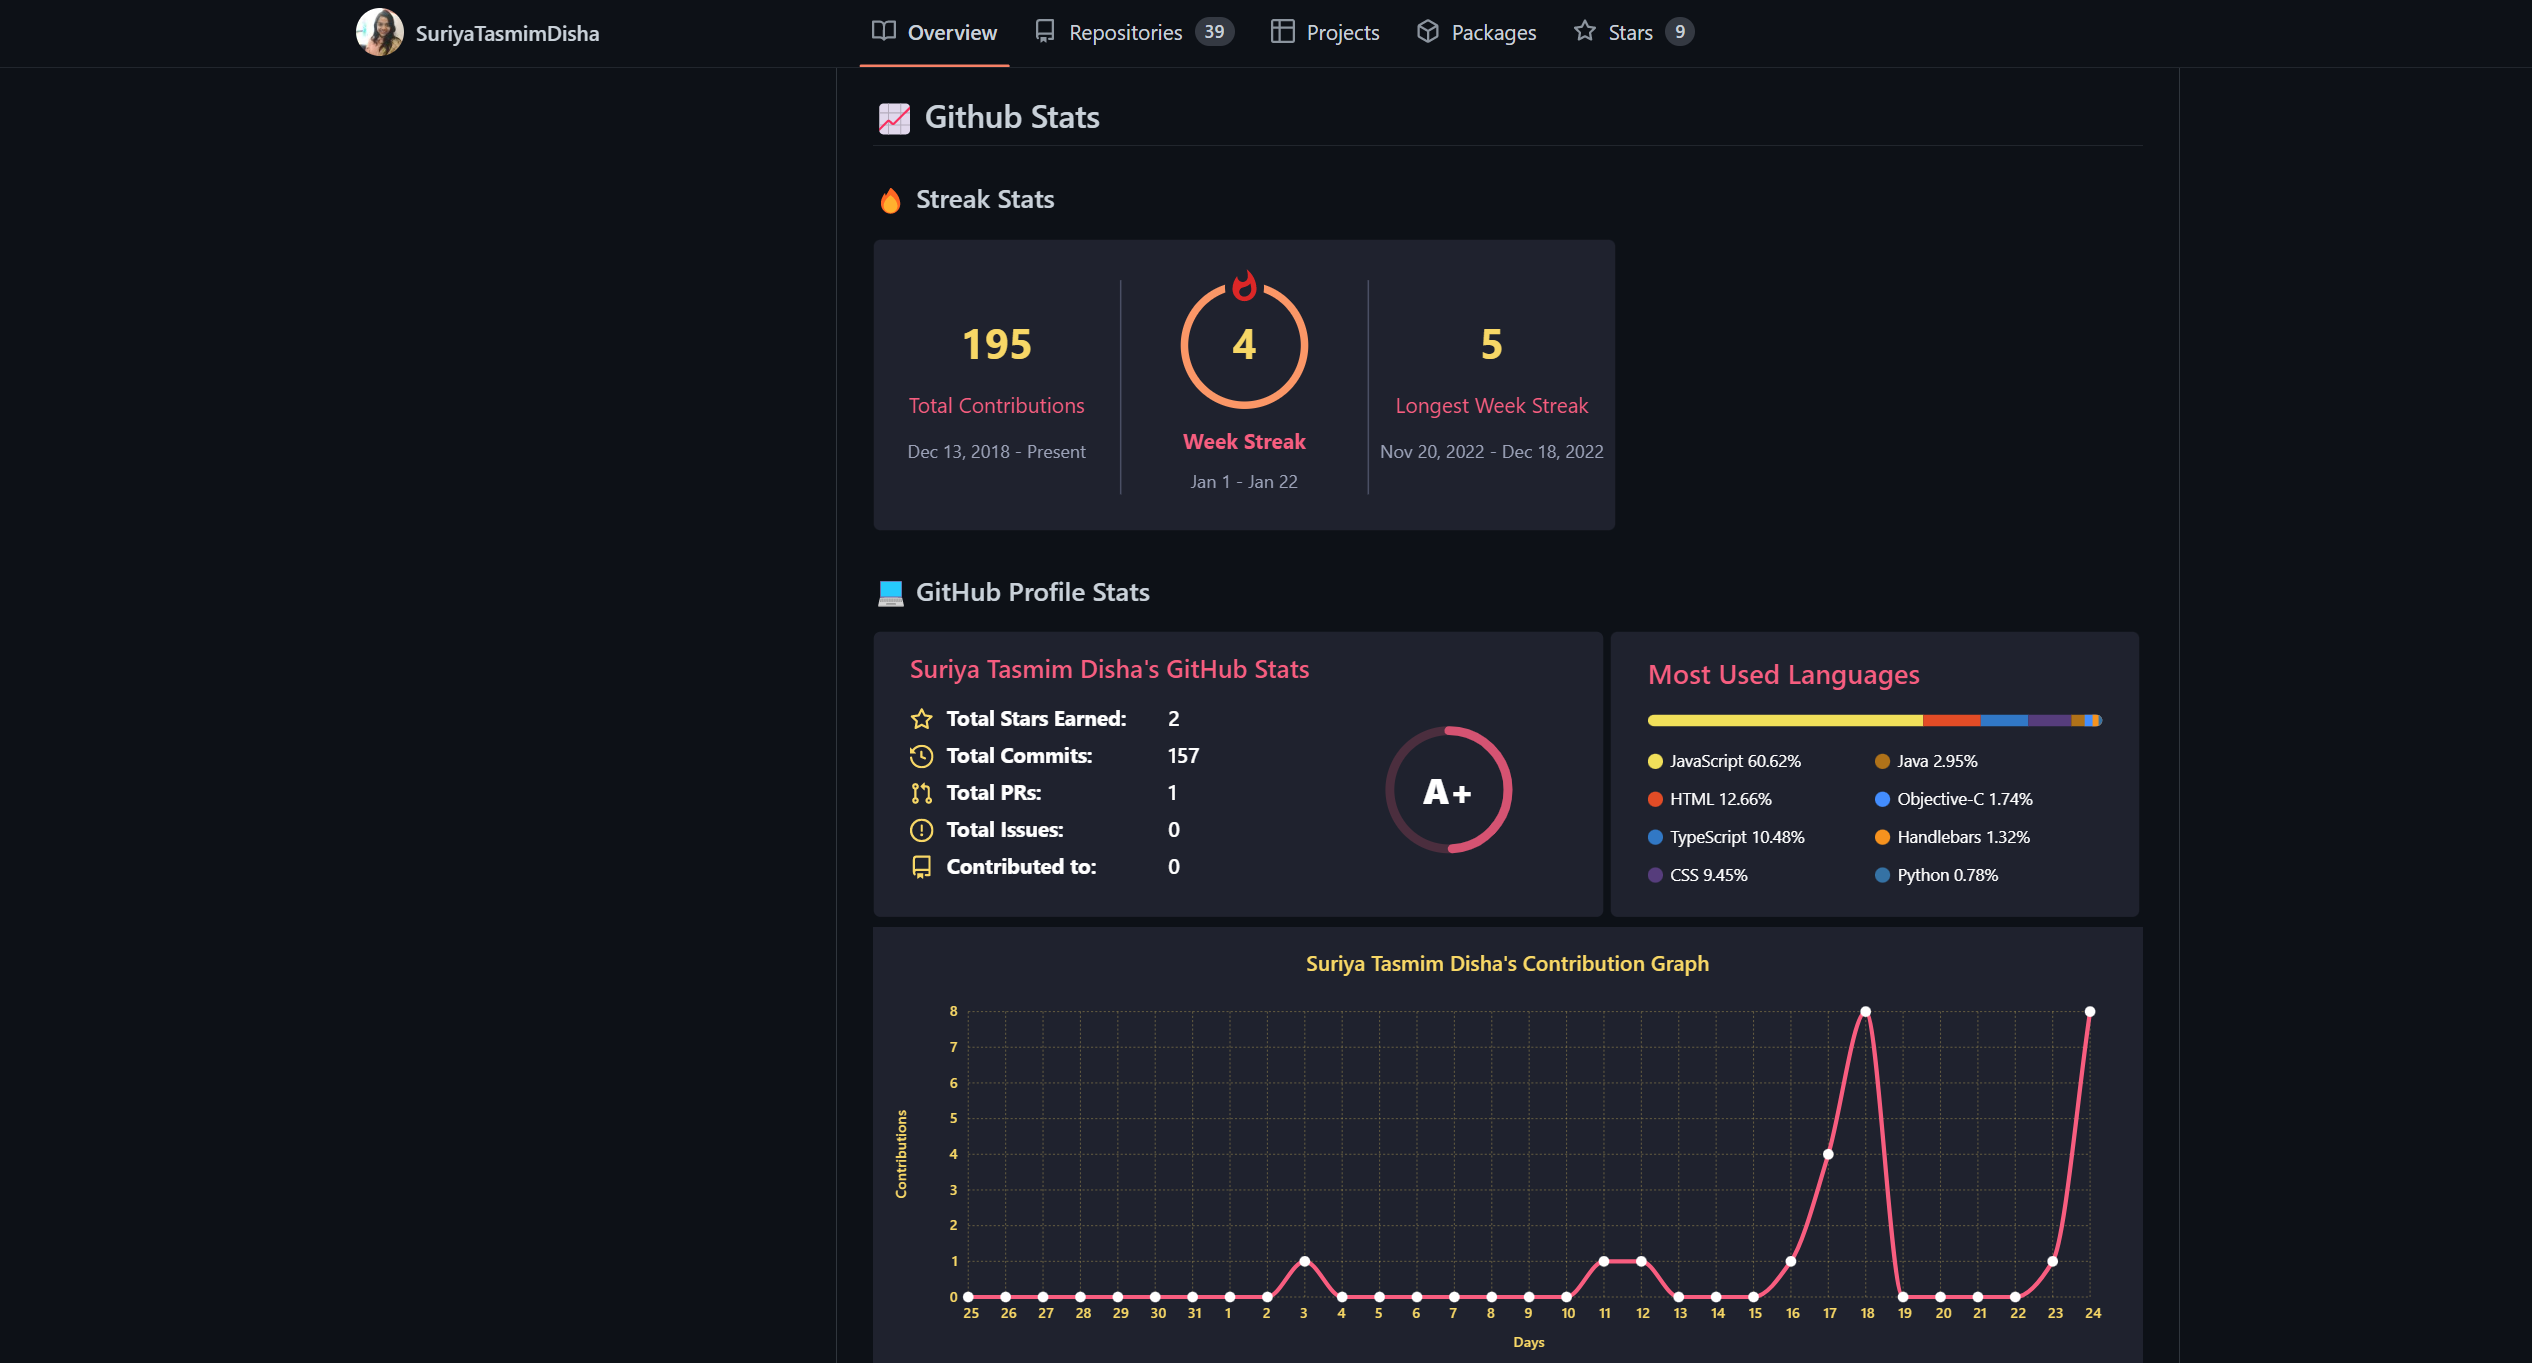
📈GitHub Stats
This is the last section where I am going to add various github activity cards.
For starters, I am going to use the github-readme-streak-stats repo to show the contributions, current streak, and longest streak of my github profile. There are multiple themes available for this card and if you want you can customize your own by heading to this link.
 <!-- Github Activities -->
 ## 📈 Github Stats
 <h3>🔥 Streak Stats</h3>
 <a href="https://github.com/DenverCoder1/github-readme-streak-stats">
     <p>
         <img src="https://streak-stats.demolab.com?user=SuriyaTasmimDisha&theme=monokai-metallian&mode=weekly&fire=DD2727">
     </p>
 </a>
After this, I am going to use the github-readme-stats repo to show dynamically generated github stats for my github repo. This card also has customization options.
 <h3>💻 GitHub Profile Stats</h3>
 <a href="https://github.com/anuraghazra/github-readme-stats">
     <img alt="SuriyaDisha's Github Stats" src="https://denvercoder1-github-readme-stats.vercel.app/api/?username=SuriyaTasmimDisha&show_icons=true&include_all_commits=true&count_private=true&theme=react&hide_border=true&bg_color=1F222E&title_color=F85D7F&icon_color=F8D866" height="192px">
 </a>
Also, I am going to use the same repo to add the top language card to my profile.
 <a href="https://github.com/anuraghazra/github-readme-stats">
     <img alt="SuriyaDisha's Top Languages" src="https://github-readme-stats.vercel.app/api/top-langs/?username=SuriyaTasmimDisha&langs_count=8&layout=compact&theme=react&hide_border=true&bg_color=1F222E&title_color=F85D7F&icon_color=F8D866&hide=Jupyter%20Notebook" height="192px">
 </a>
Finally, I am going to add a github activity graph using this github-readme-activity-graph repo. This graph will show all of my activities for the last 31 days.
 <a href="https://github.com/ashutosh00710/github-readme-activity-graph">
     <img alt="SuriyaDisha's Activity Graph" src="https://github-readme-activity-graph.cyclic.app/graph/?username=SuriyaTasmimDisha&bg_color=1F222E&color=F8D866&line=F85D7F&point=FFFFFF&hide_border=true">
 </a>
The final look of the GitHub Stats section:
I hope you have found this blog helpful and if you follow along you will be to create an amazing github profile for yourself. So thank you for checking out this blog. If you have any further questions, please let me know. I would be happy to help!