How To Create An AWS Billing Alarm

Possessing a high ambition of being a full-stack developer after working as a frontend engineer for some time, currently, I am expertizing in backend engineering with AWS and serverless architecture. Taking a problem, solving it, and then making it work using coding always gives me great pleasure. Moreover, as I got to taste the flavor of both the frontend and backend parts, I can easily visualize and make a bridge between them while working on any project now.
Keeping an eye on the bills for using the AWS services is vital. However, it’s not convenient to always watch over the real-time AWS usage bills.
Let’s assume, you have a budget to spend USD 100 per month. You are checking your usage bills daily and it’s way below the threshold. Everything is fine so far. One day, mistakenly and unknowingly, you or your developers start running an AWS service and the usage bill crossed your threshold limit. By the time you get to know about this, the bill is already way over USD 100. This type of situation is very common and it can lead you or your company to a huge financial crisis. But, you can avoid this kind of crisis, by simply creating an AWS billing alarm.
AWS billing alarm will send you notifications whenever it crosses your threshold limit. And, in this article, I am going to show you how you can set up your AWS billing alarm step by step.
Prerequisites:
AWS account
Note: If you don’t have an AWS account yet, you can follow this AWS - Create Your Free Account In 7 Easy Steps guide and create one.
Signed in as an AWS root user or have proper IAM permission.
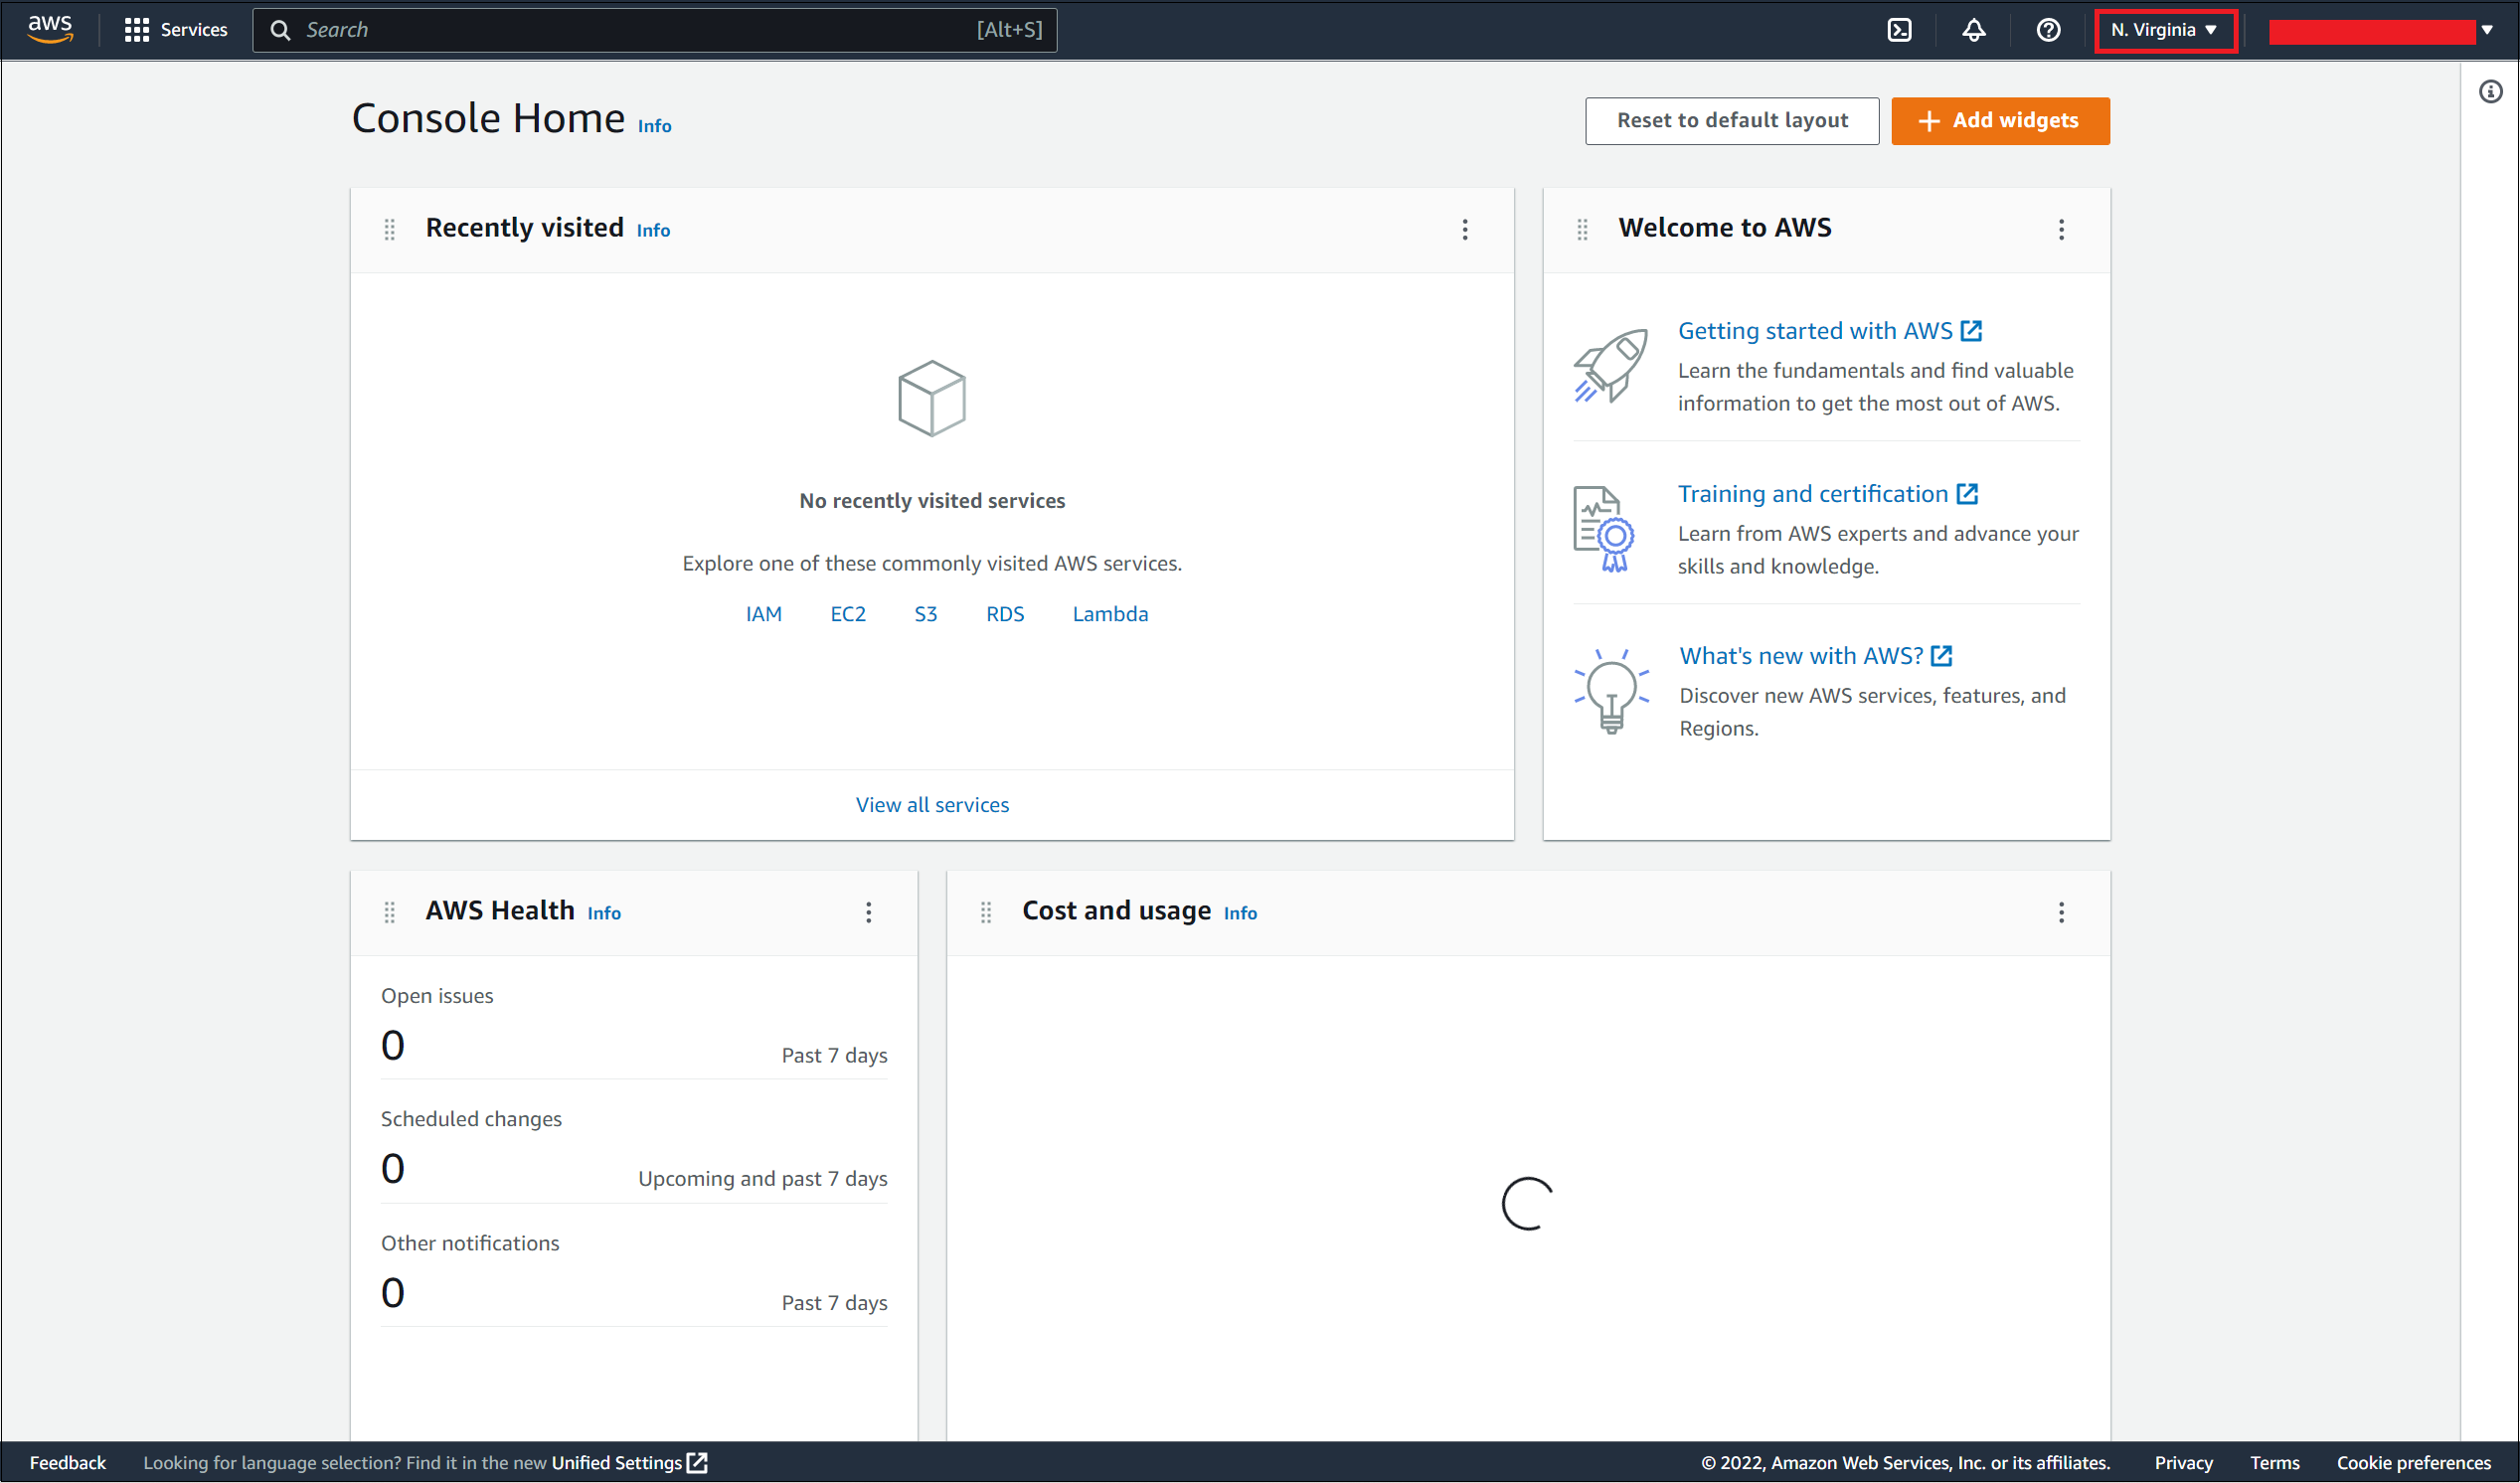
Important: After signing into the AWS account you need to select US East (N. Virginia) region. All the billing metric data including estimated charges for every AWS service that you use and the estimated overall total of your AWS charges are stored in this region. So, whenever you are performing any creation, modification, or deletion of billing, you need to be in this region.
Enable Billing Alarm Monitoring
Sign in to AWS Management Console.
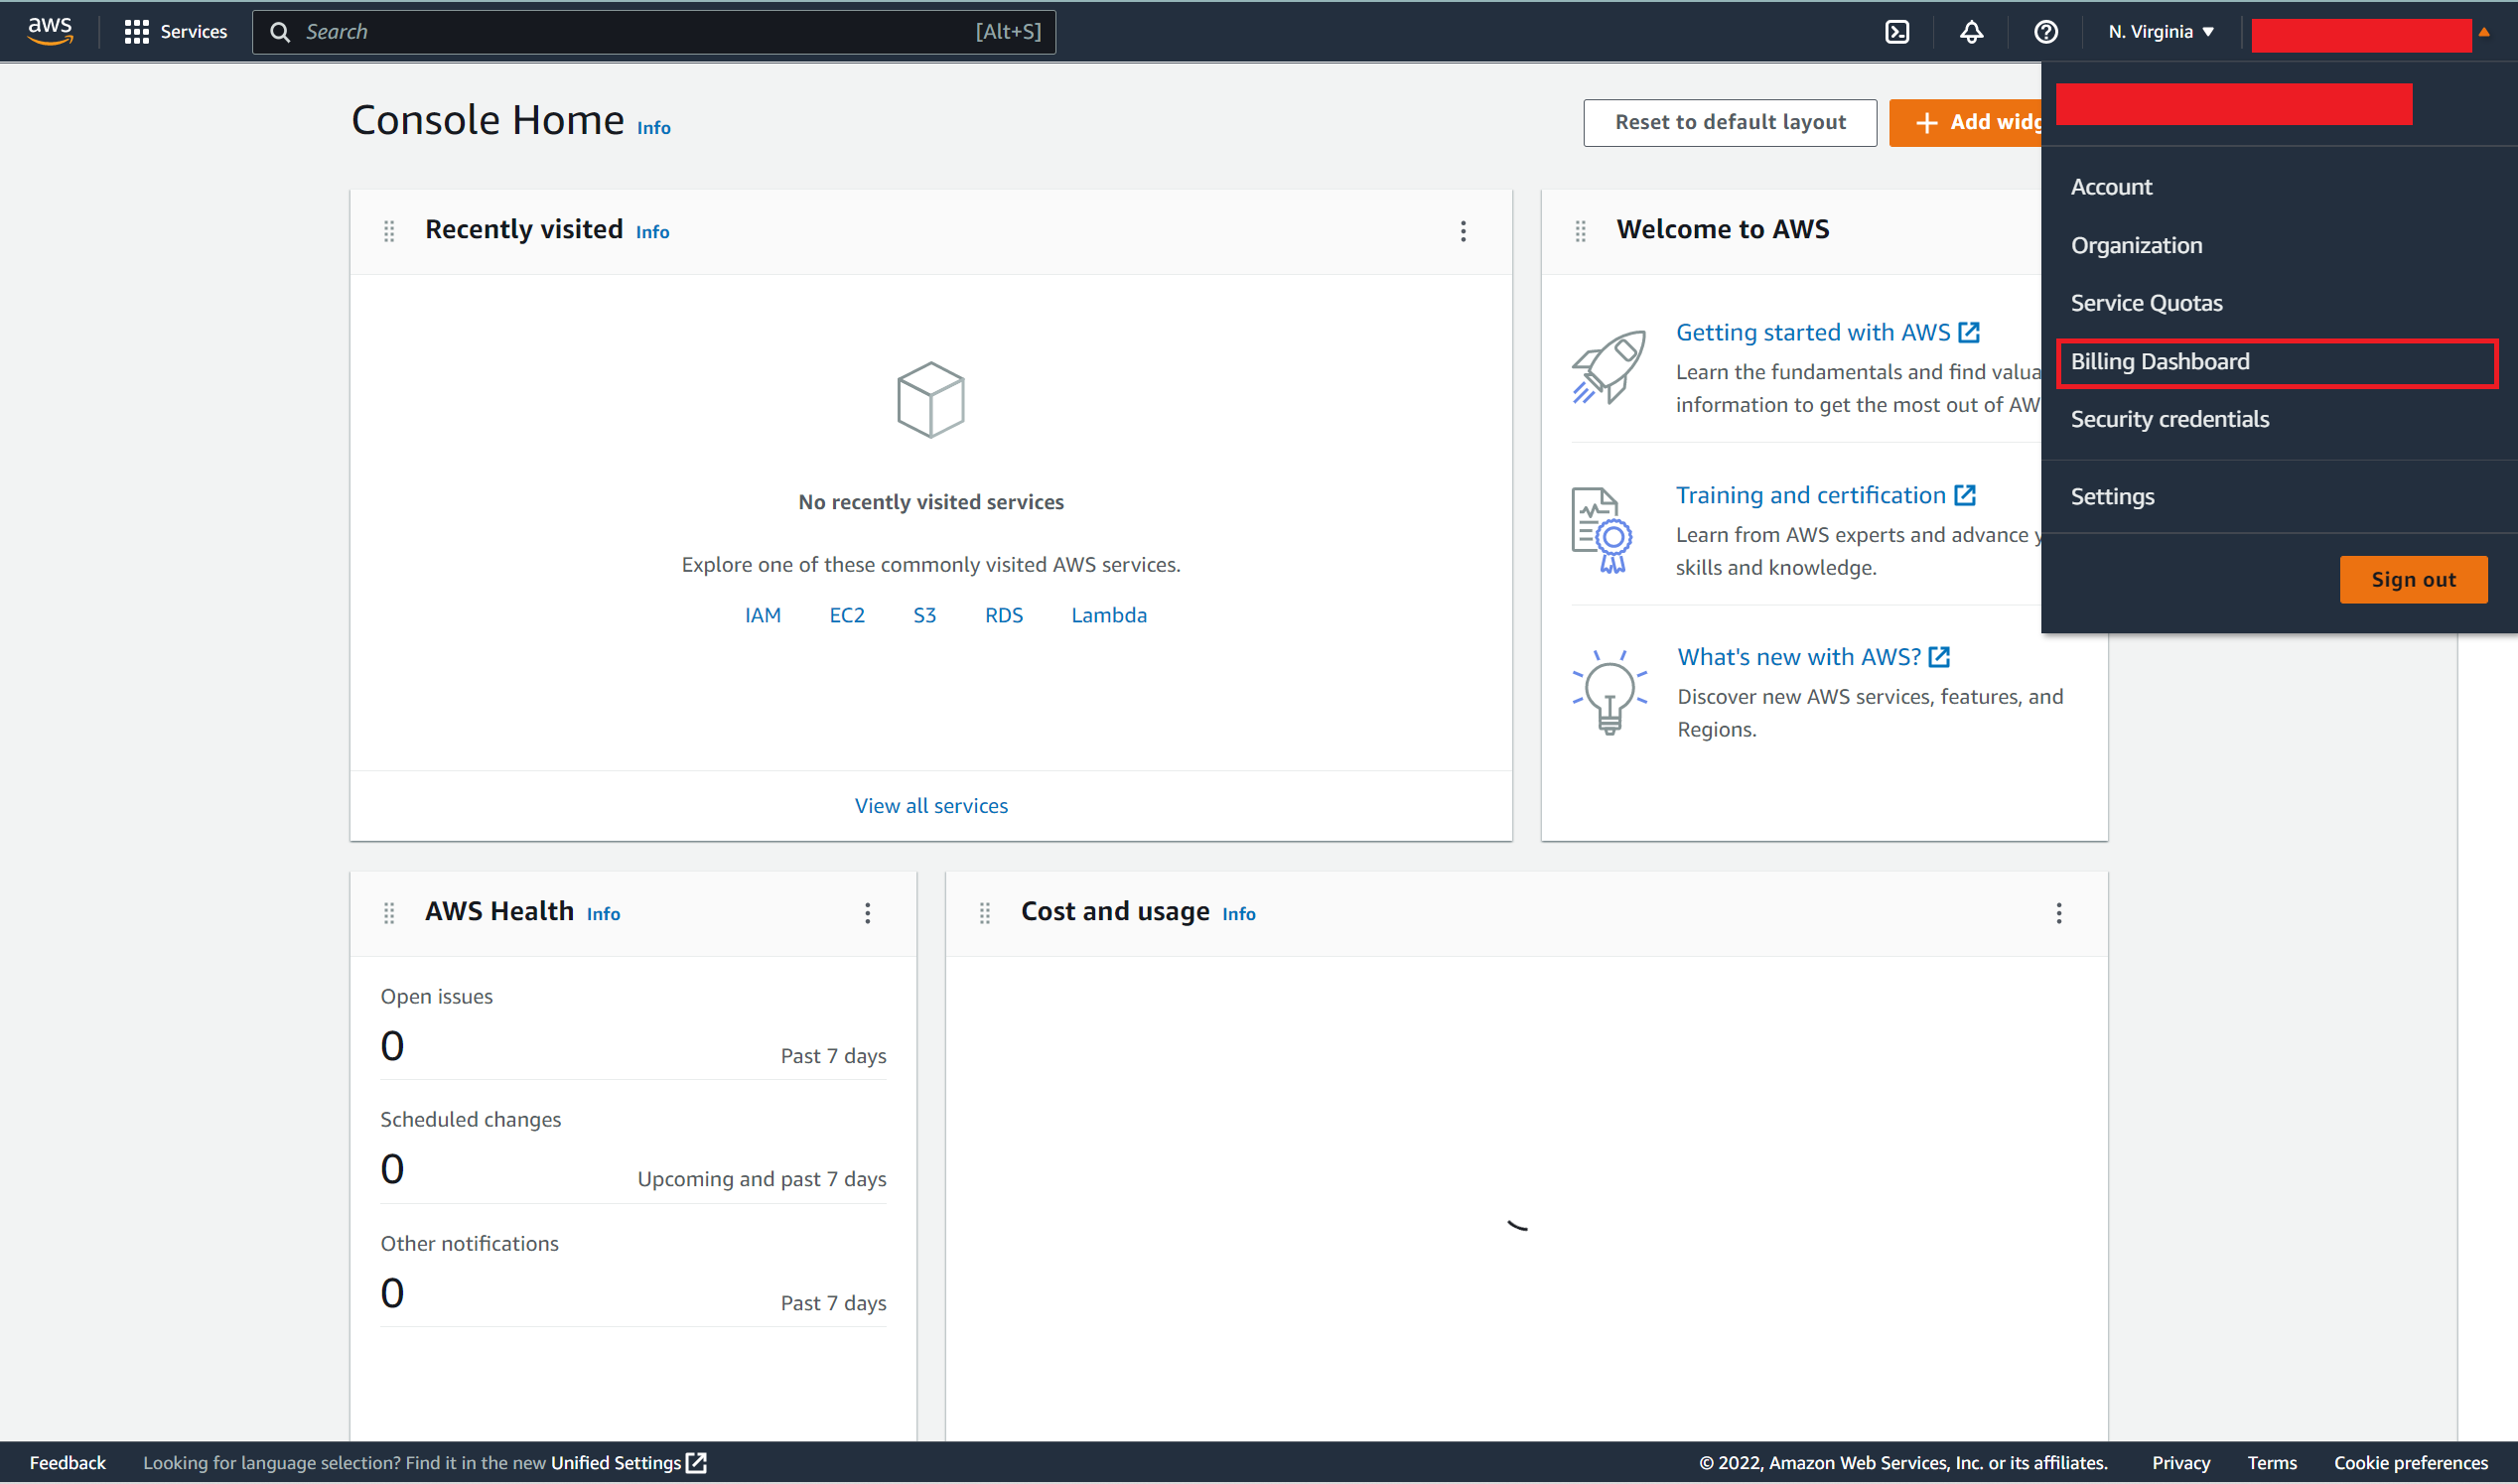
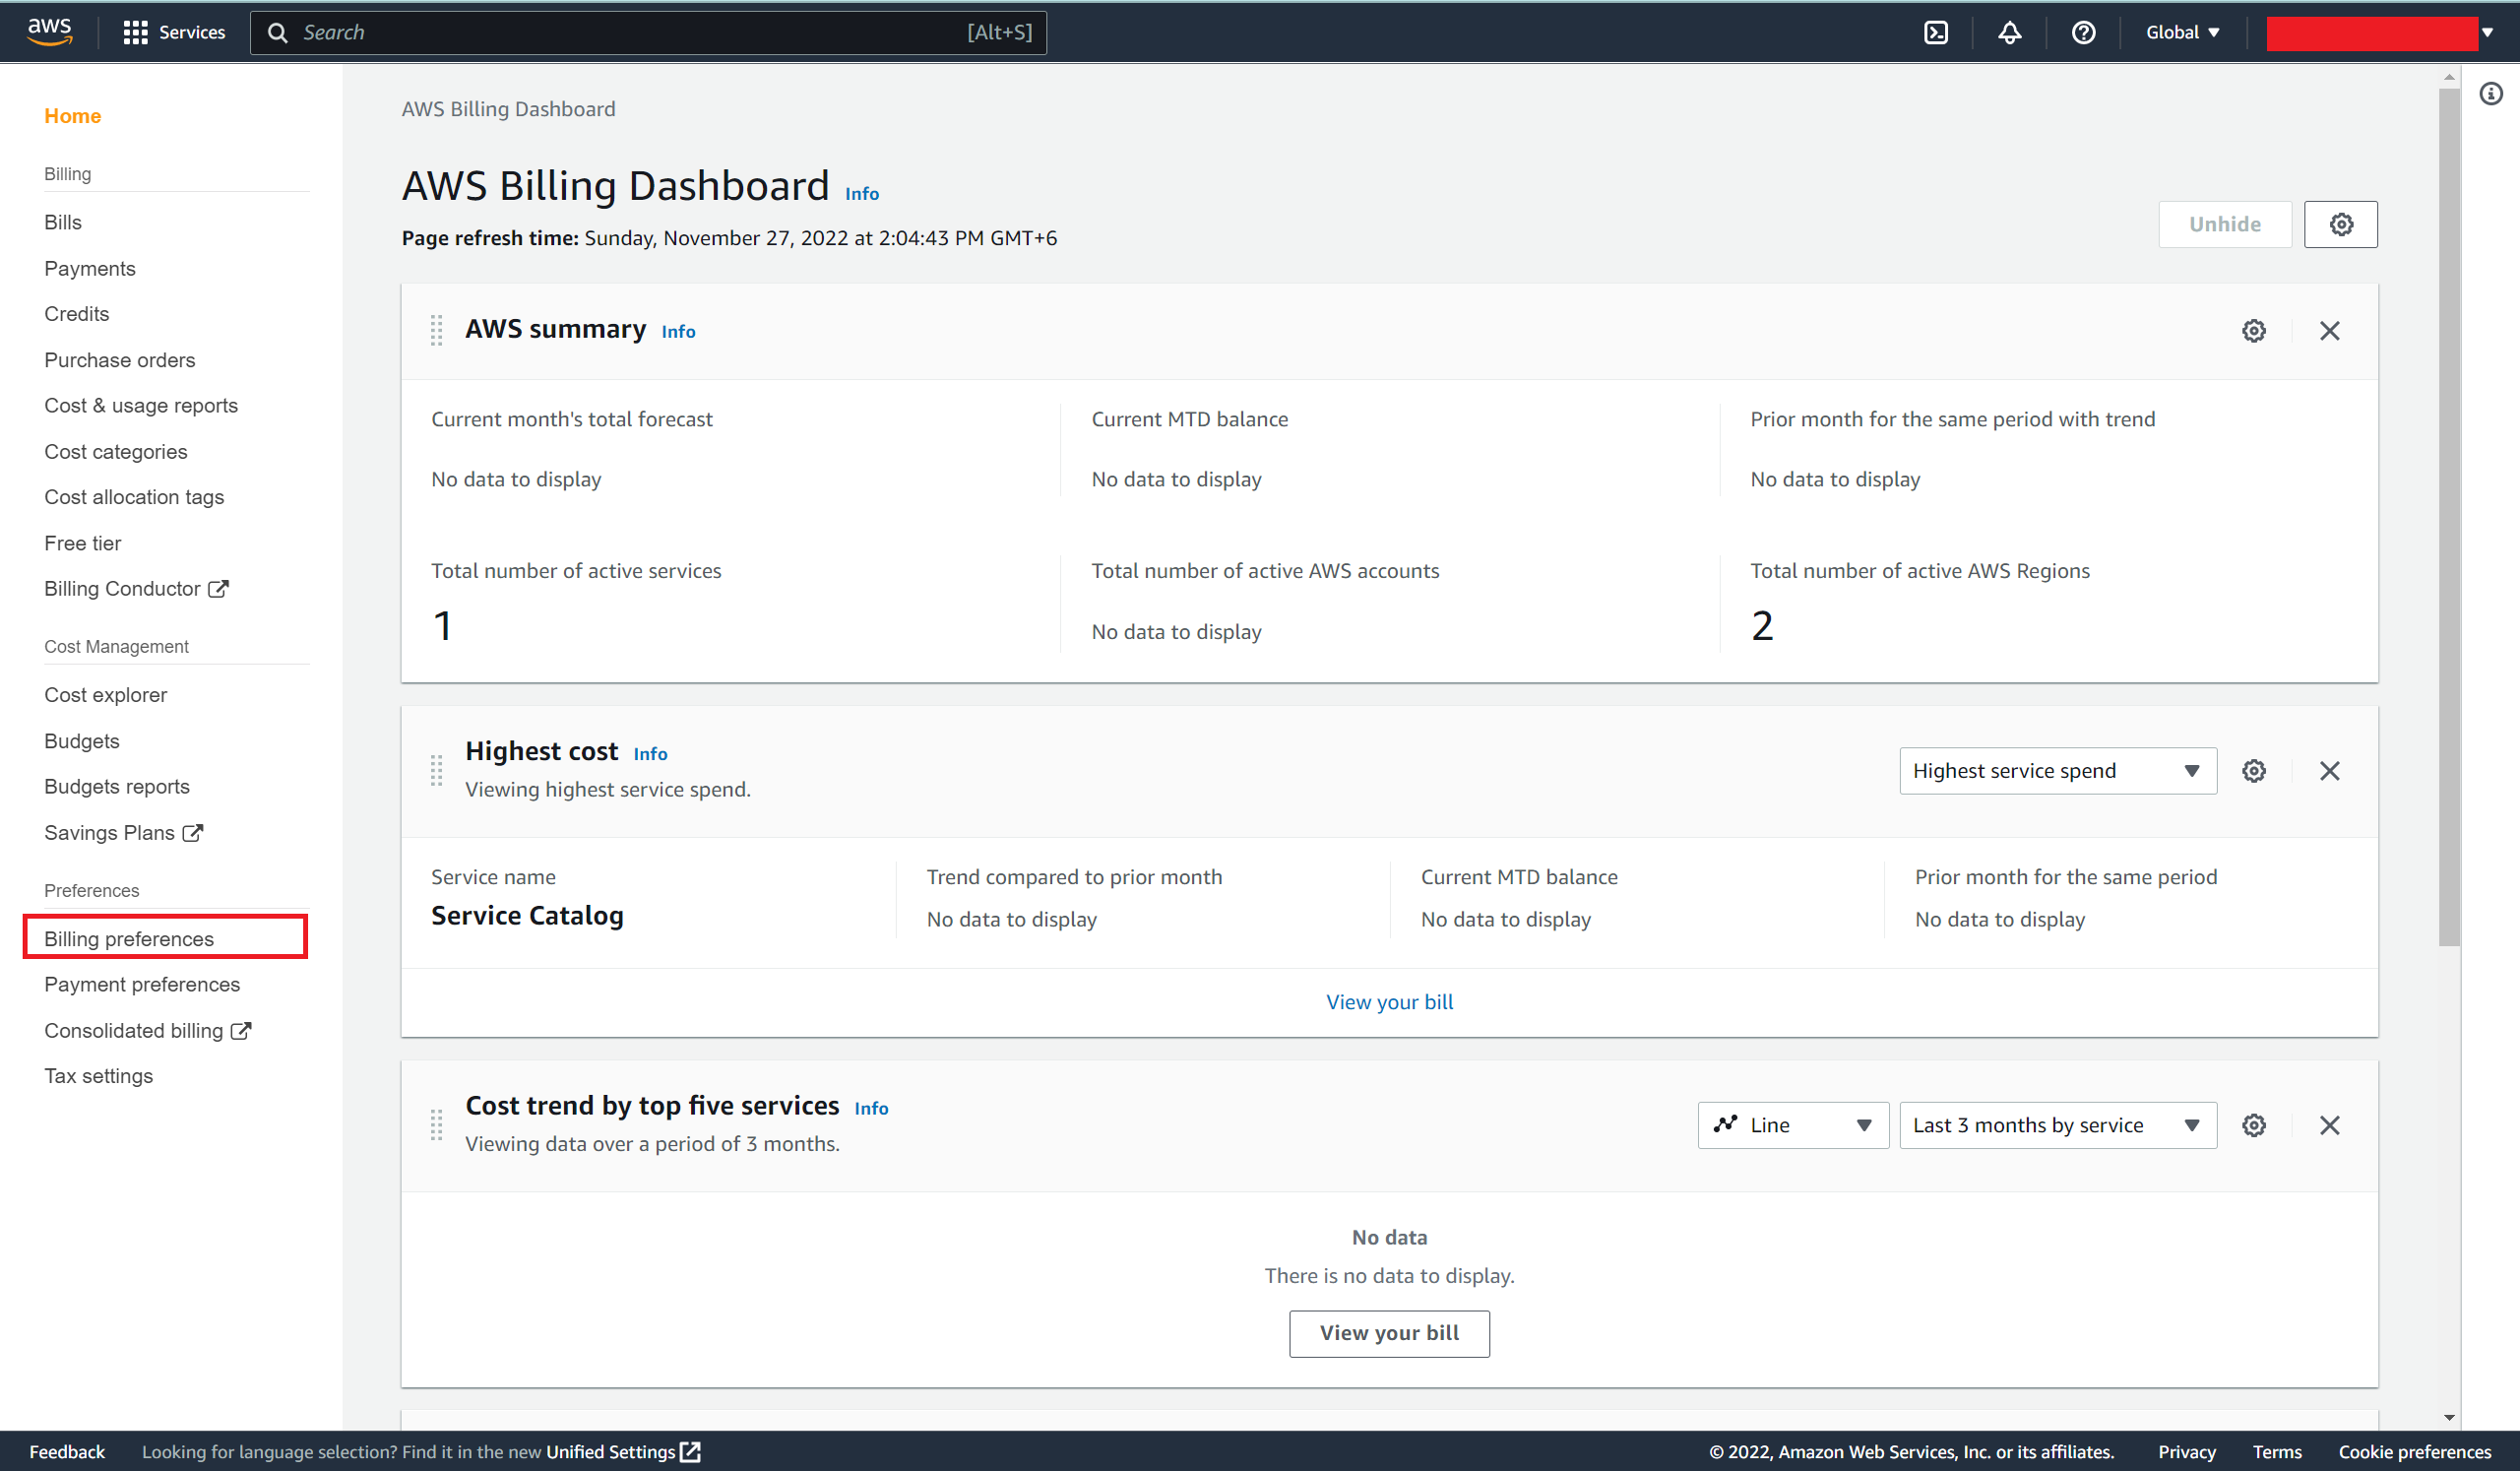
Click on the account name at the top right corner and select Billing Dashboard from the options.
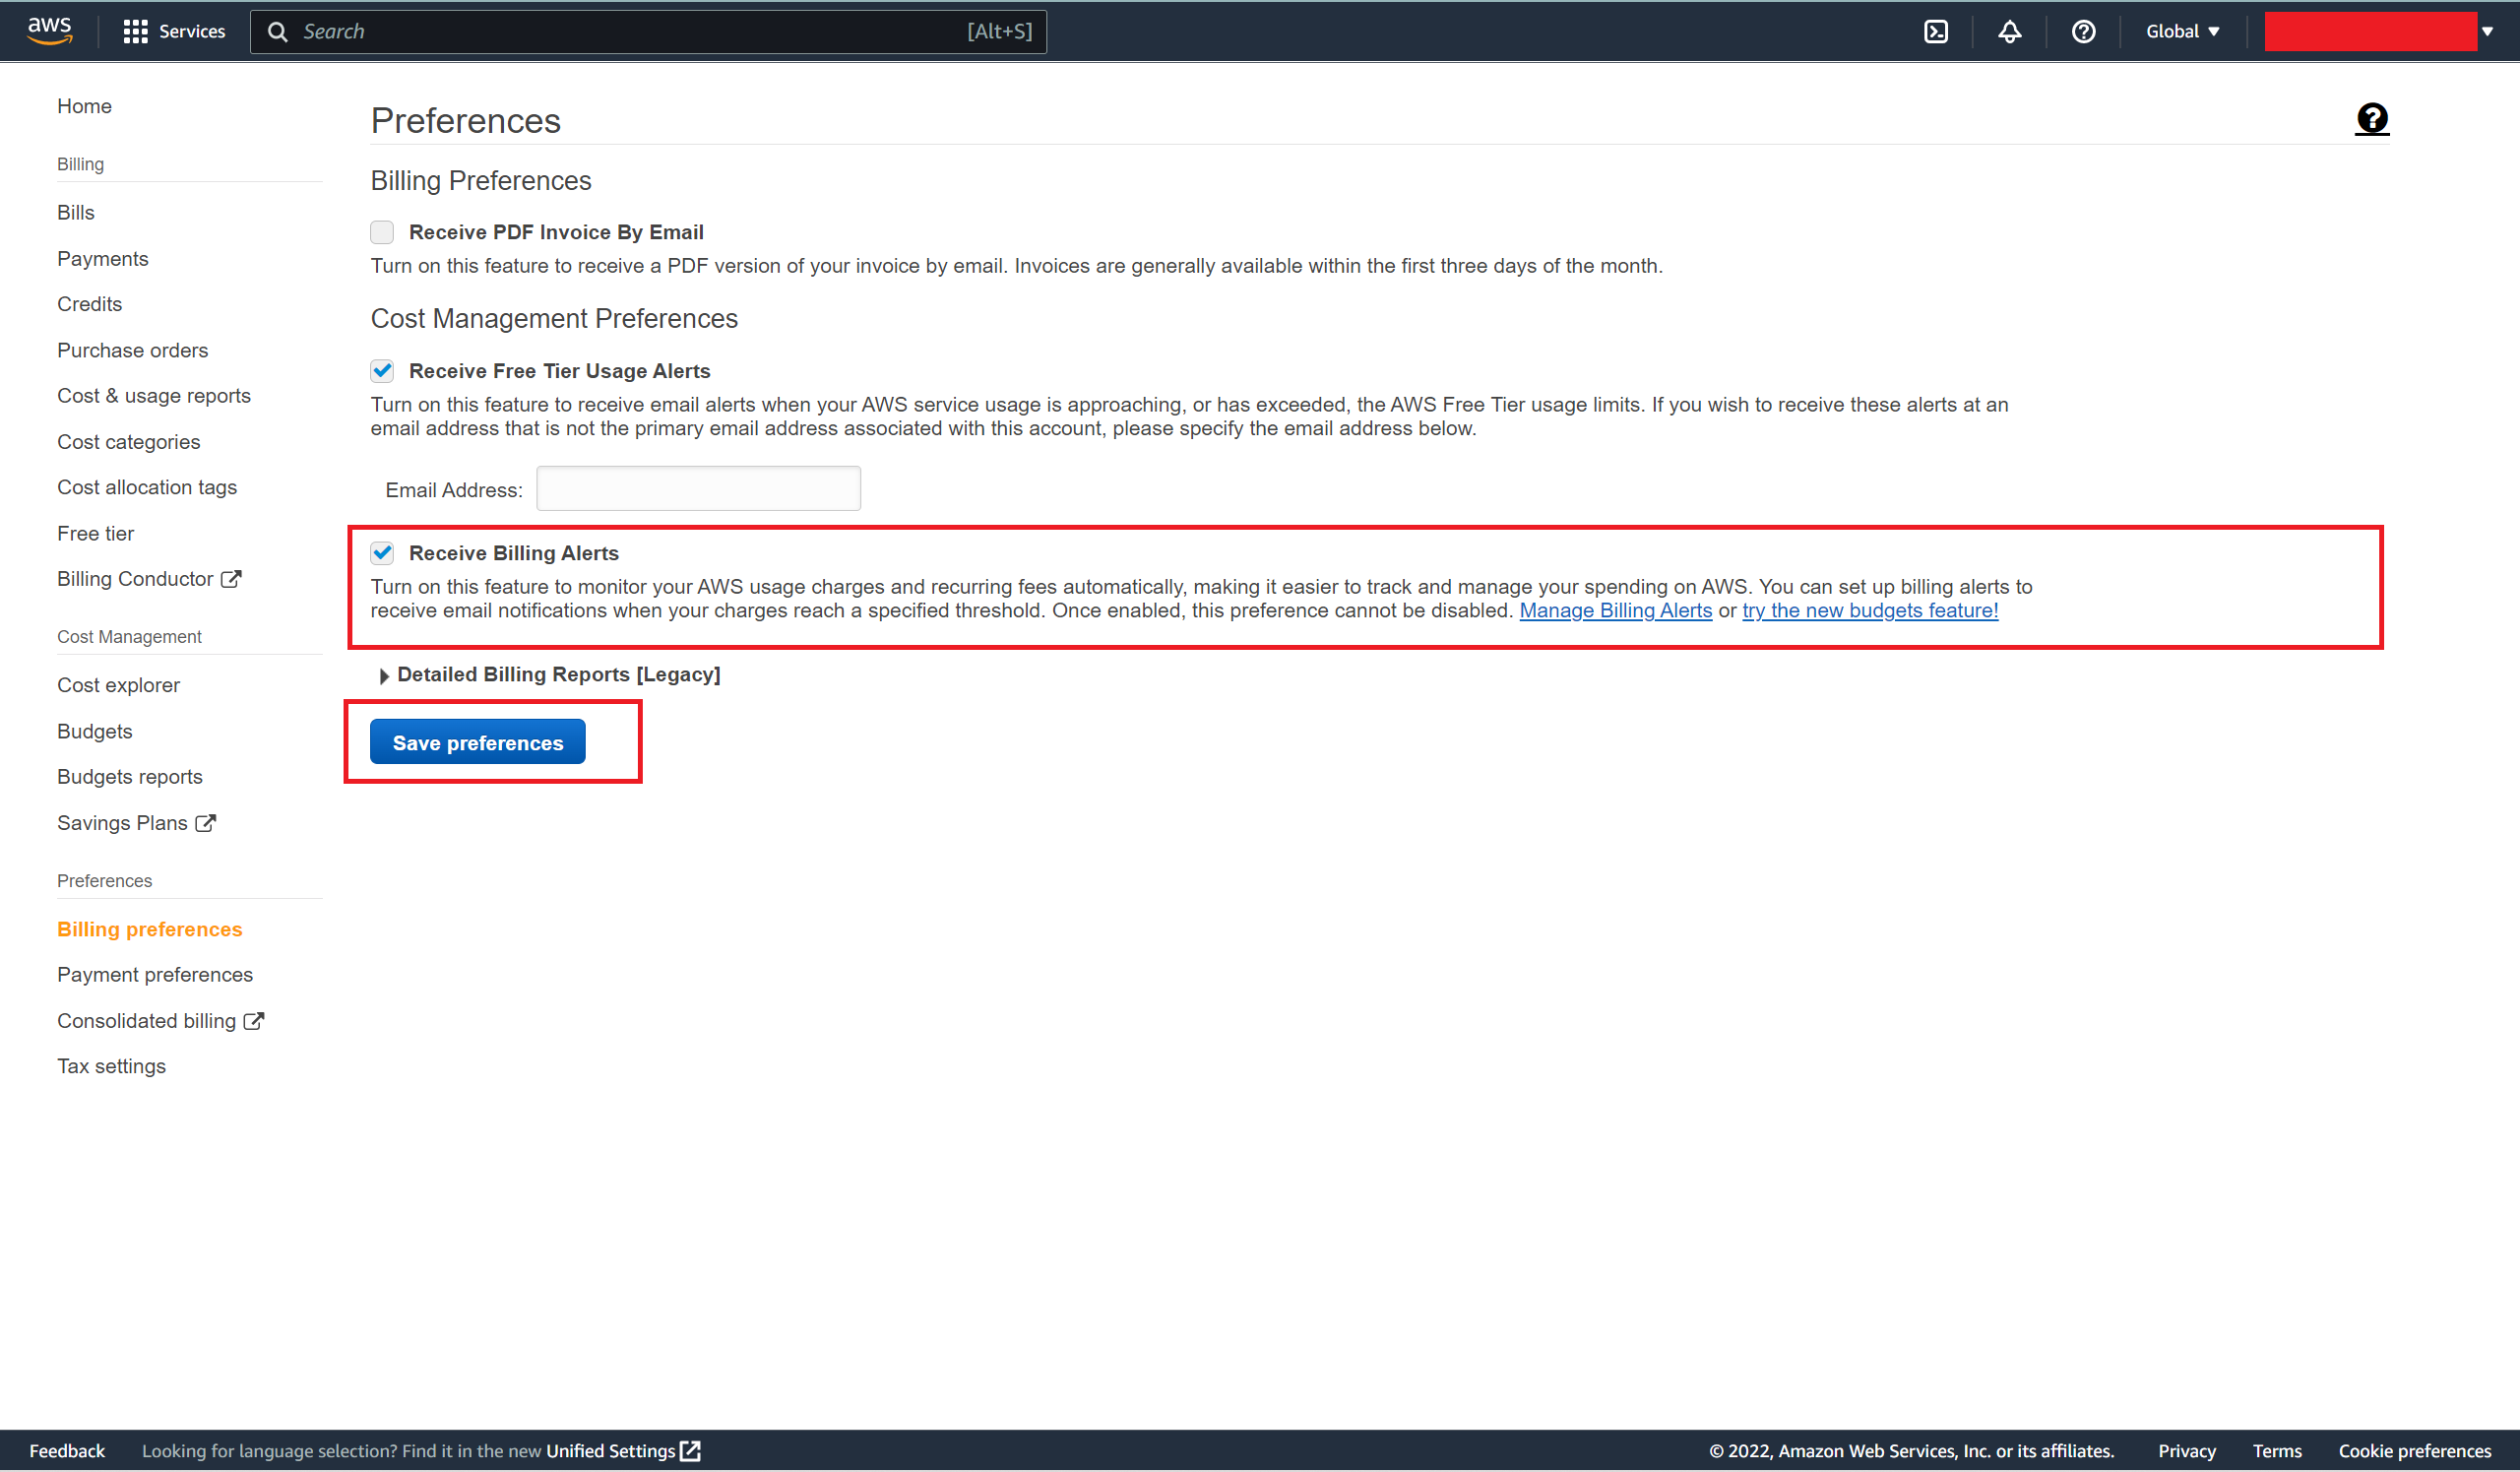
- Choose Billing Preferences from the navigation pane.

- In the billing preferences page, select Receive Billing Alerts and choose Save Preferences.
Important:
After enabling the billing alert, it is not possible to stop data collection. But you can delete the billing alarms at any time.
After enabling the billing alert for the first time, it can take about 15 minutes to get a view of the billing data and create any billing alarms.
Creating a Billing Alarm
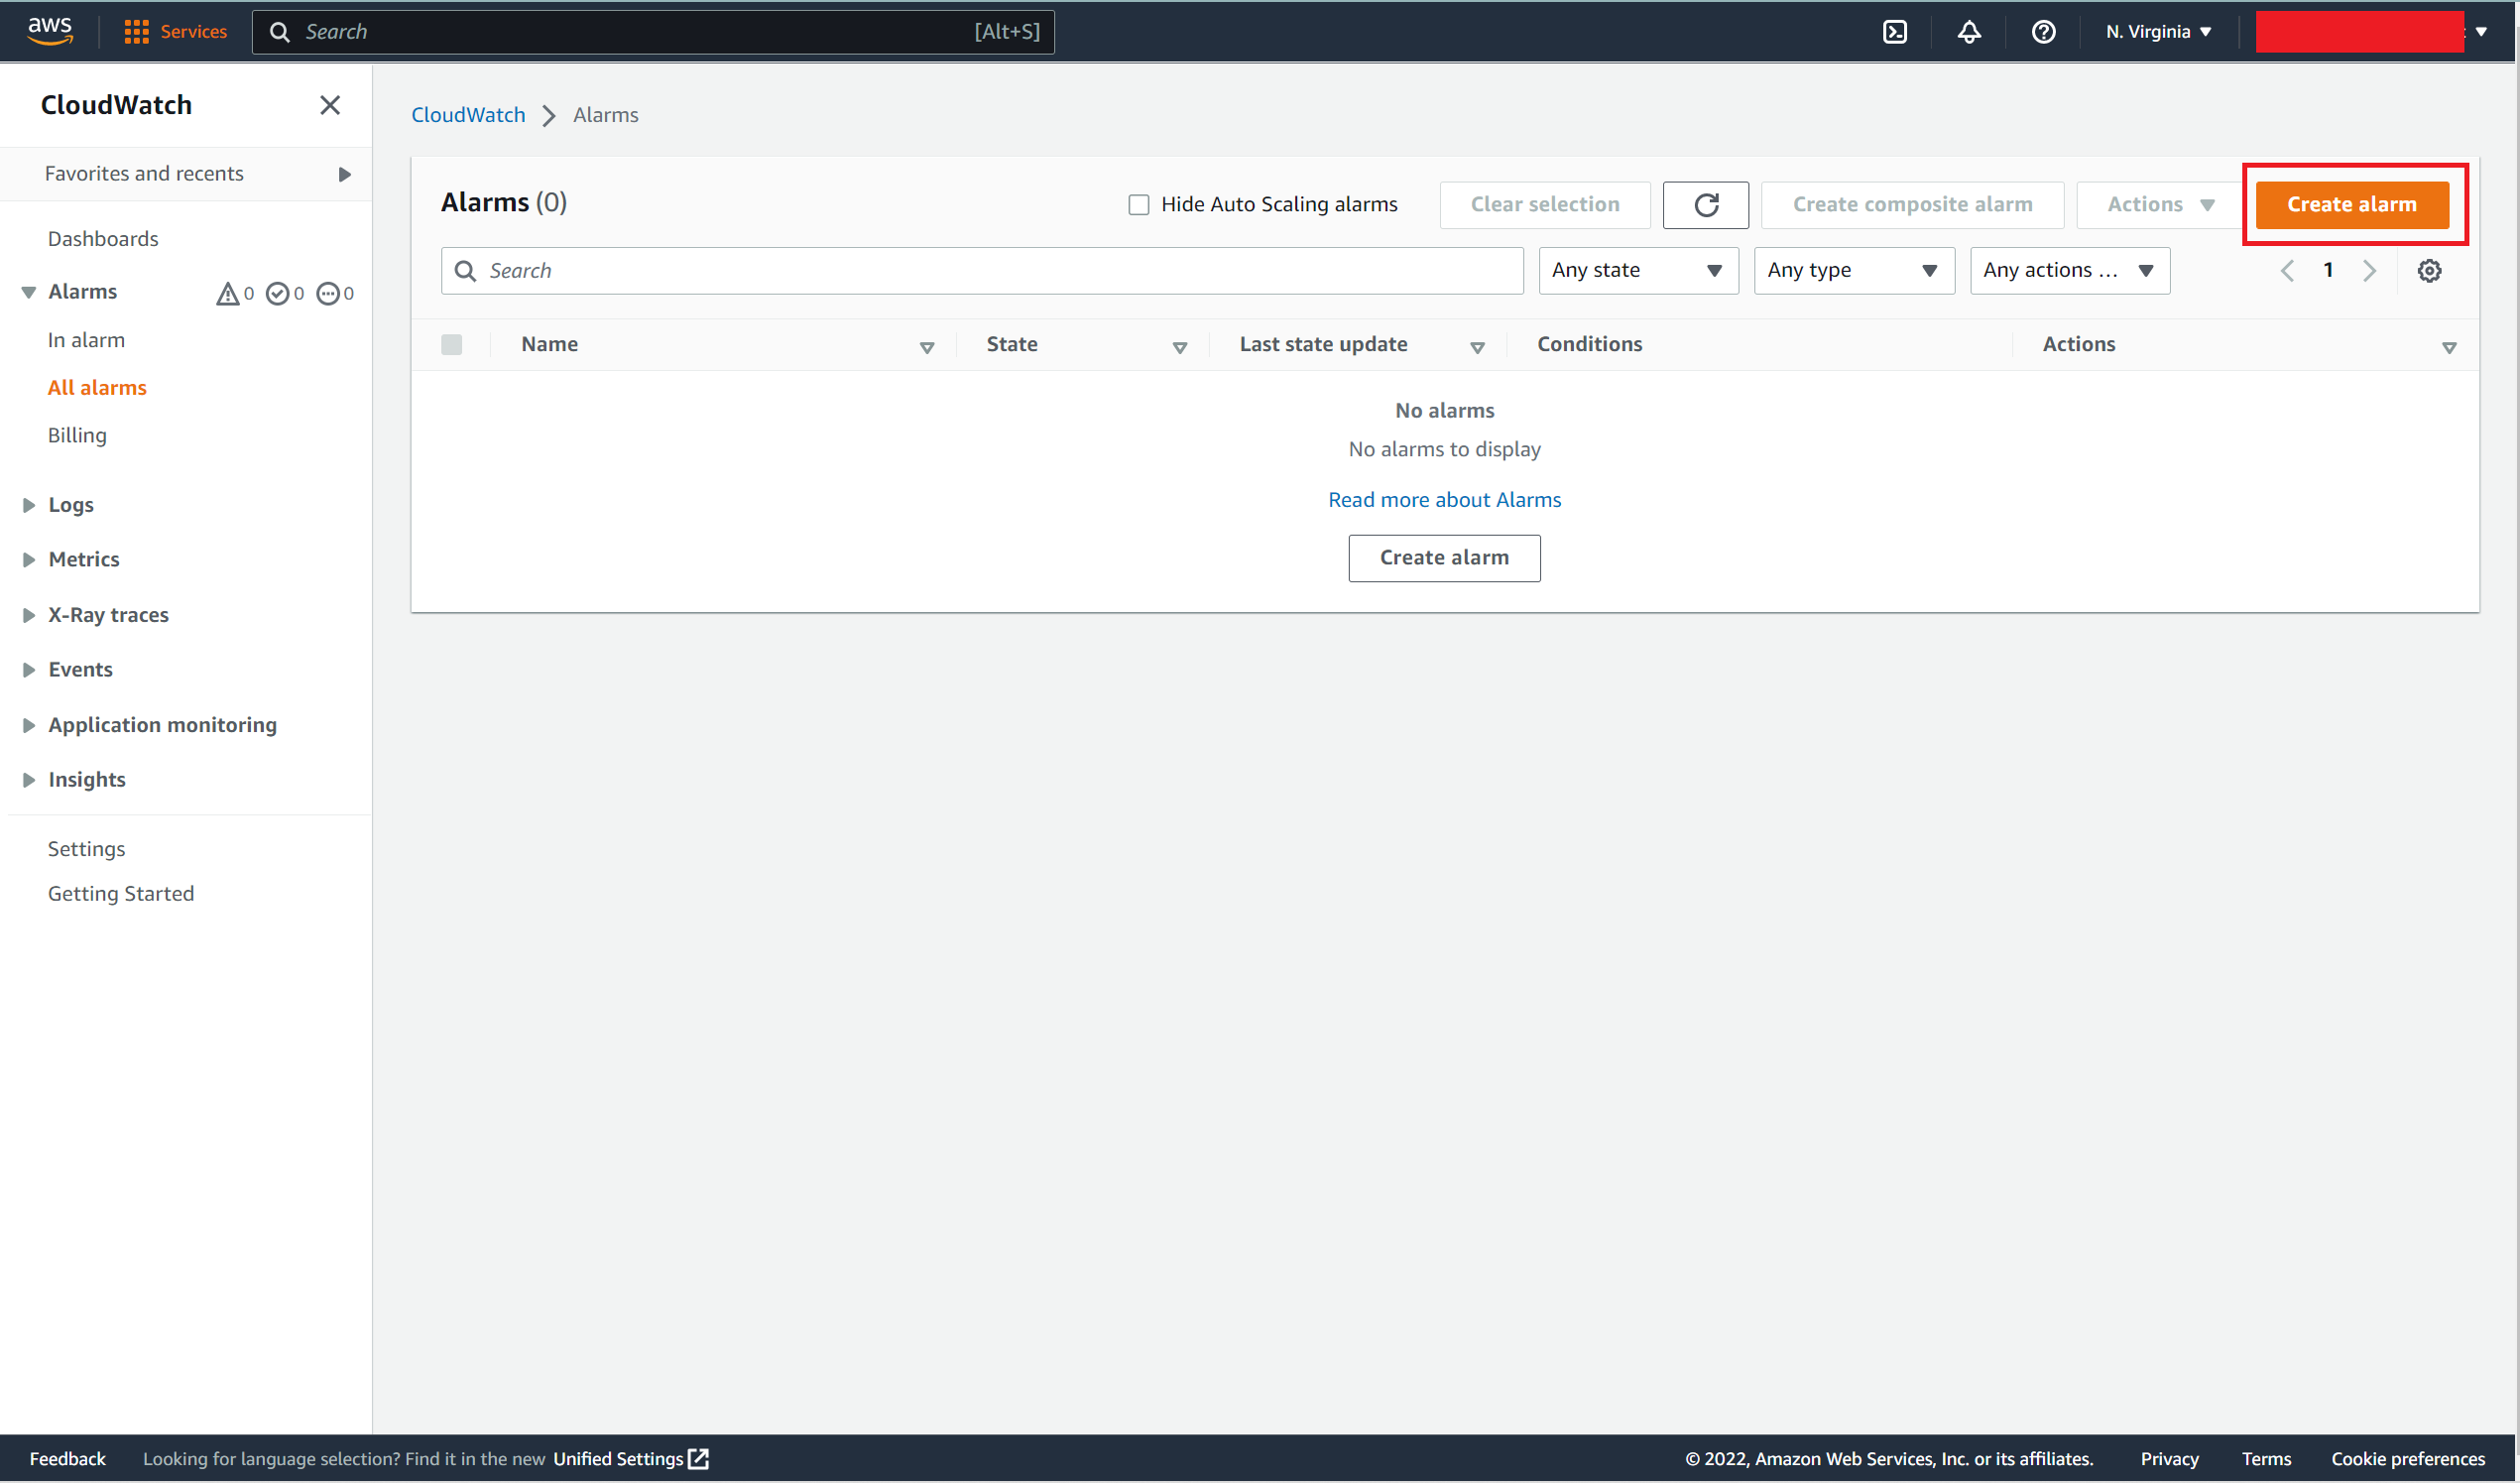
Go to AWS Cloudwatch.
Expand Alarm and select All alarms from the navigation pane.
- Choose Create Alarm.
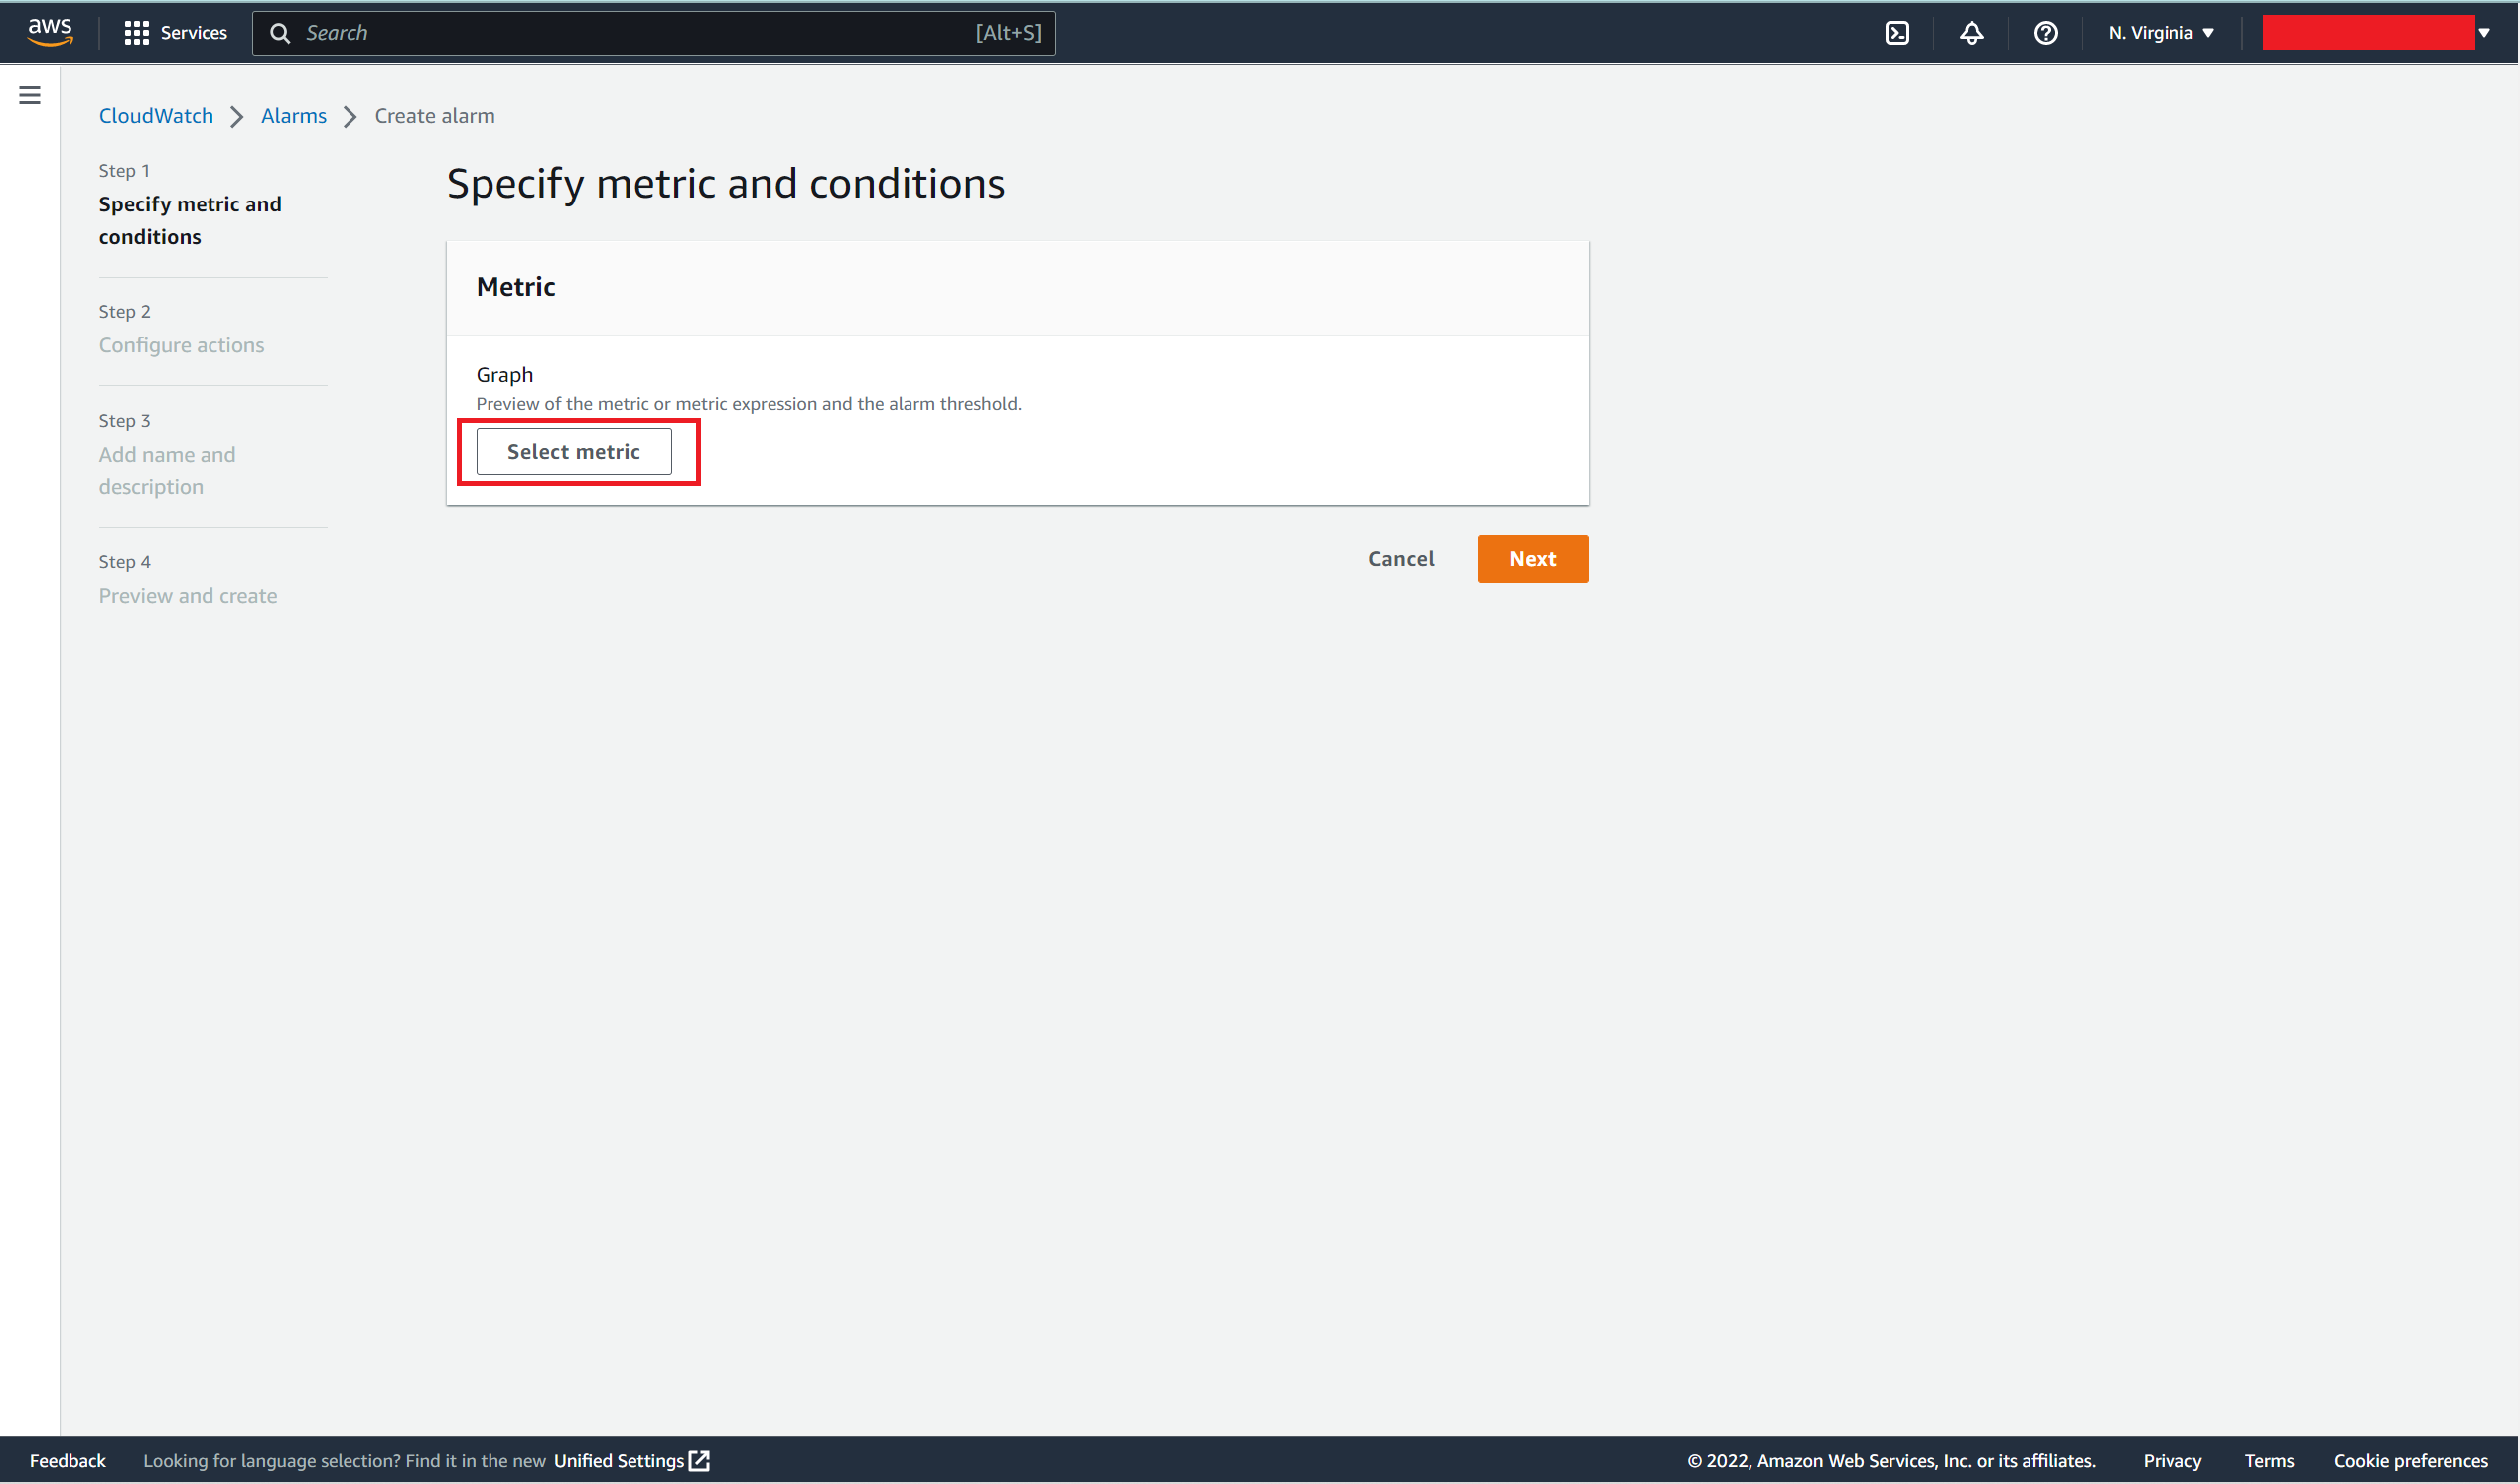
- Click on Select metric.
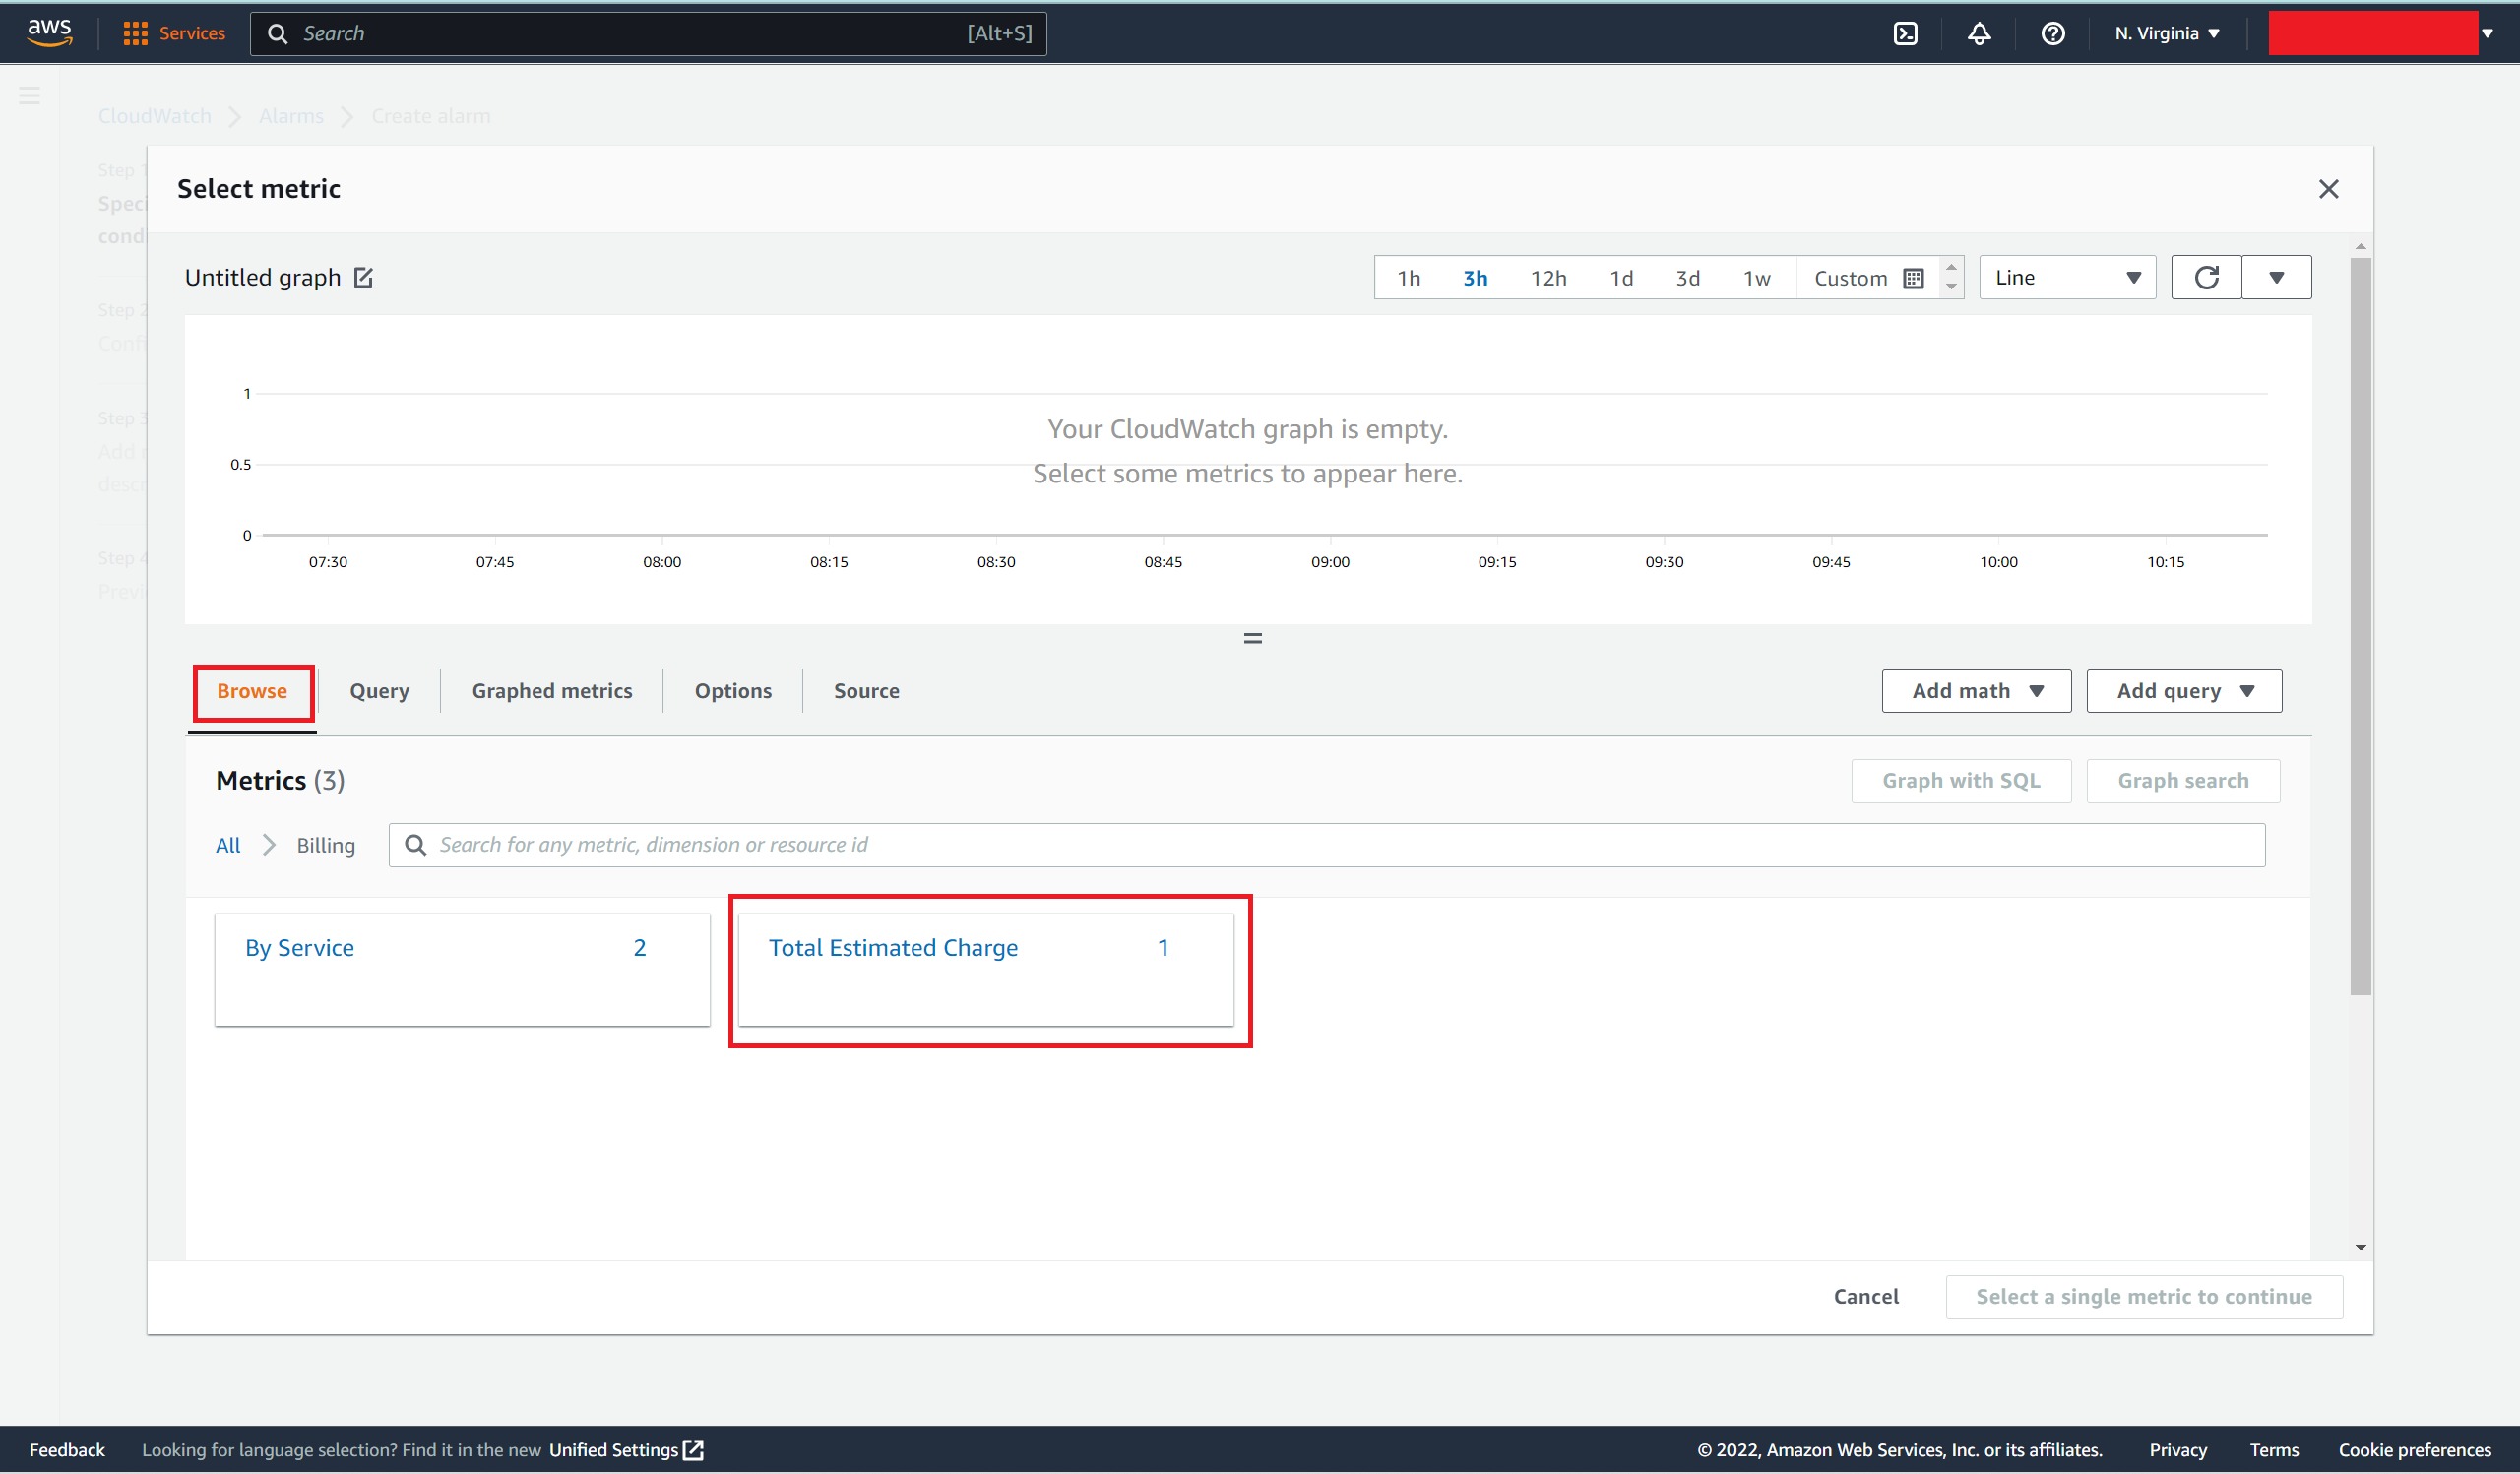
- From the Browse tab choose the Billing option.
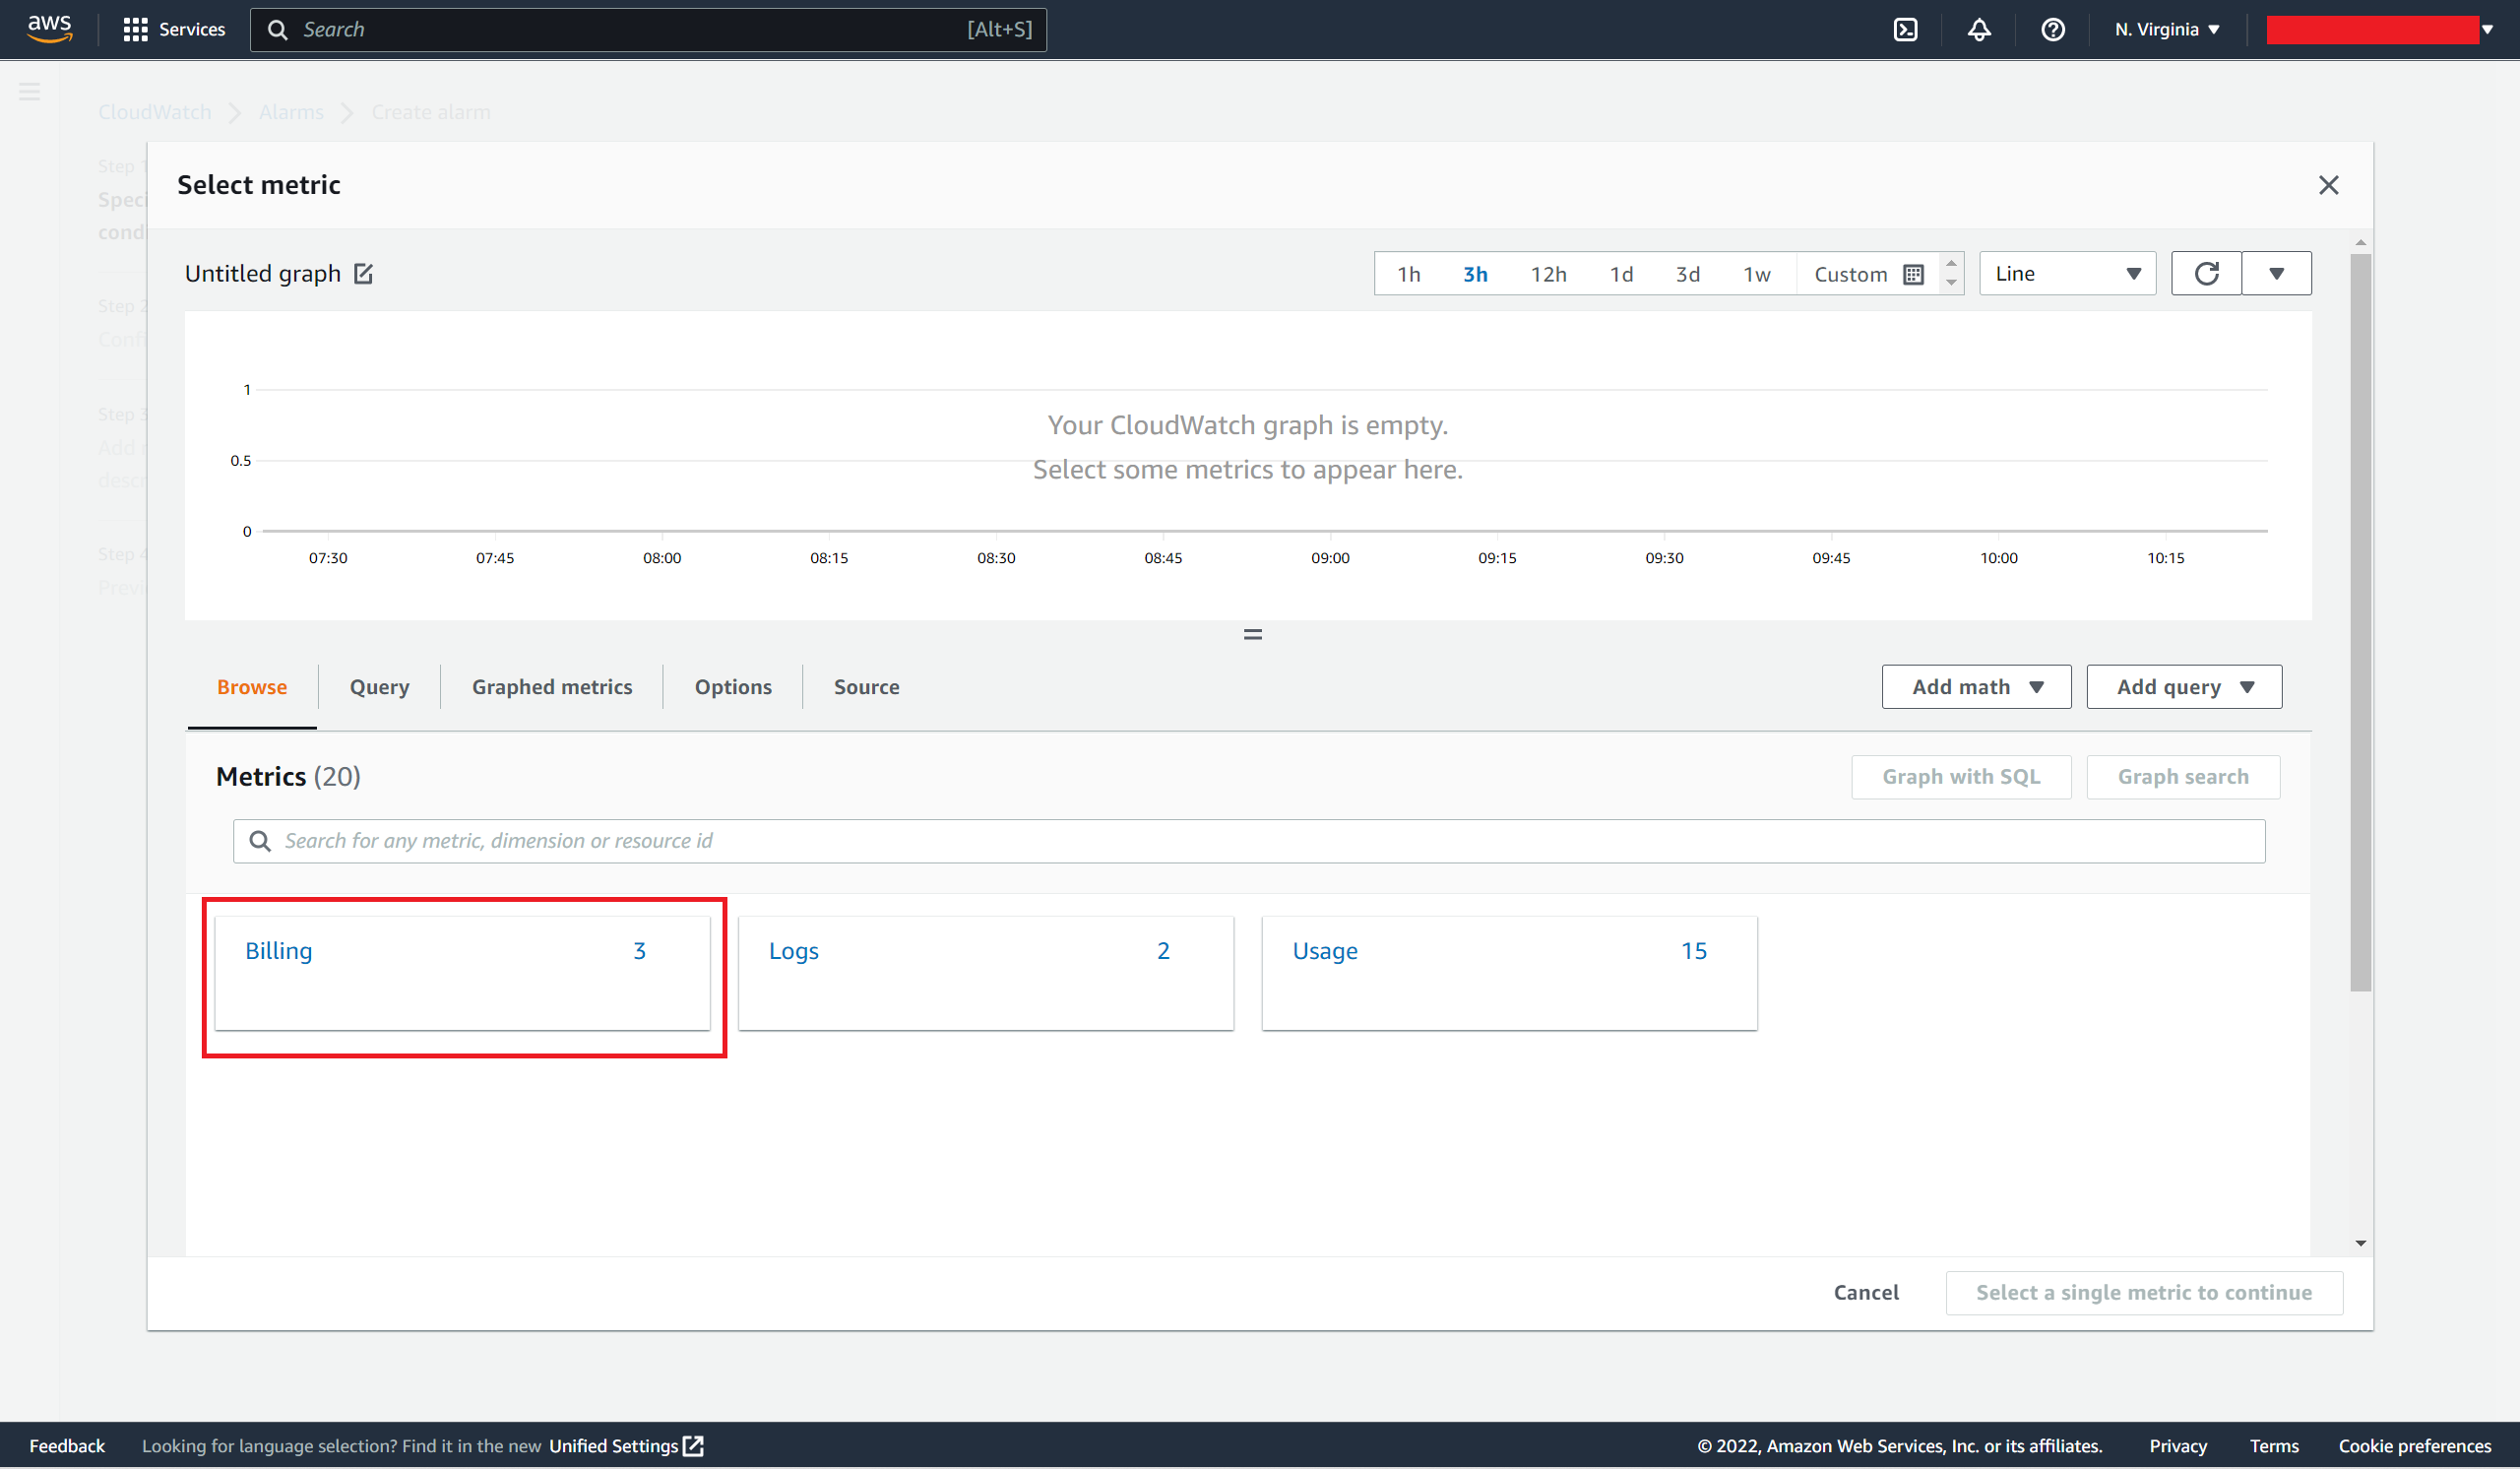
- After choosing the Billing option, choose Total Estimate Charge.
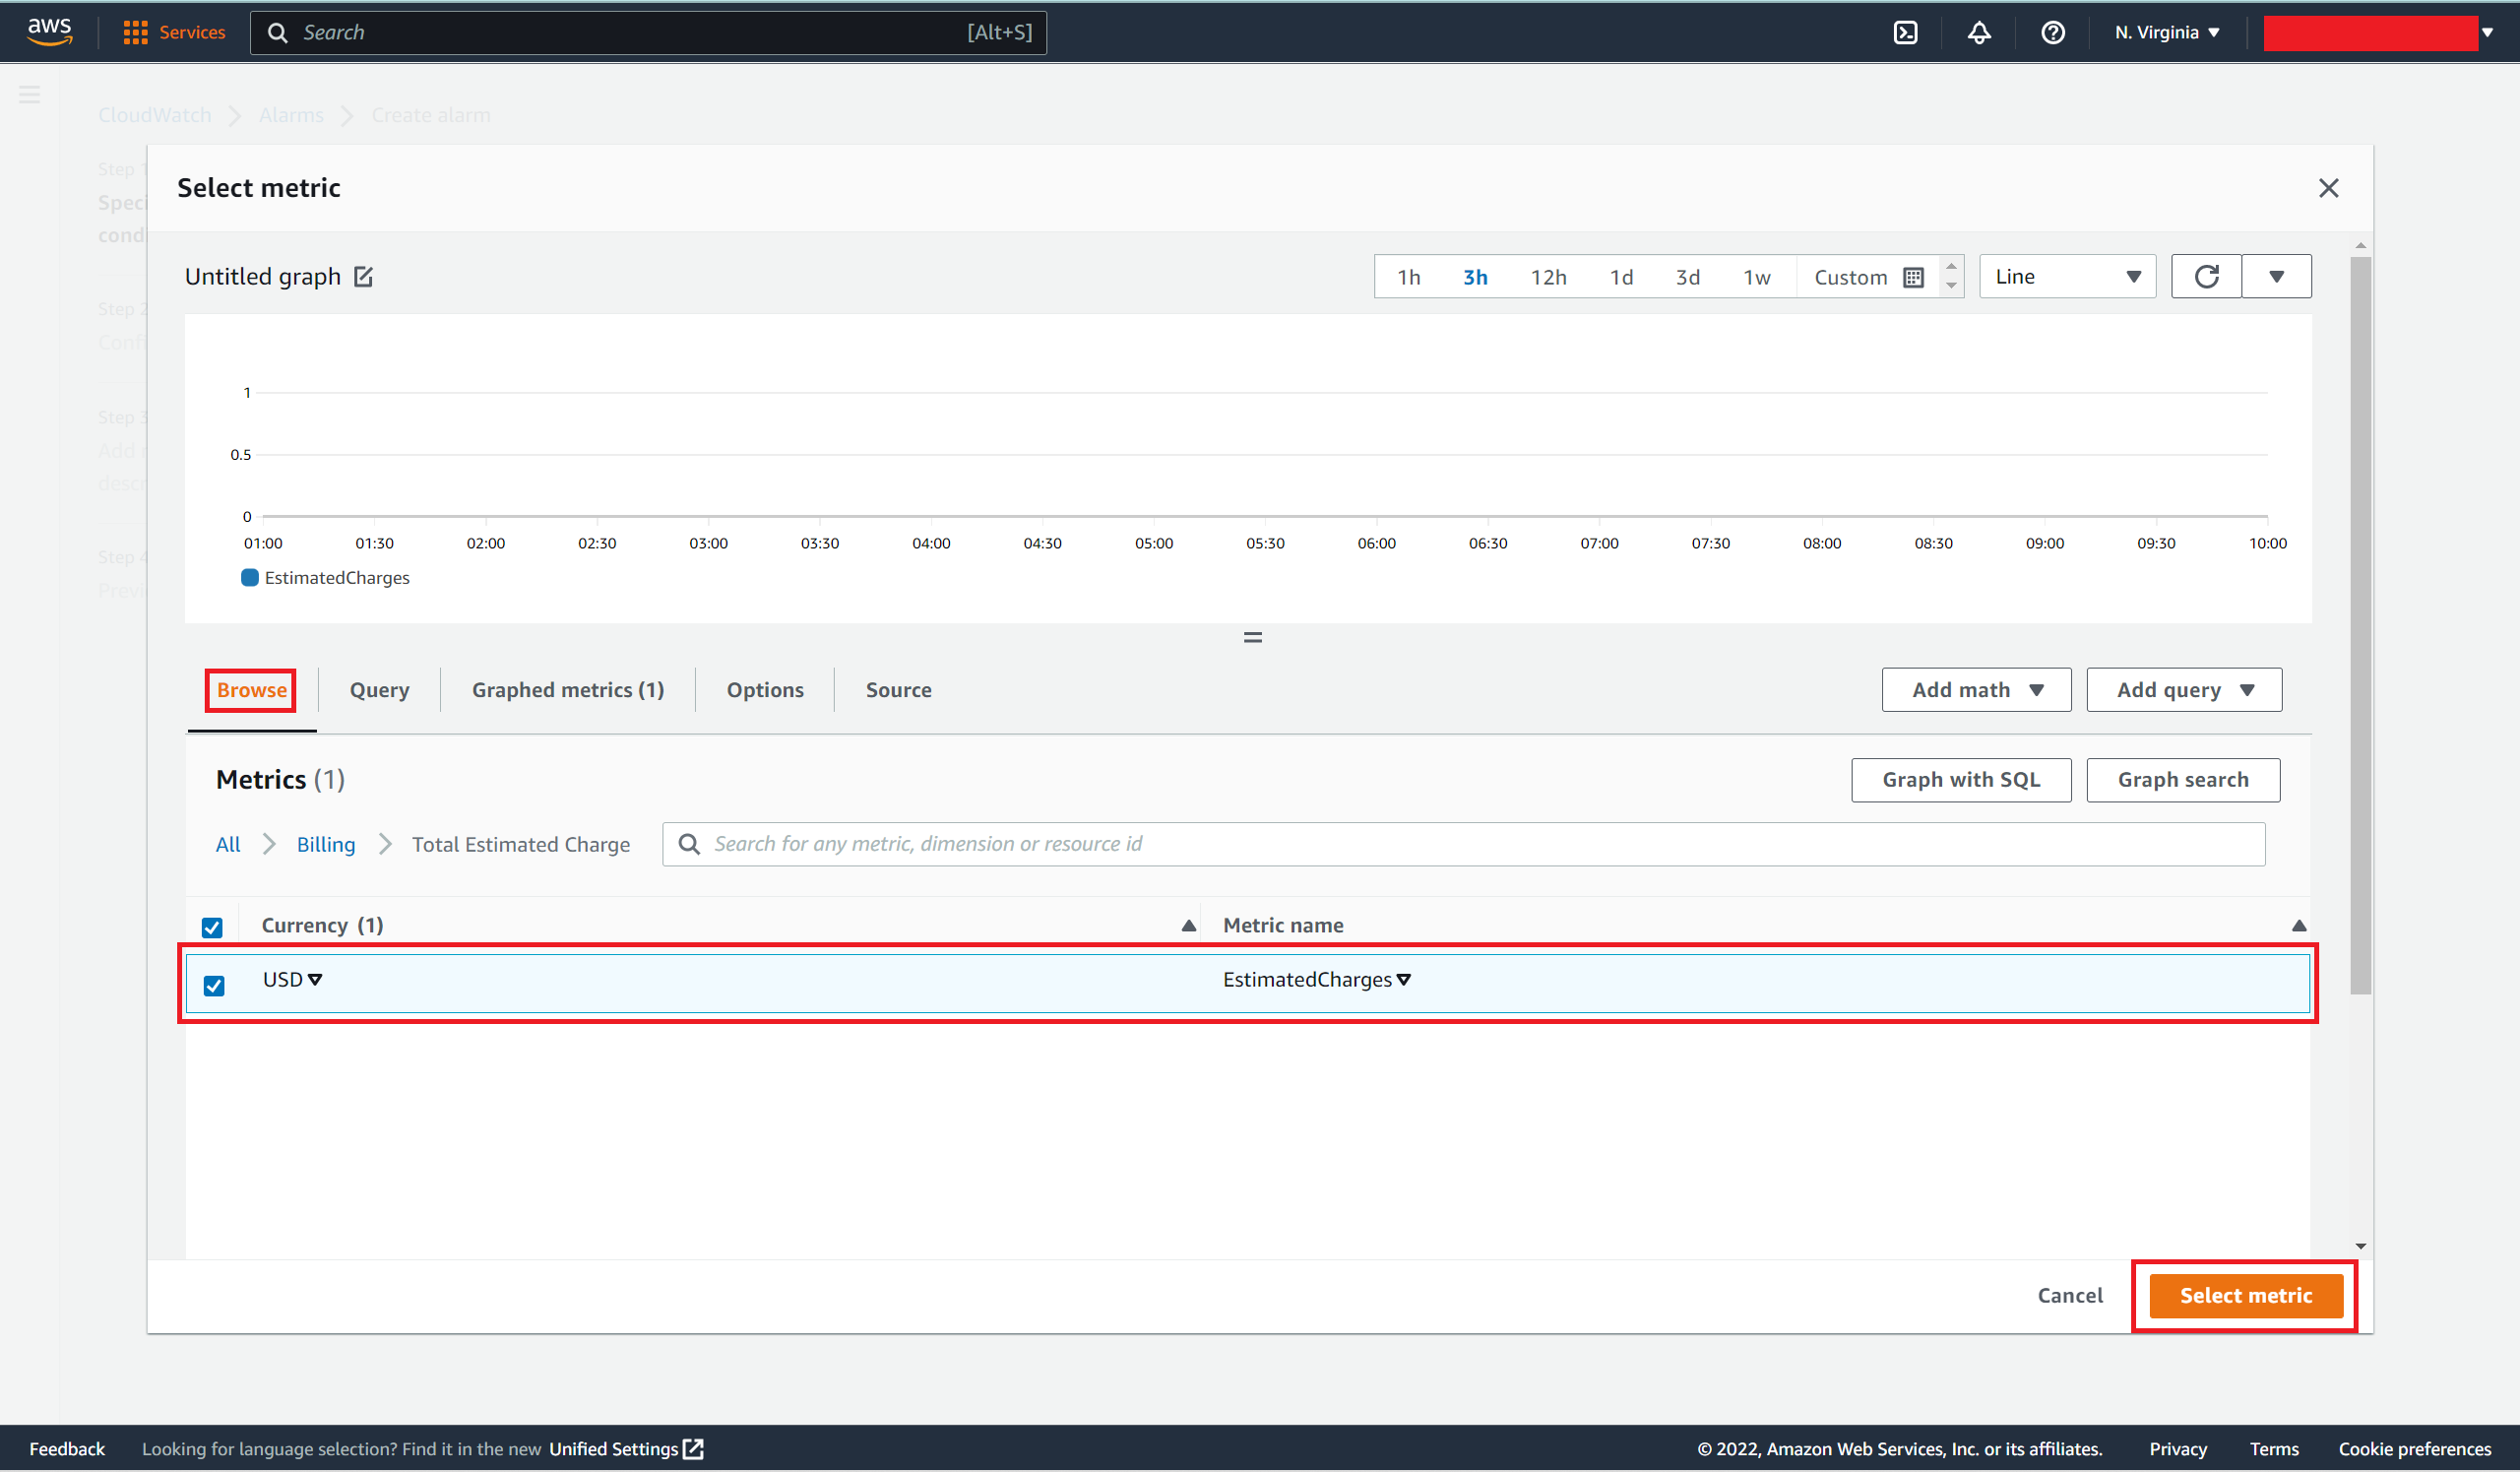
- Select the row for estimated charges and then choose Select matrix.
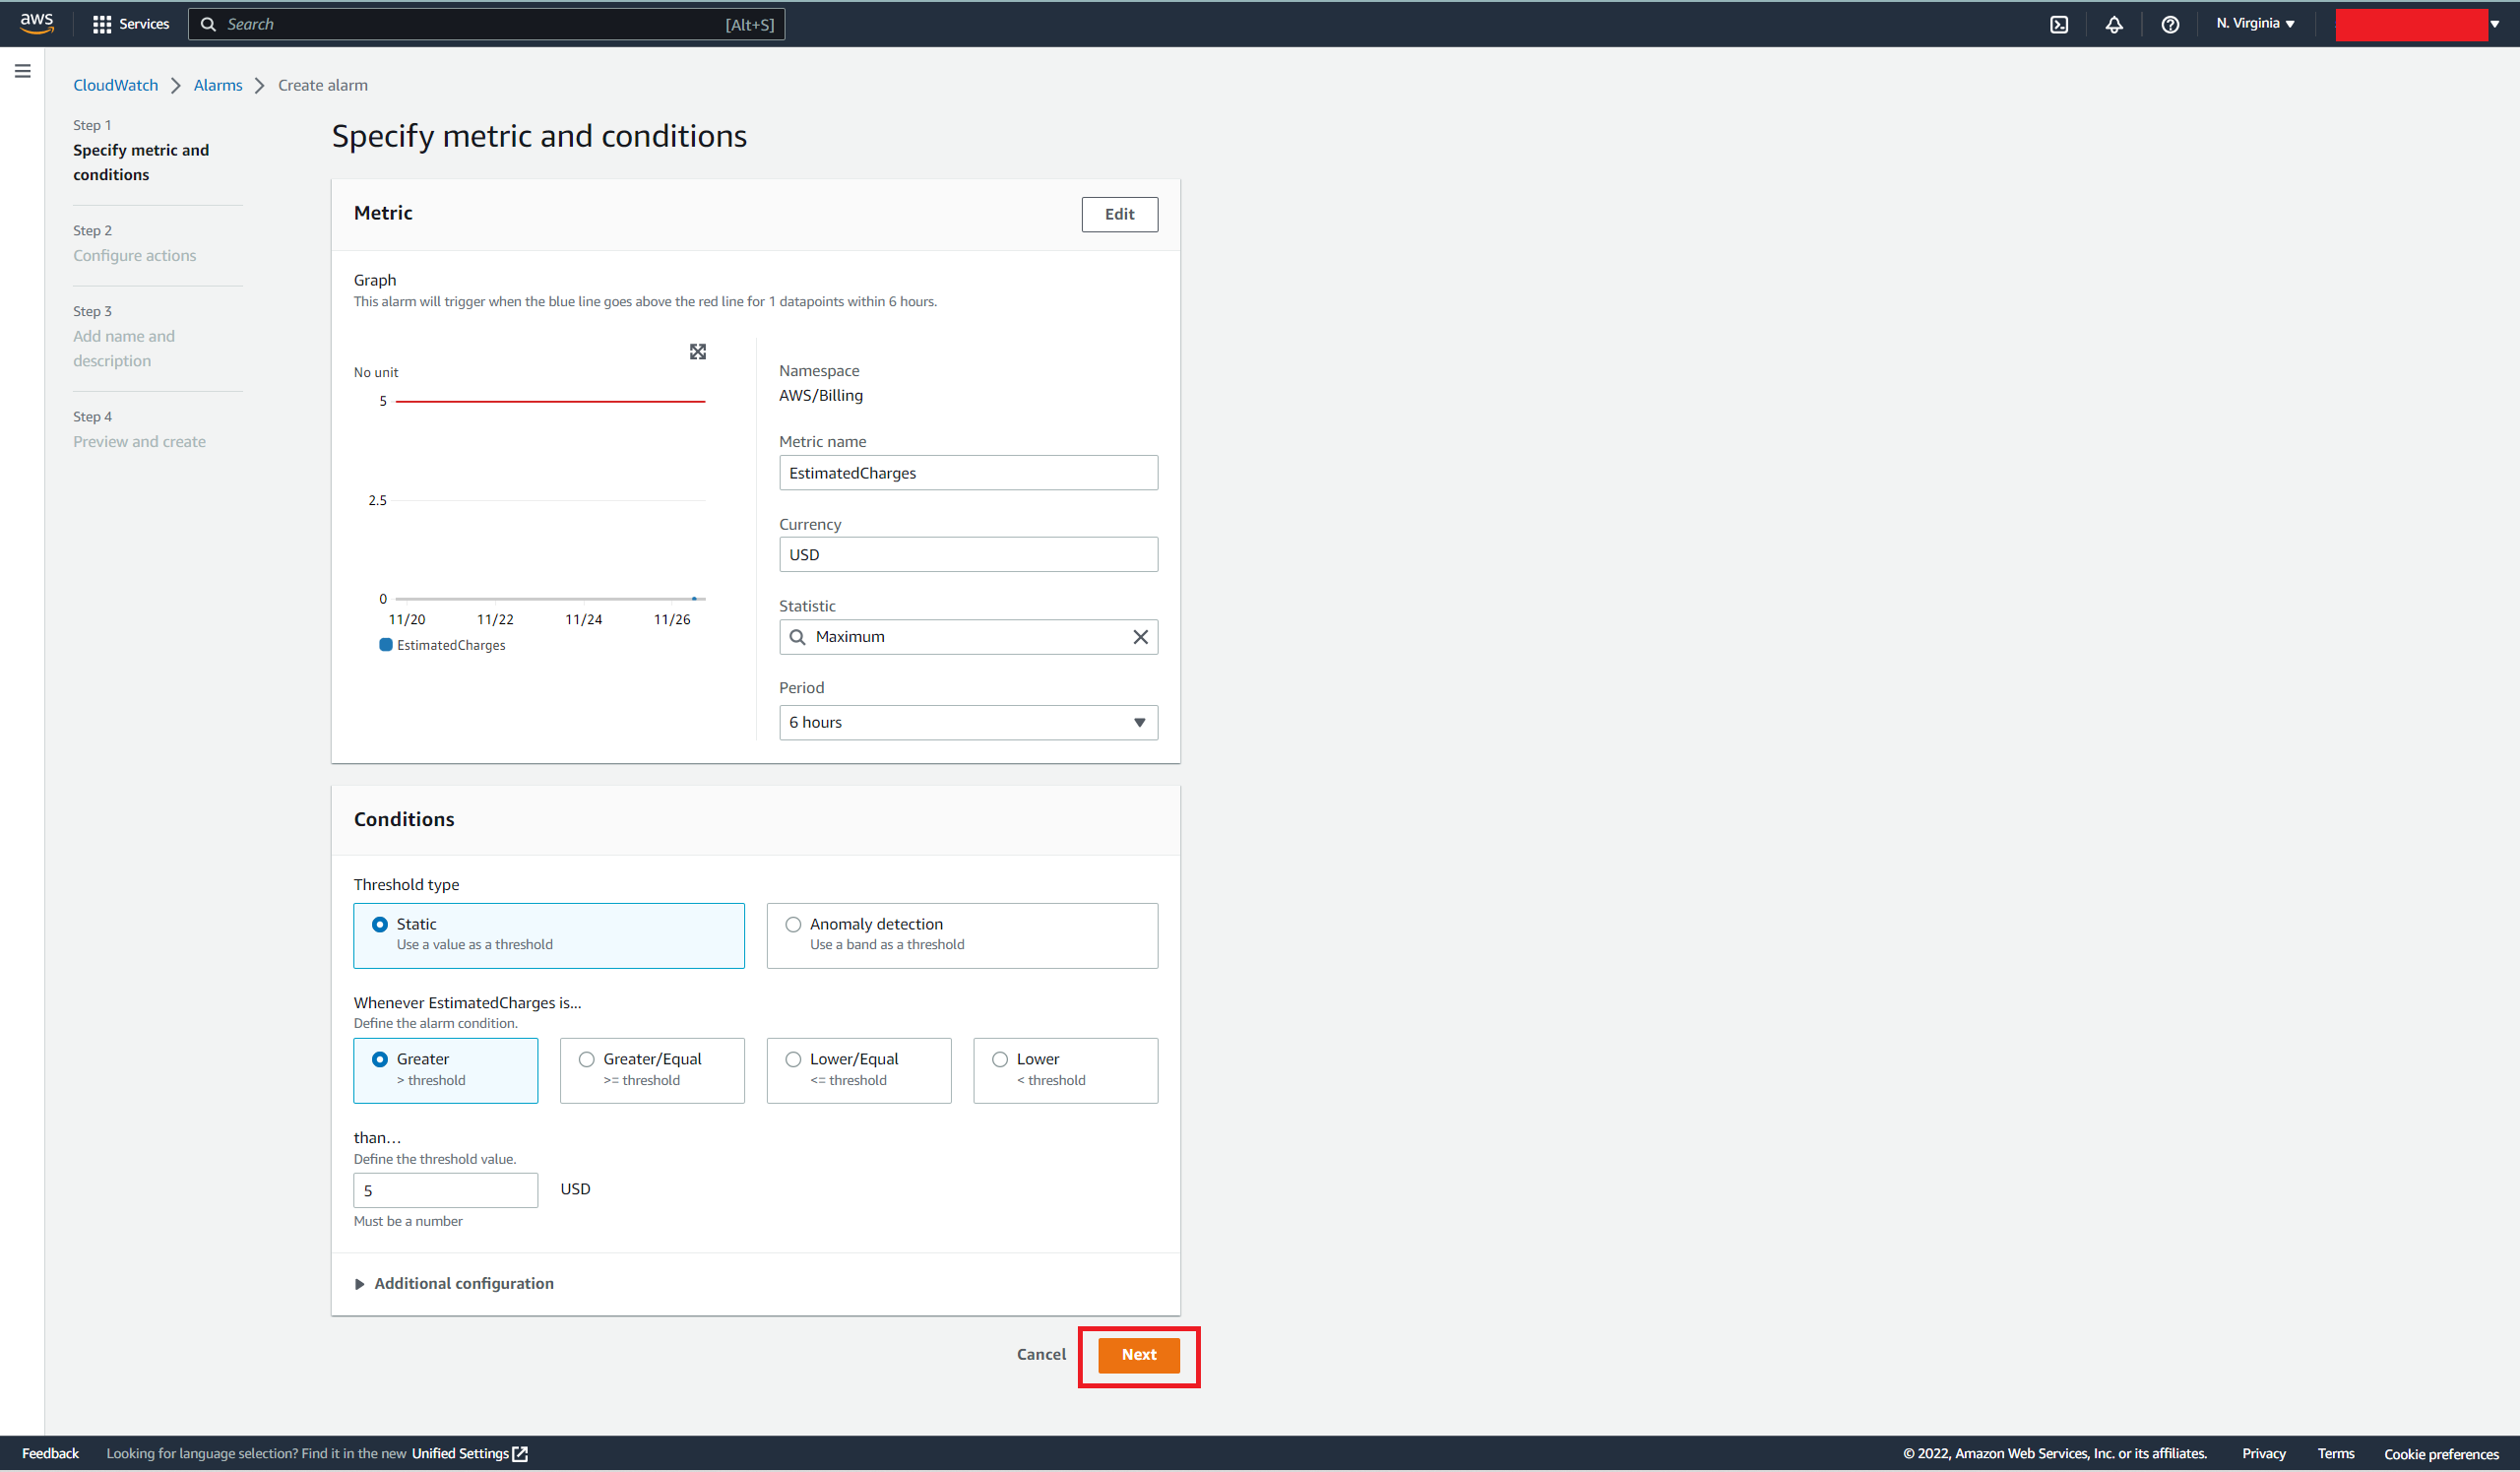
In the Specify metric and conditions:
For the Threshold type, select Static.
For the Whenever EstimatedCharges is…, choose Greater> threshold.
For the than…, input a threshold value that will trigger the billing alarm.
Choose Next.
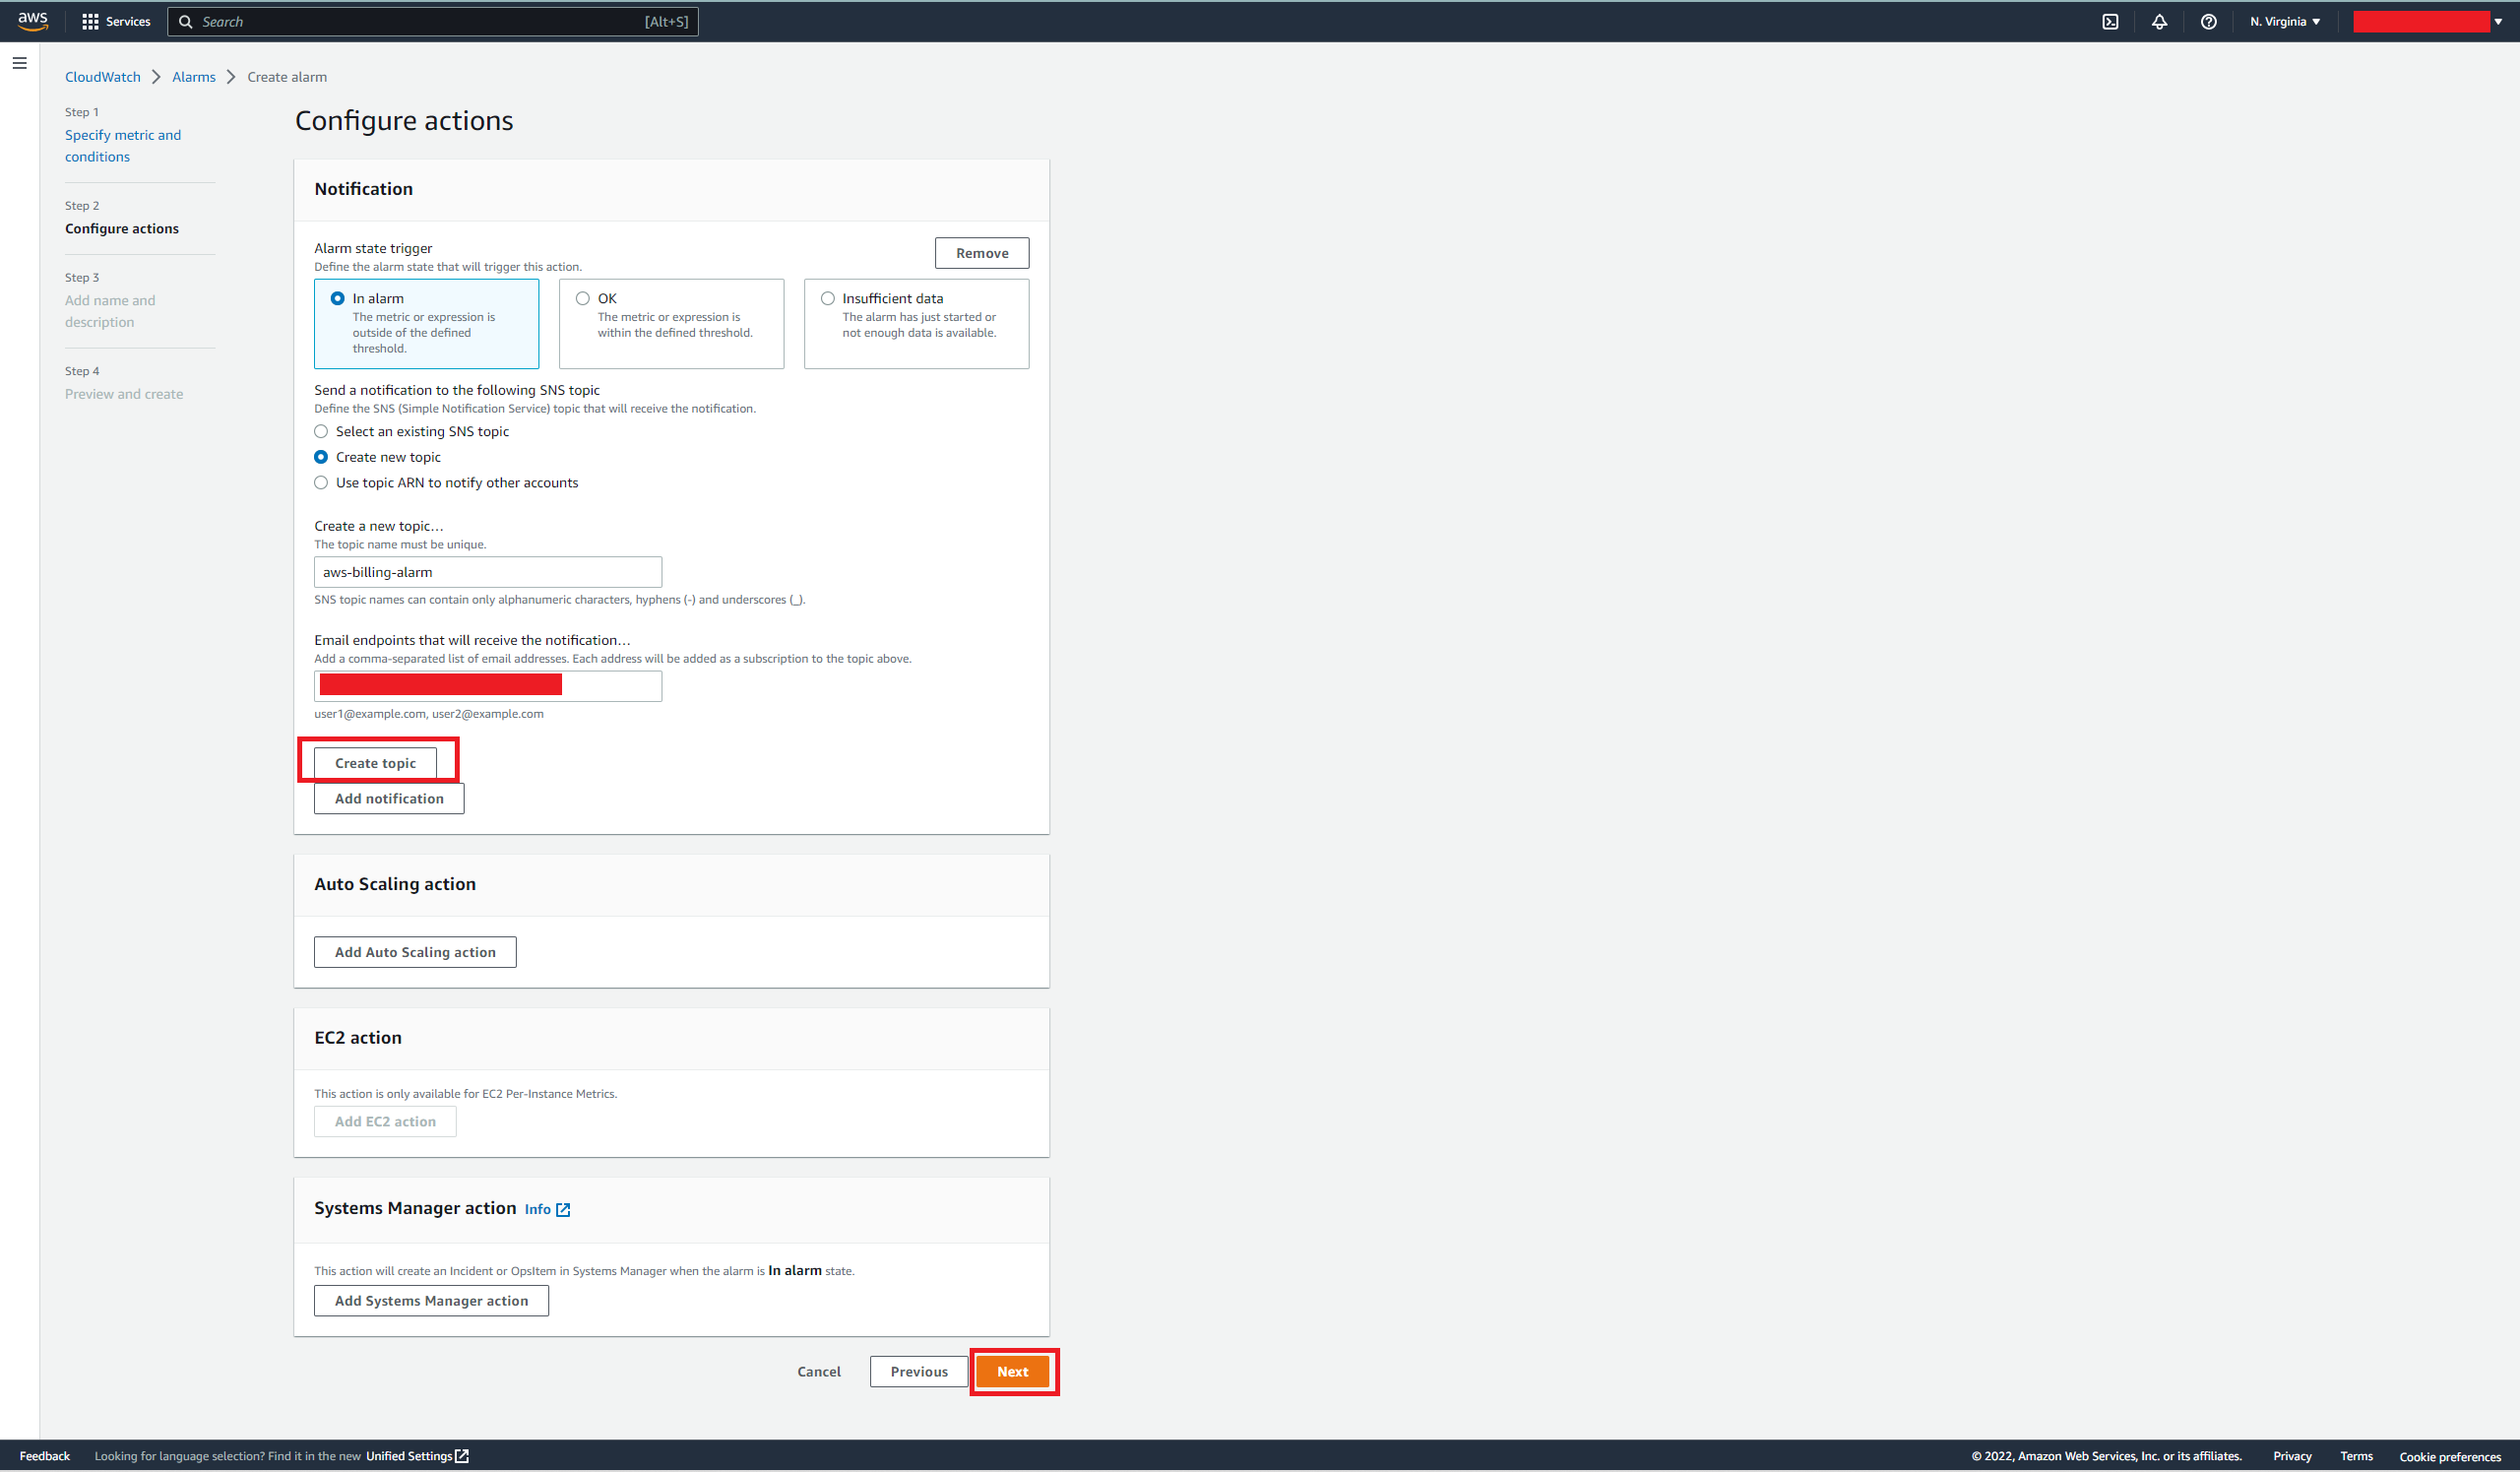
In the Configure actions Notification block, for the Alarm state trigger, select In alarm state, which will trigger the AWS SNS to send you the notification.
For the Send a notification to the following SNS topic, select an existing SNS topic or create a new one. If you choose to create a new SNS topic, then:
*   For the **Create a new topic…**, input a topic name.

*   For the **Email endpoints that will receive the notification…,** you can add one or multiple email addresses.

*   Choose **Create topic**.

*   Choose **Next.**
Note: If you want to send multiple notifications for the same alarm state or multiple alarm states, select Add notification. After that repeat the steps from 12-14.
Important: After creating the topic, you need to accept the SNS subscription from your email.
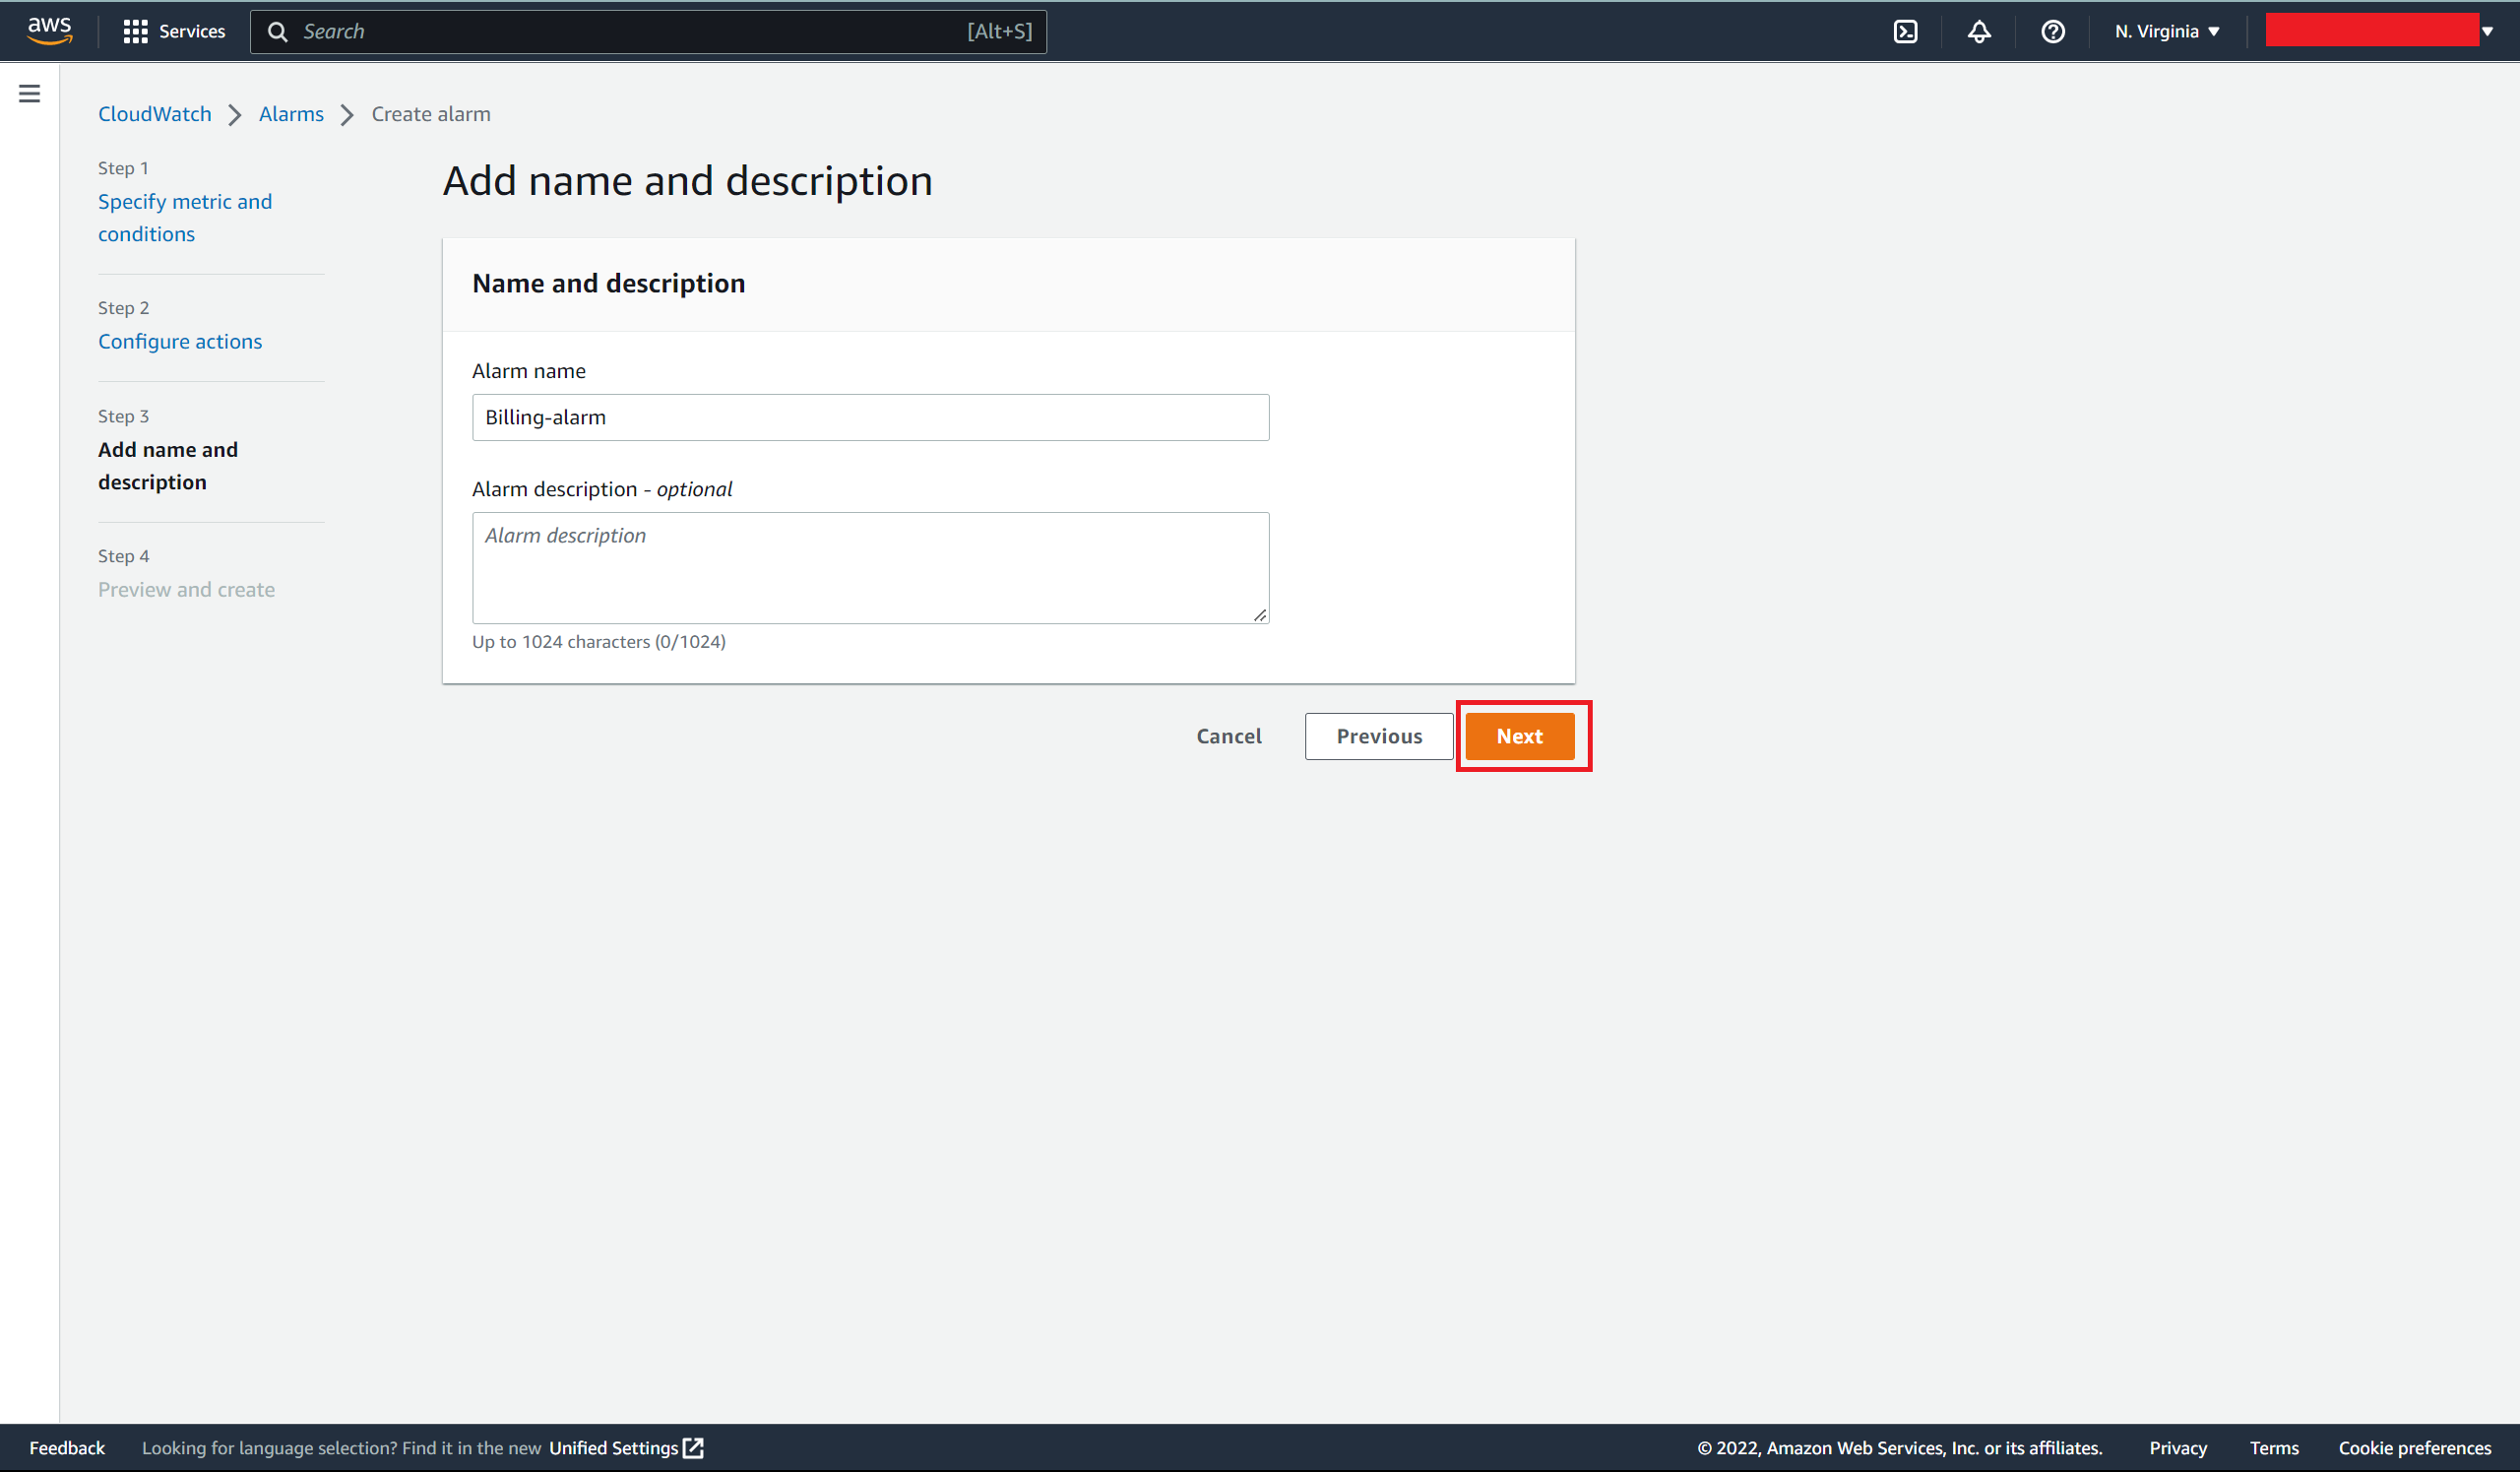
- Add the Alarm name, and select Next.
- Finally, check all the information in the Preview and create step, then choose Create alarm.

Now if you go to the alarm dashboard, you will see your billing alarm in the table.
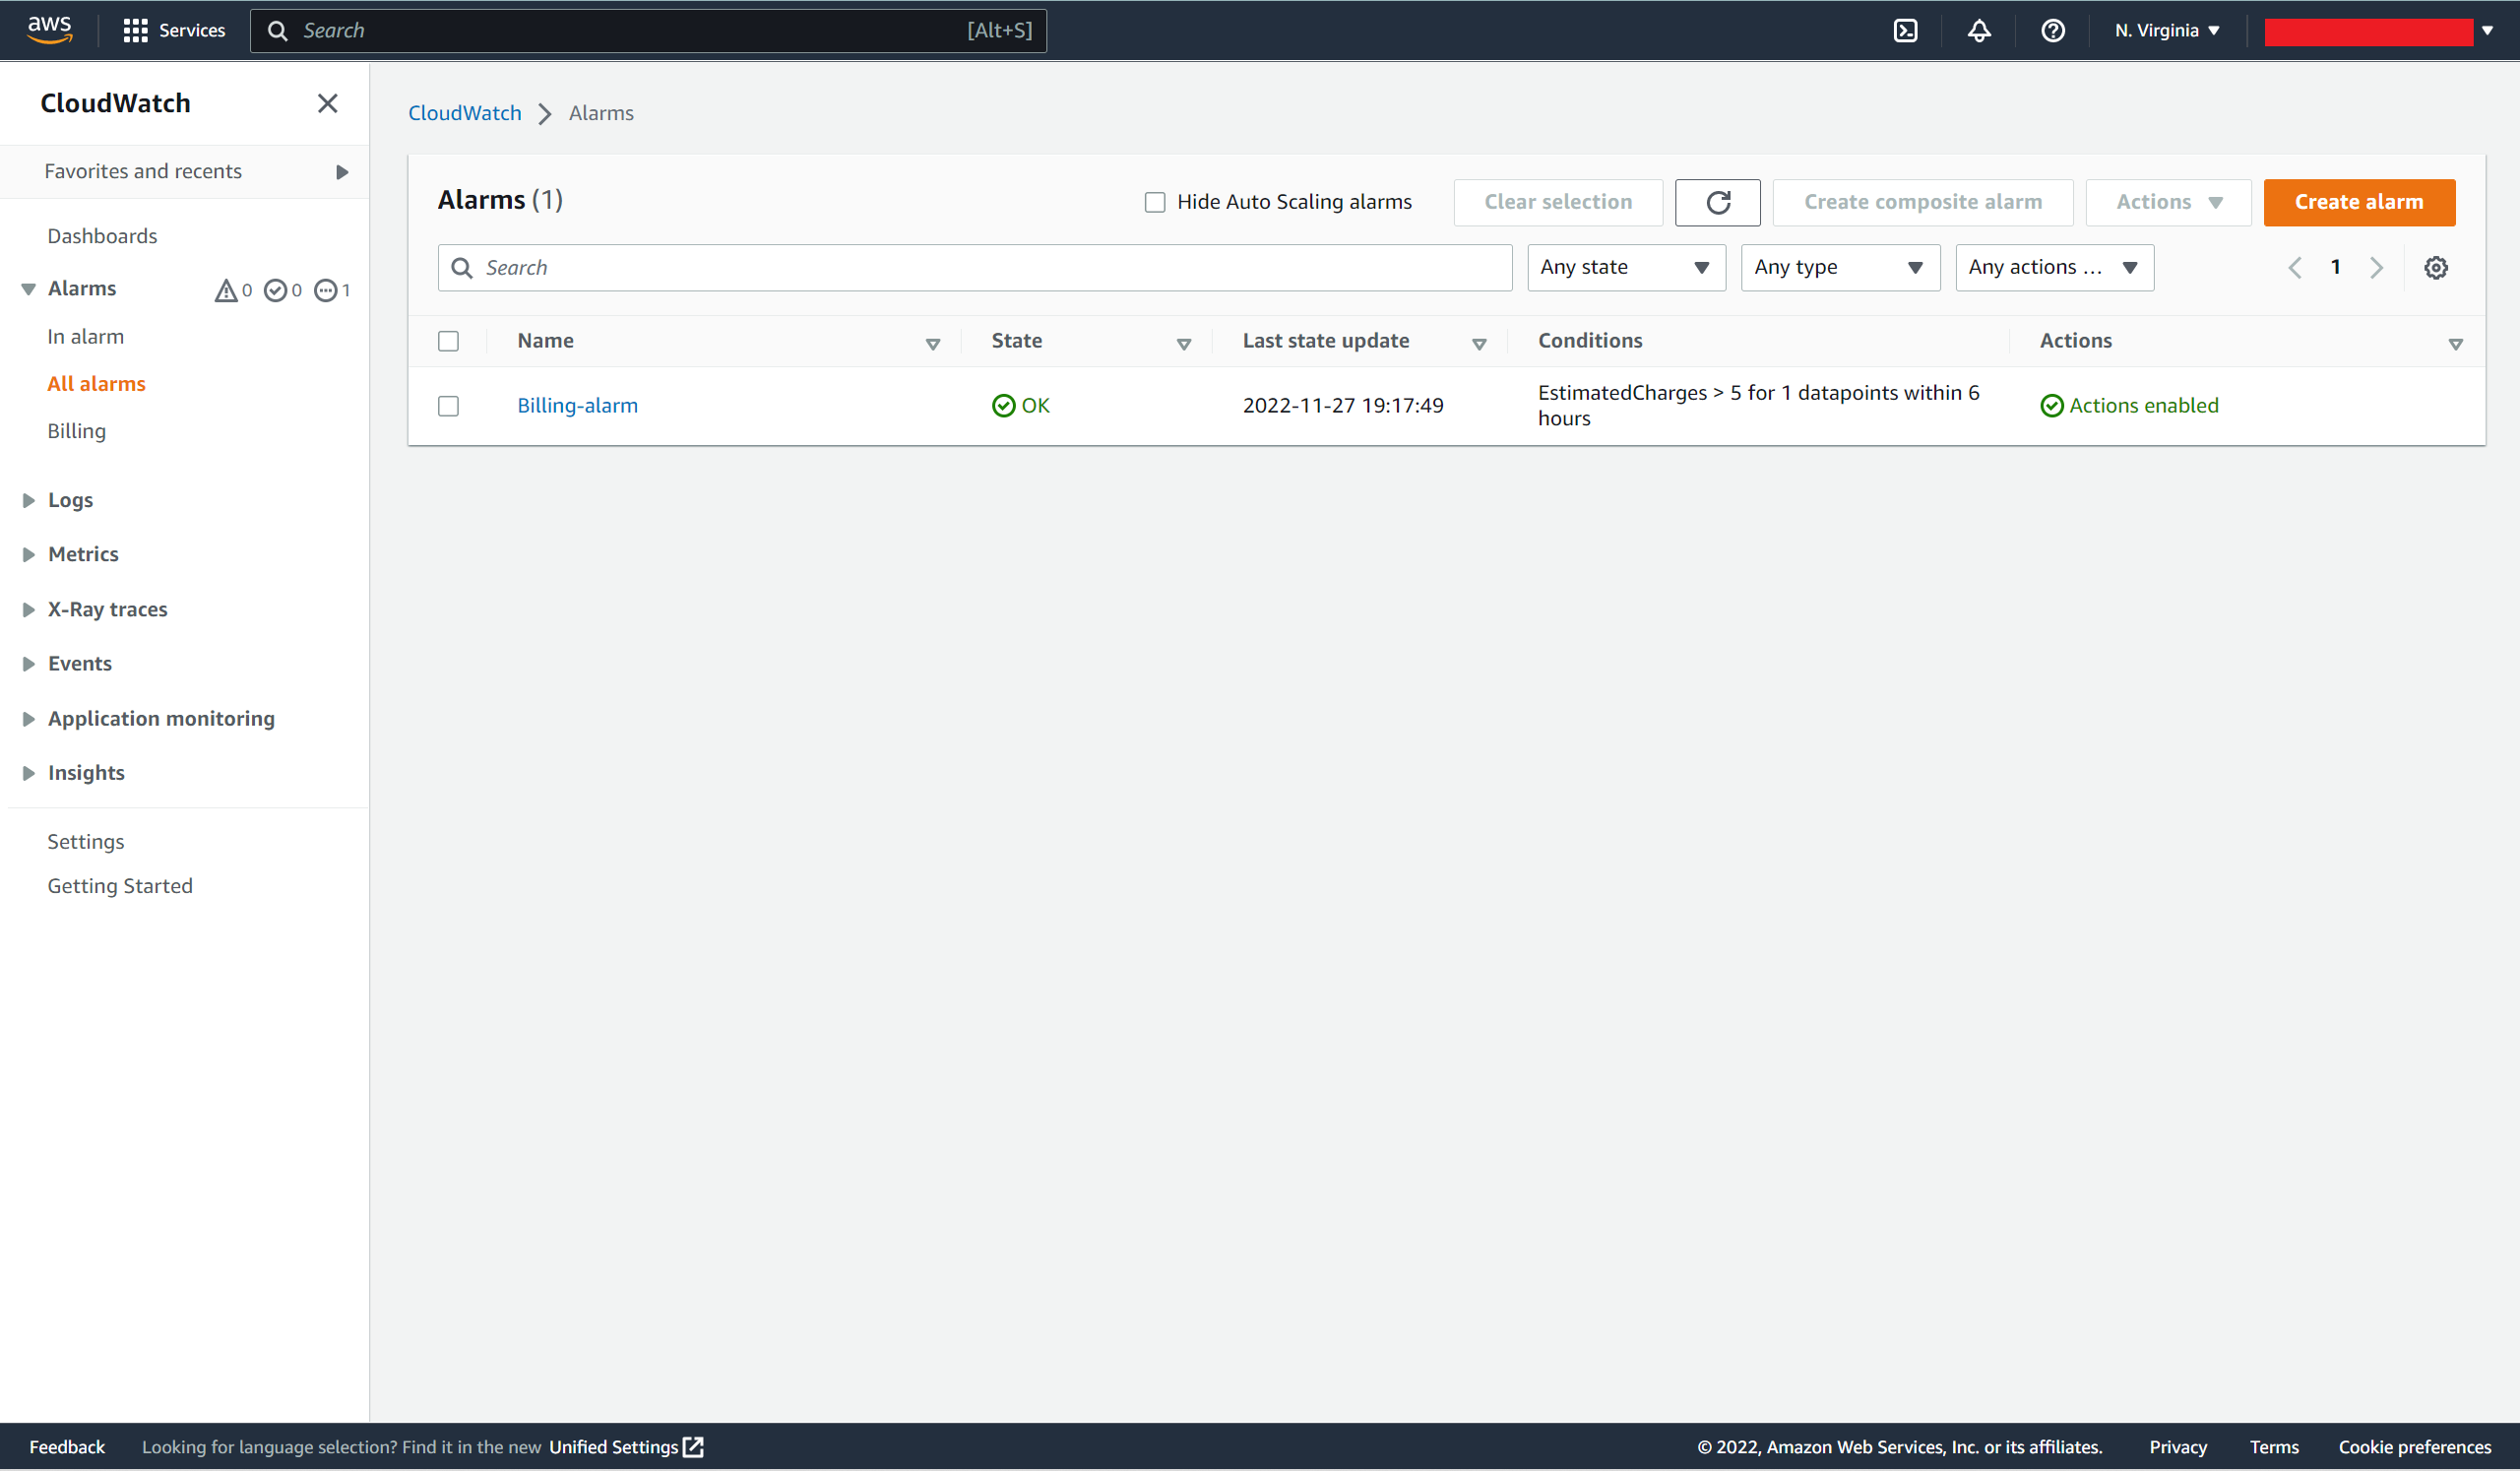
Also, you will be able to view the alarm details and metrics, if you click on the alarm name.

Important: In the AWS Free Tier, you can use up to 10 alarms and 1,000 e-mail notifications each month for free.
So, I hope you were able to successfully create a billing alarm. Now, have more fun with AWS. Thank you for reading!!!